Wrist Support and Injury Prevention Guide
Introduction to Wrist Anatomy and Common Causes of Injuries
The wrist is a complex joint formed by the two forearm bones (radius and ulna) and eight small carpal bones that connect to the bones of the hand
These bones are held together by a network of ligaments, and many tendons pass through the wrist, allowing for finger and thumb movement. This intricate structure gives the wrist a wide range of motion, but it also means the joint is vulnerable to injury.
Common Wrist Injuries: Wrist problems generally arise from either acute trauma or chronic overuse. Acute injuries occur suddenly – for example, a hard fall on an outstretched hand can sprain ligaments or even break a bone (often the radius, in a distal radius fracture)
Sports accidents, bike or scooter falls, and impacts during activities like skating or snowboarding frequently cause such acute wrist injuries. Overuse injuries, on the other hand, develop over time due to repetitive stress. Activities that involve repeated wrist motions (typing, tennis, weightlifting, drawing, etc.) can lead to inflammation of tendons or nerve compression. Conditions like tendonitis and carpal tunnel syndrome are common overuse injuries that result from chronic strain on wrist tissues
In both cases, pain, swelling, and reduced mobility are typical symptoms when the wrist’s structures are pushed beyond their limits.

Preventive Measures for Wrist Injuries
Preventing wrist injuries involves proactive steps in your workouts, sports, and daily routines. By caring for your wrists before they hurt, you can avoid many common problems. Key preventive measures include:
Always Warm Up: Cold, stiff tissues are more prone to injury. Begin any workout or sports activity with a proper warm-up to get blood flowing to your wrist joints, tendons, and muscles. Simple wrist rotations, gentle stretches, and light aerobic activity can lubricate the wrist with synovial fluid and improve flexibility
- Warming up is especially important as we age, since muscles and ligaments become less flexible over time. Take a few minutes to do wrist circles, open-and-close your fists, or try movements like wrist rolls and kneeling leans (placing hands flat and rocking forward/back) to prime the joint for activity.
Maintain Proper Technique and Alignment: Using correct form during exercises and activities protects your wrists. Keep your wrists in a neutral position (not bent excessively up, down, or sideways) whenever possible to reduce strain
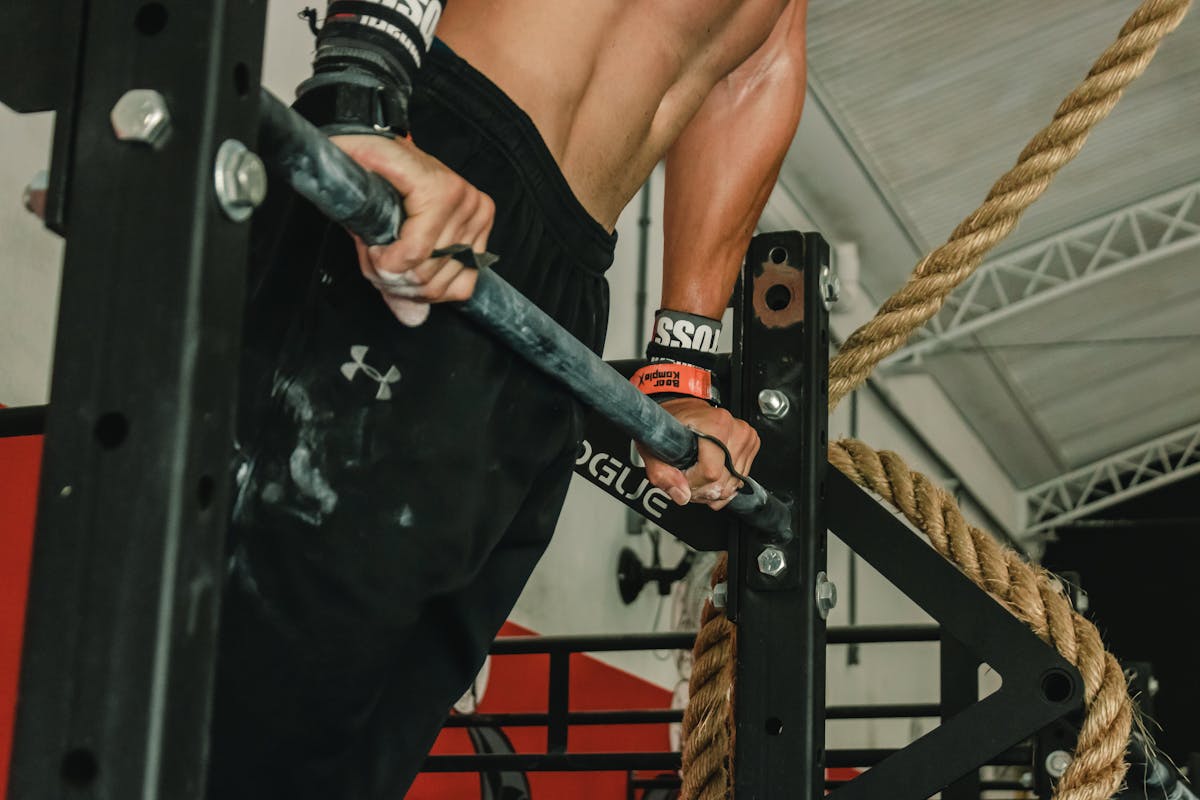
- For example, when lifting weights, avoid bending your wrists back under the weight; your knuckles, wrist, and forearm should align in a straight line. In exercises like push-ups, consider doing them on your fists or using push-up handles to keep wrists straight, which reduces stress on small wrist ligaments. A firm but not death-grip hold on weights or sports equipment can also prevent unnecessary tension in the wrist
- If you’re unsure about your form, consult a trainer or physical therapist to guide you – proper technique is essential to injury prevention.
Improve Wrist Flexibility: Gently stretching your wrists and forearms can increase your range of motion and prevent tightness. If an exercise or sport requires your wrist to bend deeply (for instance, front squats or gymnastics poses), incorporate stretches beforehand to prepare that range. A simple prayer stretch (palms together in front of your chest, then slowly lowering your hands down while keeping palms pressed) helps elongate forearm muscles and wrist ligaments. Similarly, extension stretches (holding your arm out and using the opposite hand to pull your fingers back toward your shoulder) can counteract tightness. By maintaining flexibility, you reduce undue strain on the wrist during activities.
Strengthen Your Grip and Wrist Muscles: Strong wrists are more stable and resilient. Building up the forearm muscles that support the wrist can be a protective measure. Simple tools like hand grippers, resistance bands, or light dumbbells can be used to perform wrist curls, reverse wrist curls, or squeezing exercises that enhance your grip strength. A stronger grip means you can hold weights or objects securely without compensating with awkward wrist positions. Strong wrist extensors and flexors also help stabilize the joint under stress. (See the exercise section below for specific wrist-strengthening exercises.)
Progress Gradually and Listen to Your Body: Avoid sudden large increases in weight or intensity that your wrists aren’t conditioned to handle. Whether you are increasing your typing time or upping your bench press weight, gradual progression is key. In weight training, follow the principle of progressive overload – increase weights slowly over time so your wrists and forearms can adapt to the heavier load
During any activity, pay attention to discomfort signals. Never “play through the pain” if your wrist starts hurting during exercise or sports
Pain is a warning sign; continuing despite it can turn a minor issue into a serious injury. Instead, stop or modify the activity, and give your wrists a chance to rest (or seek guidance if the pain is sharp or persistent).
Use Safe, Stable Positions: Whenever possible, position your wrists in ways that minimize extreme angles. For example, when doing exercises like bench presses or planks, try to keep wrists aligned with your forearms rather than letting them flop back. In everyday tasks like lifting a heavy box, lift with palms facing each other (neutral grip) if you can, as this is often easier on the wrists than palms-down positions
Small adjustments – such as slightly arching your hand when weight-bearing or using a more neutral hand position – can significantly cut down stress on the joint.
By incorporating these preventive measures into your routine, you can greatly reduce the risk of wrist injuries and keep your joints healthy and pain-free.

Exercises to Strengthen the Wrists and Improve Flexibility
Regularly performing wrist exercises can make the muscles and tendons around the joint stronger and more flexible, improving overall wrist stability and range of motion. A balanced routine of strengthening and stretching exercises will fortify your wrists against strain while also keeping them limber. Here are some effective exercises for wrist strength and flexibility:
Wrist Curls and Extensions: Use a light dumbbell (or even a water bottle). Sit with your forearm resting on a table or your thigh, palm facing up for curls or down for extensions, with your wrist at the edge. For wrist curls: hold the weight with palm up and slowly curl your wrist upward, then lower it back down in a controlled manner. For wrist extensions: flip your grip (palm down) and lift the back of your hand up toward the ceiling, then slowly lower. Do 2–3 sets of 10–15 repetitions. These exercises strengthen the forearm muscles that support your wrist
Wrist Rotations (Supination/Pronation): Hold a light weight or a hammer-like object in your hand with your elbow bent 90 degrees at your side. Slowly rotate your forearm so your palm turns upward (supination), then rotate the opposite direction so your palm turns downward (pronation). You can also do this with your forearm supported on a surface, wrist hanging off the edge. Perform 10–15 rotations in each direction. This helps strengthen the rotational muscles of the forearm and improves wrist mobility.
Grip Squeezes: Squeeze a stress ball, grip trainer, or even a rolled towel in your hand, hold for 5 seconds, then release. Repeat for 10–15 reps each hand. This simple exercise strengthens the muscles of your hand and forearm, contributing to better wrist support. It’s an easy one to do at your desk or while watching TV, and it can help build a stronger grip over time (which correlates with wrist strength).
Finger Stretch and Extension: Start with your forearm supported on a table and your hand hanging off the edge, or just hold your arm in front of you. Make a tight fist, squeezing your fingers into your palm, then open your hand and stretch your fingers out as far as possible
Feel the stretch through your palm and the underside of your wrist. Repeat this opening and closing motion 10–20 times. This exercise helps maintain flexibility in the fingers and wrist, and warms up the muscles and tendons in the area.
Prayer Stretch: Stand or sit with your palms together in front of your chest (as if praying), elbows bent. Keep your palms pressed and slowly lower your hands down toward your waist until you feel a gentle stretch in your forearms and wrists. Hold for 15–30 seconds, then relax. This stretch targets the wrist flexors and can relieve tension from activities like typing or gripping.
“Desk” Stretches (Wrist Extension Stretch): Extend one arm in front of you with the elbow straight and palm facing down. With your other hand, gently pull the fingers of the extended arm back toward your body (fingers pointing up) and hold for 15 seconds (you’ll feel a stretch on the underside of your wrist and forearm). Then, bend the wrist downward (fingers pointing to the floor) and gently pull the hand toward you to stretch the opposite side of the wrist. Repeat on the other arm. Make sure you feel a good stretch but no sharp pain. This exercise helps keep the wrist joints supple and counteracts stiffness from desk work
premierortho.com Perform these exercises 2–3 times a week as part of your routine. Remember to start with light resistance and small ranges of motion, especially if you’re new to wrist exercises or recovering from an injury. Over time, as your wrists become stronger and more flexible, you can increase repetitions or weight slightly. Consistency is key – regular wrist conditioning will pay off in better support and fewer injuries.

The Role of Wrist Support Gear and How to Use It Properly
Wrist support gear can be very helpful in reducing stress on your wrists, especially during heavy activities or when recovering from injury. Common wrist support devices include wrist wraps, braces, and compression sleeves. Each serves a slightly different purpose, but all aim to stabilize the joint and protect it from excessive movement or strain.
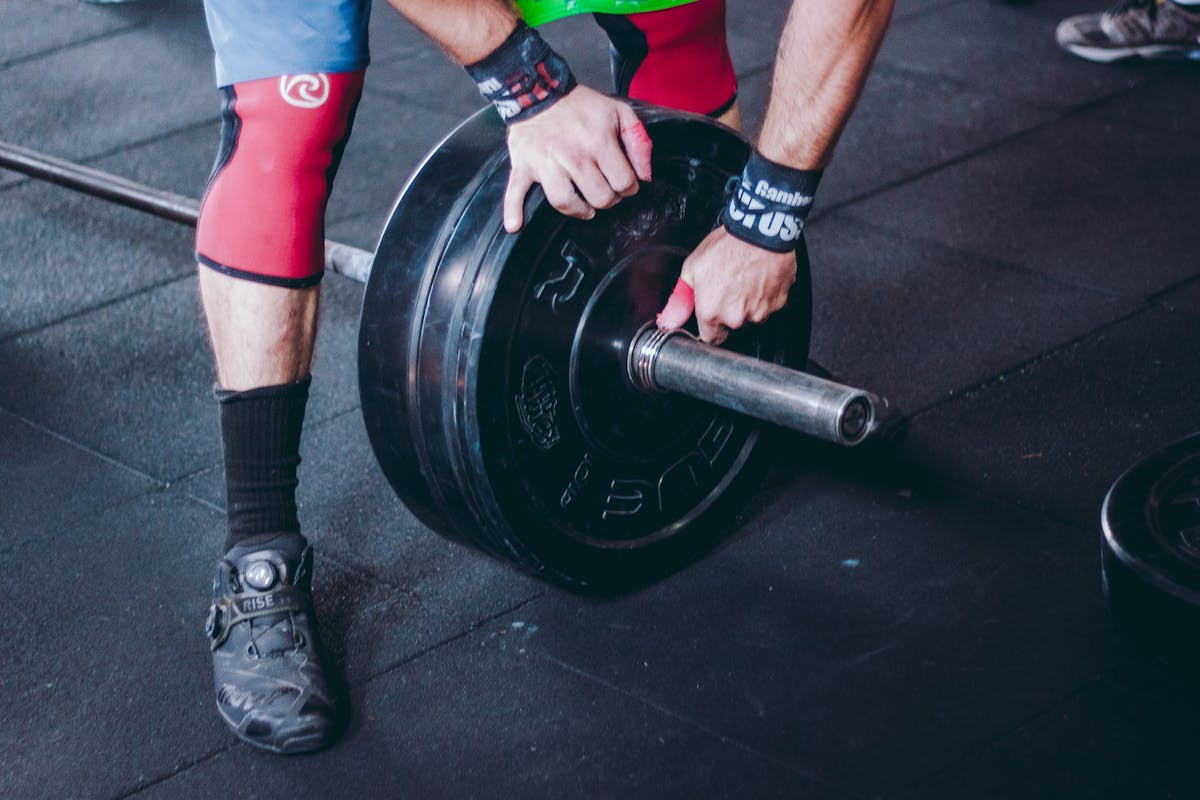
Wrist Wraps: Typically made of cloth or elastic material, wrist wraps are commonly used in weightlifting and strength training. They are wrapped tightly around the wrist joint and fastened (with Velcro or thumb loops) to provide external support.
When to use: Wrist wraps are best for short-term support during heavy lifts like bench presses, overhead presses, or Olympic lifts. They help by providing compression and stability, allowing you to focus on the lift rather than worrying about your wrist buckling
- Proper use: Wrap them snugly but not so tight that they cut off circulation or cause numbness. Start just above the wrist joint and wrap around 2–3 times, ensuring the wrap covers the wrist joint area for support. You should still be able to move your fingers freely. Use wrist wraps for your heaviest sets or when your wrists feel vulnerable; avoid relying on them for every light set so that your wrists still get stronger naturally
Remember, wraps are an aid, not a substitute for good form and strength – over-relying on them without developing your own wrist stability can be counterproductive
Wrist Braces (Splints): Braces are more rigid support devices, often with metal or hard plastic stays, designed to immobilize or limit the motion of the wrist. They are commonly used in injury recovery (such as after a sprain or surgery) or for conditions like carpal tunnel syndrome. Braces can range from lightweight neoprene sleeves with a bit of support to heavy-duty splints that fully prevent movement.
When to use: Wear a wrist brace if you have a minor sprain, significant wrist pain, or a condition that benefits from keeping the wrist neutral (for example, people with carpal tunnel often wear a brace at night to prevent curling the wrist). Athletes might use a softer brace during activities to remind them to avoid extreme motions.
Proper use: Ensure the brace is fitted correctly so that it holds your wrist in a neutral, straight position (not bent). It should be snug and supportive but not painfully tight. Follow the product instructions for fitting. Generally, you position the brace so that any metal support stays are along the palm side and/or back of the wrist, then tighten the straps comfortably. Use braces during the periods your doctor or therapist recommends – for instance, only during sleep, or only during activity, depending on the injury. Prolonged, unnecessary brace use can weaken your wrist due to disuse, so use them appropriately and continue to do gentle range-of-motion exercises if advised.
Compression Sleeves and Athletic Tape: These provide more moderate support. A compression sleeve is a stretchy fabric sleeve that slides over your wrist (and often part of the forearm). It provides gentle compression, which can increase blood circulation and warmth in the joint. This can help with mild support and may reduce swelling during activity.
When to use: Use a compression sleeve for mild wrist discomfort, or during high-repetition activities (like long tennis matches or typing sessions) where you want a bit of extra support and to keep the area warm. Athletes sometimes wear them to keep previously injured wrists warm and less stiff. Athletic tape or kinesiology tape, when applied correctly, can also support the wrist by restricting harmful movements while allowing some flexibility. Taping is common in sports like gymnastics or boxing.
Proper use: Slide on compression sleeves so they cover the wrist joint; ensure they are not so tight that your hand tingles or turns cold. For tape, it’s best to have a coach or trainer show you taping techniques, as improper taping won’t help (and could even cause blisters or circulation issues). Generally, tape is wrapped in figure-eight patterns around the wrist and hand to reinforce the joint without cutting off blood flow.
Key point: Wrist support gear is there to supplement your body’s own support. These tools are very useful – for example, using wrist wraps can reduce the risk of injury when lifting heavy gripzilla.co, and a brace can relieve pain by immobilizing a strained wrist – but they should be used correctly. Always follow the product instructions, and don’t become so dependent on gear that you neglect strengthening your wrists. Use supports during high-risk activities or rehab periods, and gradually rely more on your improved strength and technique to carry you.
 - for Support, Carpal Tunnel, Tendonitis, Wrist Injury, and Pain (Pack of 1)")
Tips for Managing Wrist Pain and Recovering from Minor Injuries
Even with precautions, you may occasionally experience wrist pain or suffer a minor injury like a sprain. How you handle these situations can affect how quickly and fully you recover. Here are some tips for managing mild wrist injuries and soreness:
Rest and Protect the Wrist: At the first sign of significant pain (sharp pain, swelling, or reduced mobility), stop the activity that caused it and give your wrist a break. Rest is crucial for healing. Avoid heavy lifting, repetitive motions, or putting weight on the injured wrist for a couple of days (or as long as pain persists). You may consider using a light brace or splint to immobilize the wrist in a neutral position during this initial period – this prevents you from accidentally aggravating the injury and reminds you to limit movement.
Ice the Area: Applying ice packs can help reduce swelling and numb pain, especially within the first 48 hours of injury. Wrap ice or a cold pack in a cloth (do not apply ice directly to skin) and place it on the wrist for about 15–20 minutes at a time, several times a day. Inflammation is part of the body’s healing process, but too much can increase pain and delay function, so icing in moderation (especially in the acute phase) can be beneficial.
Compression and Elevation: If your wrist is swollen, a light compression bandage can prevent excessive swelling. Use an elastic bandage to wrap the wrist snugly (not so tight that fingers go numb or turn blue). This provides support and helps manage swelling my.clevelandclinic.org Also, when resting, try to keep your wrist elevated above heart level on a pillow – this uses gravity to reduce swelling. The combination of Rest, Ice, Compression, and Elevation (RICE) is a time-tested method for soft tissue injuries like sprains. medicalnewstoday.com
Over-the-Counter Relief: Over-the-counter anti-inflammatory medications (like ibuprofen or naproxen) can help reduce pain and swelling in the short term. Always follow dosing instructions and be mindful of any contraindications. Topical pain relief creams or gels may also provide some comfort for mild strains.
Gentle Mobilization and Stretching: After a day or two of rest (for a minor sprain or strain), it’s usually helpful to begin gentle movements to prevent stiffness. Start with mild range-of-motion exercises: for example, slowly flex and extend your wrist (bend forward and back) within a pain-free range, or do slow wrist circles. You can also wiggle your fingers and do light fist clenches. Pain should be your guide: a little discomfort or stiffness is okay, but stop if you feel sharp pain. Gradually introducing movement helps scar tissue heal in a flexible way and restores mobility. Likewise, gentle stretching (like the prayer stretch or finger stretches described earlier) can be reintroduced as pain subsides. If an exercise increases your pain, back off and rest more.
Return to Activity Gradually: Do not rush back into full-intensity workouts or tasks with an injured wrist. Once the acute pain and swelling have improved, ease back in. For example, if you stopped weightlifting due to a sprained wrist, start with lighter weights than you used before and see how the wrist tolerates it. Support your wrist with a wrap if needed when you resume. If you feel any pain during activity, stop and rest again. It’s better to take a few extra days off or train around the injury (e.g., focus on lower body or use your uninjured hand) than to reinjure your wrist by being too aggressive too soon
When to Seek Medical Help: Home management should lead to steady improvement over a few days. If you have severe pain, obvious deformity, or the pain doesn’t subside after several days of rest, it’s important to see a healthcare provider. A doctor can determine if there’s a more serious issue (like a fracture or severe ligament tear) that needs specific treatment. As a general rule, get medical advice if you cannot bear weight on the wrist, have numbness/tingling, or if swelling and pain are significant and not improving
my.clevelandclinic.org . It’s always better to get a proper diagnosis than to ignore a potentially serious injury.
Throughout your recovery, be patient and follow recommended guidelines. Minor wrist injuries often heal well with time and care, allowing you to get back to your regular activities. Just remember not to ignore what your wrist is telling you – pain is an important signal to modify what you’re doing.
![Carpal Tunnel Wrist Brace Night Support and Metal Splint Stabilizer [Single] - Helps Relieve Tendinitis Arthritis Carpal Tunnel Syndrome Pain - Reduces Recovery Time for Men Women - Right (S/M)](https://m.media-amazon.com/images/I/91GWFXSlKZL._SX522_.jpg "Carpal Tunnel Wrist Brace Night Support and Metal Splint Stabilizer [Single] - Helps Relieve Tendinitis Arthritis Carpal Tunnel Syndrome Pain - Reduces Recovery Time for Men Women - Right (S/M)")
Best Practices for Maintaining Wrist Health in Training, Sports, and Daily Activities
Keeping your wrists healthy is an ongoing process that extends beyond the gym or the occasional injury. It involves being mindful of how you use your wrists in all aspects of life – from lifting a barbell to typing at your desk. Here are some best practices to maintain long-term wrist health:
Prioritize Ergonomics in Daily Activities: Much of wrist strain comes from our daily habits, especially for those who work on computers or perform repetitive tasks. To protect your wrists, maintain a neutral wrist position during activities like typing or using a mouse. Keep your wrists straight (in line with your forearm) rather than bent up or down. Adjust your workstation so that your keyboard and mouse are at a comfortable height (wrists at or just below elbow level) and you’re not cocking your wrists at an angle
bone-joint.com Consider using an ergonomic keyboard or a gel wrist rest for support. Even with a good setup, take regular breaks – for example, a five-minute break every 20–30 minutes of continuous computer usepremierortho.com Stand up, shake out your hands, or do a quick wrist stretch. These pauses relieve the build-up of tension in your wrist and hand muscles. Remember the Mayo Clinic’s advice: pay attention to ergonomics, take breaks, and keep wrists relaxed and neutral while typingUse Protective Gear When Appropriate: In sports or activities with a high risk of wrist injury, use the gear designed to protect you. For example, wear wrist guards for snowboarding, skateboarding, or rollerblading; use taped support or braces in sports like gymnastics or boxing where wrists take impact. If you play sports like hockey or basketball, make sure any fall-prone activity has you thinking about how to fall safely (learning to roll or using forearms can sometimes spare your wrists). The idea is to prevent injury by cushioning or supporting the wrist during risky movements
mayoclinic.org Always warm up before games or intense activities and stretch afterward– this helps keep your wrists mobile and less prone to strain.
Incorporate Wrist Exercises and Stretching into Your Routine: Don’t wait for an injury to start strengthening your wrists. Include some of the wrist exercises from the earlier section in your regular workout regimen or weekly routine. Even if you’re not an athlete, simple exercises like wrist rotations, flexion/extension stretches, and grip squeezes can be done a few times a week at home or during breaks at work. This proactive approach builds resilience. Flexible and strong wrists are less likely to get injured because they can handle stress better. Treat your wrist care like you would your back or knees – a little preventive exercise can go a long way in avoiding pain.
Apply Good Technique in Strength Training: When lifting weights or doing bodyweight exercises, always focus on form, especially hand and wrist position. Keep your wrists aligned with your forearms (avoid extreme bends), use a full grip around bars to distribute force, and engage your forearm muscles to stabilize the joint. For instance, when doing a push-up or bench press, do not let your wrists collapse backward; instead, grip firmly and imagine driving power through a straight wrist. When doing bicep curls or kettlebell swings, control the movement to avoid any sudden jerks to the wrist. If you feel your form slipping as you fatigue, reduce the weight or take a break. Quality of movement is more important than quantity, not just for performance but for joint health.
Avoid Overuse and Balance Your Activities: Repetitive strain is a common cause of wrist pain (think of hours of typing or lots of tennis serves). To combat this, avoid doing the same wrist-intensive activity for too long without a break. If possible, alternate tasks (for example, switch between typing and writing by hand, or between computer work and meetings) to give your wrists different kinds of movement. In the gym, try not to schedule too many heavy wrist-loading exercises on the same day; mix up your routine (e.g., alternate days focused on upper body vs. lower body) so wrists get a rest in between. Listen to your body: if your wrists are feeling sore or stiff, that’s a sign to ease up. Maybe skip that extra set of handstand practice or take a day off from rock climbing to let your wrists recover. Recovery days and adequate sleep are just as important for wrist health as they are for muscle growth.
Maintain Overall Bone and Joint Health: Your wrists will benefit from your general health practices. Ensure you get enough calcium and vitamin D for bone strength (this helps prevent fractures)
mayoclinic.org Stay hydrated, as joints need fluid for lubrication. If you have any medical conditions (like rheumatoid arthritis or diabetes) that affect the joints, follow your doctor’s advice to manage those, as they can influence wrist health. Sometimes systemic issues can manifest in the wrists (for example, rheumatoid arthritis often involves the wrists mayoclinic.org), so keeping those conditions in check is part of preventing wrist problems.
Don’t Ignore Pain or Niggles: Finally, treat your wrists with the same care you’d treat a knee or shoulder. If you notice persistent discomfort, numbness, or weakness in your hands or wrists, address it early. That might mean doing extra stretches, reducing your workload temporarily, or consulting a medical professional if it continues. Pushing through significant wrist pain is rarely a good idea and often exacerbates the issue
my.clevelandclinic.org It’s much easier to rehab a minor wrist irritation with a week of rest and targeted exercises than to recover from a major injury that forced you to stop using your wrist for months. Pay attention to the warning signs your body gives.
By following these best practices in your training, sports, and everyday life, you’ll support your wrists in the long run. Healthy wrists will enhance your performance in the gym, make your day-to-day tasks easier, and allow you to enjoy hobbies without pain. Remember that wrist health is a combination of strength, flexibility, technique, and rest. With mindful care, you can prevent many problems and keep your wrists strong and pain-free for years to come.
")
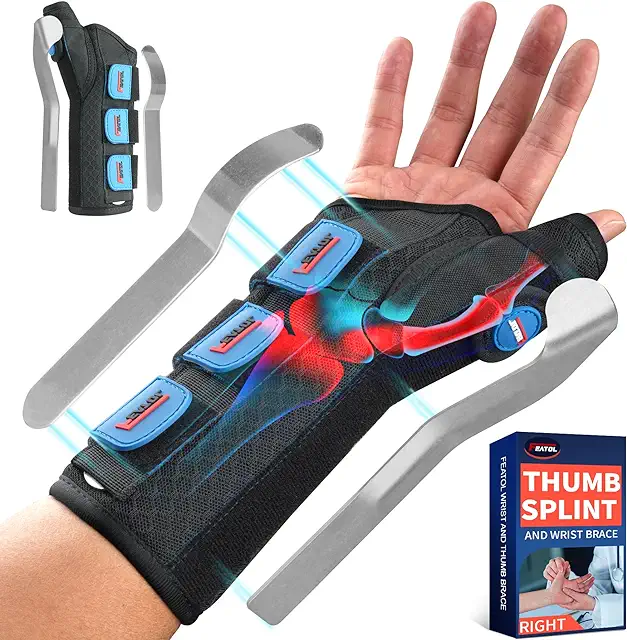
FEATOL Wrist Support & Injury Prevention
Provides support and relief for wrist pain, De Quervain's Tendonitis, and injury prevention.

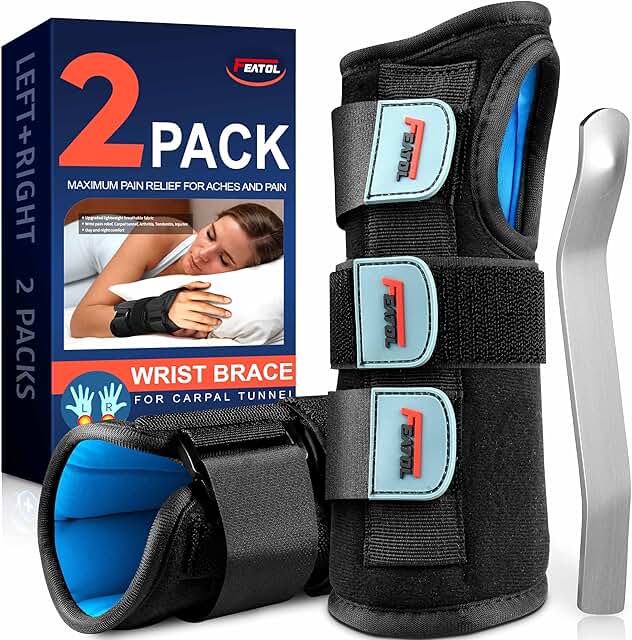
Splints Carpal Adjustable Wrist Support
Adjustable splints designed to relieve wrist pain and support carpal tunnel, tendinitis, and arthritis.
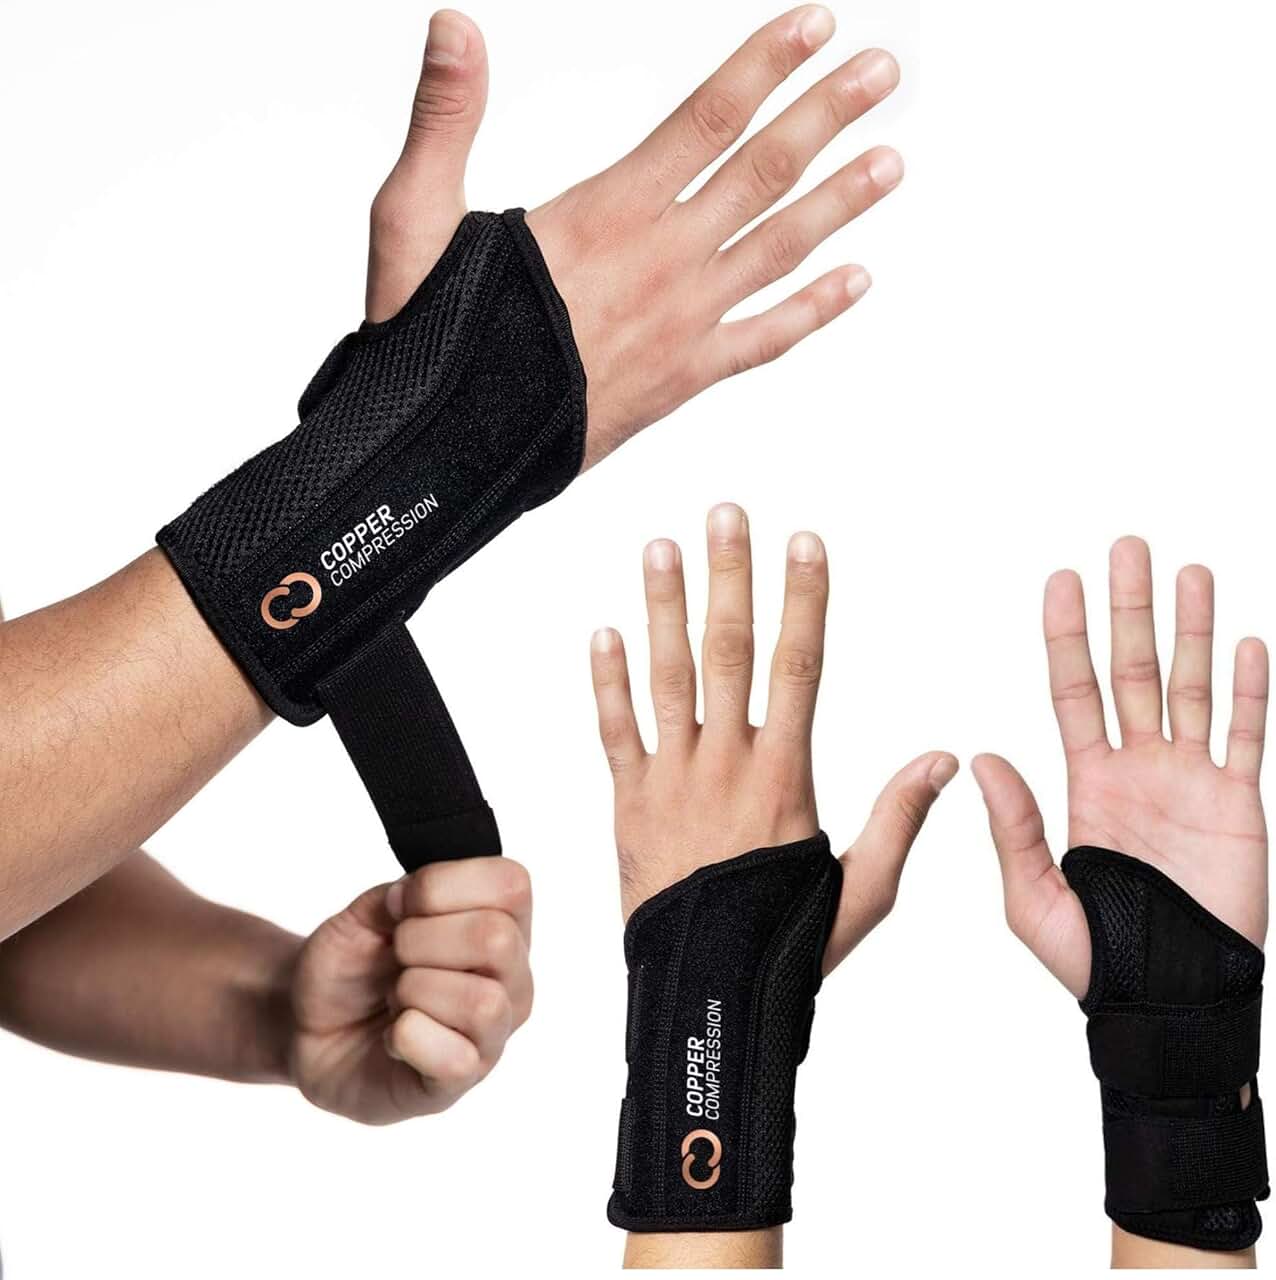
FEATOL Black Wrist Support
Ergonomic wrist brace designed for carpal tunnel relief and injury prevention.
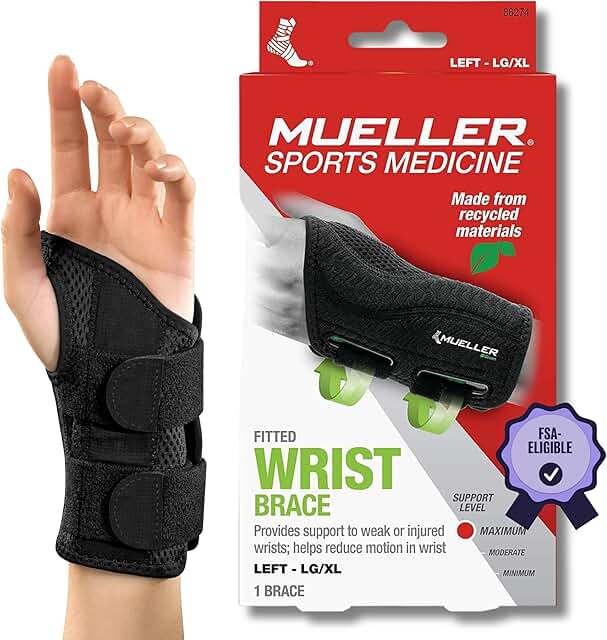
Wrist Support Brace
Ergonomic wrist brace designed for maximum support and injury prevention.

Carpal Tunnel Wrist Brace Support
Designed for wrist pain relief and injury prevention, ideal for carpal tunnel syndrome support.
Wrist Compression Support Brace
Provides compression and support for wrist pain, carpal tunnel, tendinitis, and arthritis.

Amazon Store Product
Explore premium fitness and wellness products available on the Amazon Store.


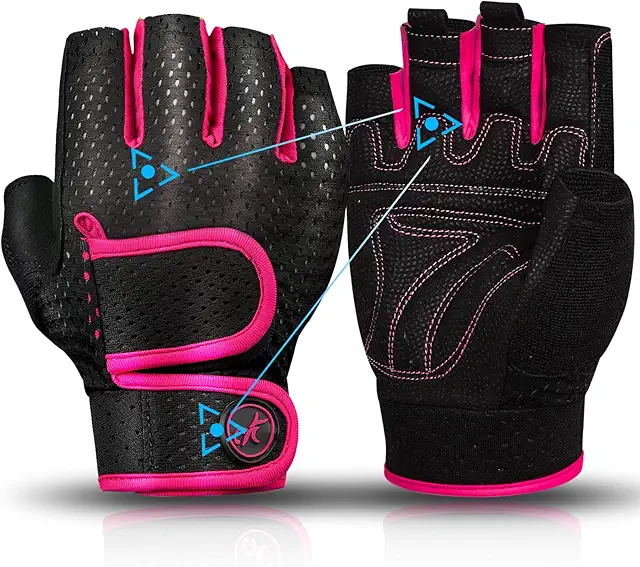
Premium Weightlifting Gloves
High-quality weightlifting gloves designed for comfort, grip, and durability during intense workouts.

Premium Weightlifting Wrist Wraps
Designed for superior wrist support and stability, these wraps help reduce strain during intense weightlifting and training sessions.

Weightlifting Wrist Wraps
Strong and durable wrist wraps designed for weightlifting, powerlifting, and bodybuilding to provide enhanced wrist support and stability.

High-Performance Weightlifting Gloves
Designed for superior grip, comfort, and durability, these gloves are perfect for heavy lifting and intense workouts.

Ultimate Gym Weightlifting Gloves
Designed for high-intensity workouts, these gloves provide superior grip, wrist support, and durability for all your training needs.

Weightlifting Gloves with Wrist Support
Durable and breathable gloves with integrated wrist support for weightlifting, CrossFit, and powerlifting.

Professional Athletic Gear
Tailored for high performance and durability to meet all your sporting needs.

Dynamic Sports Equipment
Designed to enhance agility and performance in a variety of sports.
MOREOK Workout Powerlifting Gloves
High-quality workout gloves designed for powerlifting, weightlifting, and intense training sessions.
Wrist support and injury prevention are crucial for anyone engaged in weightlifting, CrossFit, calisthenics, or other activities that place stress on the wrists. Weak or unsupported wrists are prone to sprains, strains, and chronic pain, which can hinder your progress and performance. Here’s a comprehensive guide on wrist support and injury prevention, including tips, exercises, and gear recommendations:

Why Wrist Support Matters
High-Stress Area: Wrists bear significant load during pressing movements (e.g., bench press, overhead press) and weight-bearing exercises (e.g., push-ups, handstands).
Vulnerability: The wrist joint is small and complex, making it susceptible to injuries like sprains, tendonitis, and carpal tunnel syndrome.
Performance Impact: Weak or painful wrists can limit your ability to lift heavy, perform technical movements, or maintain proper form.
Common Wrist Injuries
Sprains: Overstretching or tearing of ligaments, often caused by sudden impact or improper form.
Tendonitis: Inflammation of the tendons due to repetitive stress or overuse.
Carpal Tunnel Syndrome: Compression of the median nerve, leading to pain, numbness, and weakness in the hand and wrist.
Fractures: Caused by trauma or excessive force, often during falls or heavy lifts.
How to Prevent Wrist Injuries
1. Warm Up Properly
Perform wrist circles, flexion/extension stretches, and dynamic movements to increase blood flow and mobility before lifting.
Example: Rotate your wrists clockwise and counterclockwise for 30 seconds each.
2. Strengthen Your Wrists
Incorporate exercises that target the wrists, forearms, and grip strength:
Wrist Curls: Use dumbbells or a barbell to perform wrist flexion and extension.
Farmer’s Carries: Hold heavy dumbbells or kettlebells and walk for a set distance or time.
Plate Pinches: Hold weight plates between your fingers and thumb for as long as possible.
Rice Bucket Training: Dig your hands into a bucket of rice and perform opening/closing motions.
3. Improve Mobility
Stretch your wrists regularly to maintain flexibility and prevent stiffness:
Prayer Stretch: Press your palms together in front of your chest and lower your hands toward your waist.
Reverse Prayer Stretch: Place the backs of your hands together and lift your elbows.
Wrist Extension Stretch: Place your palm on a flat surface with fingers pointing toward you and gently lean forward.
4. Use Proper Form
Maintain a neutral wrist position during lifts to reduce stress on the joint.
For bench presses, keep your wrists straight and avoid bending them backward.
For overhead presses, ensure the barbell or dumbbells are aligned with your forearm.
5. Gradually Increase Load
Avoid jumping to heavy weights too quickly. Gradually increase the load to allow your wrists to adapt.
6. Rest and Recover
Give your wrists adequate rest between workouts to prevent overuse injuries.
If you feel pain, stop the exercise and allow time for recovery.
Wrist Support Gear
1. Wrist Wraps
Purpose: Provide compression and stability to the wrist joint during heavy lifts.
When to Use: During bench presses, overhead presses, or any exercise where wrist stability is critical.
How to Use: Wrap snugly around the wrist, ensuring it’s tight enough to support but not restrict blood flow.
2. Wrist Straps
Purpose: Help secure your grip on the barbell or dumbbell, reducing strain on the wrists.
When to Use: During deadlifts, rows, or pulling exercises where grip strength is a limiting factor.
3. Wrist Splints or Braces
Purpose: Provide additional support and immobilization for injured or weak wrists.
When to Use: During recovery from an injury or when performing high-stress movements.
4. Lifting Gloves
Purpose: Offer padding and support for the palms and wrists.
When to Use: During exercises that involve gripping, such as pull-ups or kettlebell swings.
Exercises to Strengthen Wrists
Wrist Curls:
Sit on a bench with your forearms resting on your thighs, palms facing up.
Hold a dumbbell and curl your wrists upward, then lower slowly.
Reverse Wrist Curls:
Same setup as wrist curls, but with palms facing down.
Lift the dumbbell by extending your wrists, then lower slowly.
Finger Extensions:
Use a rubber band around your fingers and thumb.
Open your hand against the resistance of the band, then slowly close.
Wrist Roller:
Attach a weight to a rope wrapped around a wrist roller.
Roll the weight up and down by rotating your wrists.
Recovery Tips for Wrist Pain
Rest: Avoid activities that aggravate the pain.
Ice: Apply ice packs to reduce inflammation.
Compression: Use a wrist wrap or brace to limit movement and provide support.
Elevation: Keep your wrist elevated to reduce swelling.
Seek Professional Help: If pain persists, consult a physical therapist or doctor.
Conclusion
Wrist support and injury prevention are essential for maintaining long-term performance and avoiding setbacks in your fitness journey. By incorporating strengthening exercises, proper form, and supportive gear, you can protect your wrists and keep them healthy. Remember, prevention is always better than cure—take care of your wrists, and they’ll take care of you!
Maintaining and cleaning your gym gear is essential for hygiene, longevity, and performance. Sweat, bacteria, and dirt can accumulate on your gear over time, leading to odors, wear and tear, and even skin infections. Here’s a comprehensive guide on how to clean and care for your gym gear:

1. Gym Clothes (Shirts, Shorts, Leggings)
Why Clean?: Sweat and bacteria can cause odors and degrade fabric over time.
How to Clean:
Turn clothes inside out before washing to remove sweat and bacteria trapped in the fibers.
Use cold or warm water and a mild detergent.
Avoid fabric softeners, as they can break down moisture-wicking properties.
Hang dry or use a low-heat setting to prevent shrinkage and damage to elastic fibers.
Pro Tip: Wash gym clothes immediately after use to prevent bacteria buildup.
2. Shoes (Running Shoes, Lifting Shoes)
Why Clean?: Dirty shoes can harbor bacteria and odors, and dirt can degrade the material.
How to Clean:
Remove insoles and laces, then shake out any loose dirt.
Use a soft brush or cloth to scrub the exterior with a mixture of mild soap and water.
Rinse with a damp cloth and let air dry completely (avoid direct heat or sunlight).
For odors, sprinkle baking soda inside the shoes and let it sit overnight before brushing it out.
Pro Tip: Rotate between two pairs of shoes to extend their lifespan.
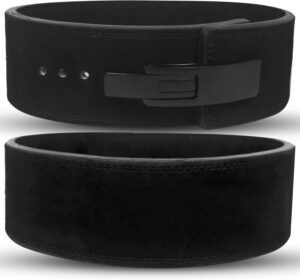
3. Weightlifting Belt
Why Clean?: Sweat and dirt can weaken the material and cause odors.
How to Clean:
Wipe down leather belts with a damp cloth and mild soap. Avoid soaking.
For nylon belts, hand wash with mild detergent and air dry.
Use a leather conditioner occasionally to maintain the belt’s flexibility and durability.
Pro Tip: Store your belt in a cool, dry place to prevent mold or mildew.
4. Lifting Straps, Wrist Wraps, and Knee Sleeves
Why Clean?: These items come into direct contact with sweat and skin, making them prone to bacteria buildup.
How to Clean:
Hand wash with mild detergent and warm water.
Rinse thoroughly and air dry completely.
Avoid using bleach or harsh chemicals, as they can degrade the material.
Pro Tip: Wash these items after every use to prevent odors and bacteria growth.
5. Gym Bag
Why Clean?: Gym bags can accumulate dirt, sweat, and bacteria from your gear.
How to Clean:
Empty the bag and shake out any debris.
Wipe the interior and exterior with a damp cloth and mild soap.
For fabric bags, check the care label—some may be machine washable.
Air dry completely before using again.
Pro Tip: Use a separate compartment or pouch for dirty clothes and shoes to keep your bag cleaner.
6. Water Bottle
Why Clean?: Bacteria can grow in moist environments, leading to unpleasant odors and potential health risks.
How to Clean:
Wash daily with warm, soapy water and a bottle brush.
For deep cleaning, use a mixture of vinegar and water or baking soda.
Rinse thoroughly and air dry with the lid off.
Pro Tip: Avoid leaving water in your bottle for extended periods, especially in warm environments.
7. Resistance Bands
Why Clean?: Sweat and dirt can degrade the material and reduce elasticity.
How to Clean:
Wipe down with a damp cloth and mild soap.
Rinse with a clean, damp cloth and air dry completely.
Avoid submerging in water, as it can weaken the bands.
Pro Tip: Store resistance bands in a cool, dry place away from direct sunlight.
8. Foam Roller
Why Clean?: Foam rollers can accumulate sweat and bacteria from direct skin contact.
How to Clean:
Wipe down with a damp cloth and mild soap after each use.
For deep cleaning, use a disinfectant spray or wipes.
Air dry completely before storing.
Pro Tip: Avoid using harsh chemicals that can degrade the foam material.
9. Headphones or Earbuds
Why Clean?: Earwax, sweat, and dirt can affect sound quality and hygiene.
How to Clean:
Wipe down with a slightly damp cloth or disinfectant wipe.
Use a cotton swab dipped in rubbing alcohol to clean small crevices.
Avoid submerging in water, especially for non-waterproof models.
Pro Tip: Store headphones in a clean, dry case when not in use.
10. Gloves and Grips
Why Clean?: Gloves and grips absorb sweat and can develop odors over time.
How to Clean:
Hand wash with mild detergent and warm water.
Rinse thoroughly and air dry completely.
For leather gloves, use a leather cleaner and conditioner occasionally.
Pro Tip: Allow gloves to dry completely before storing to prevent mold.
General Tips for Maintaining Gym Gear
Wash Immediately: Don’t let sweaty gear sit for too long; wash or clean it as soon as possible.
Air Dry: Avoid using high heat to dry gym gear, as it can damage fabrics and materials.
Rotate Gear: Use multiple sets of gear (e.g., clothes, shoes) to extend their lifespan.
Disinfect Regularly: Use disinfectant sprays or wipes for items that can’t be washed, like foam rollers or gym bags.
Store Properly: Keep gear in a cool, dry place to prevent mold, mildew, and odors.
Conclusion
Regularly cleaning and maintaining your gym gear not only keeps it smelling fresh but also extends its lifespan and ensures it performs at its best. By following these tips, you can keep your gear in top condition and create a healthier, more enjoyable workout environment. Remember, a little care goes a long way!
Maintaining and cleaning your gym gear is essential for hygiene, longevity, and performance. Sweat, bacteria, and dirt can accumulate on your gear over time, leading to odors, wear and tear, and even skin infections. Here’s a comprehensive guide on how to clean and care for your gym gear:
1. Gym Clothes (Shirts, Shorts, Leggings)
Why Clean?: Sweat and bacteria can cause odors and degrade fabric over time.
How to Clean:
Turn clothes inside out before washing to remove sweat and bacteria trapped in the fibers.
Use cold or warm water and a mild detergent.
Avoid fabric softeners, as they can break down moisture-wicking properties.
Hang dry or use a low-heat setting to prevent shrinkage and damage to elastic fibers.
Pro Tip: Wash gym clothes immediately after use to prevent bacteria buildup.
2. Shoes (Running Shoes, Lifting Shoes)
Why Clean?: Dirty shoes can harbor bacteria and odors, and dirt can degrade the material.
How to Clean:
Remove insoles and laces, then shake out any loose dirt.
Use a soft brush or cloth to scrub the exterior with a mixture of mild soap and water.
Rinse with a damp cloth and let air dry completely (avoid direct heat or sunlight).
For odors, sprinkle baking soda inside the shoes and let it sit overnight before brushing it out.
Pro Tip: Rotate between two pairs of shoes to extend their lifespan.
3. Weightlifting Belt
Why Clean?: Sweat and dirt can weaken the material and cause odors.
How to Clean:
Wipe down leather belts with a damp cloth and mild soap. Avoid soaking.
For nylon belts, hand wash with mild detergent and air dry.
Use a leather conditioner occasionally to maintain the belt’s flexibility and durability.
Pro Tip: Store your belt in a cool, dry place to prevent mold or mildew.
4. Lifting Straps, Wrist Wraps, and Knee Sleeves
Why Clean?: These items come into direct contact with sweat and skin, making them prone to bacteria buildup.
How to Clean:
Hand wash with mild detergent and warm water.
Rinse thoroughly and air dry completely.
Avoid using bleach or harsh chemicals, as they can degrade the material.
Pro Tip: Wash these items after every use to prevent odors and bacteria growth.
5. Gym Bag
Why Clean?: Gym bags can accumulate dirt, sweat, and bacteria from your gear.
How to Clean:
Empty the bag and shake out any debris.
Wipe the interior and exterior with a damp cloth and mild soap.
For fabric bags, check the care label—some may be machine washable.
Air dry completely before using again.
Pro Tip: Use a separate compartment or pouch for dirty clothes and shoes to keep your bag cleaner.
6. Water Bottle
Why Clean?: Bacteria can grow in moist environments, leading to unpleasant odors and potential health risks.
How to Clean:
Wash daily with warm, soapy water and a bottle brush.
For deep cleaning, use a mixture of vinegar and water or baking soda.
Rinse thoroughly and air dry with the lid off.
Pro Tip: Avoid leaving water in your bottle for extended periods, especially in warm environments.
7. Resistance Bands
Why Clean?: Sweat and dirt can degrade the material and reduce elasticity.
How to Clean:
Wipe down with a damp cloth and mild soap.
Rinse with a clean, damp cloth and air dry completely.
Avoid submerging in water, as it can weaken the bands.
Pro Tip: Store resistance bands in a cool, dry place away from direct sunlight.
8. Foam Roller
Why Clean?: Foam rollers can accumulate sweat and bacteria from direct skin contact.
How to Clean:
Wipe down with a damp cloth and mild soap after each use.
For deep cleaning, use a disinfectant spray or wipes.
Air dry completely before storing.
Pro Tip: Avoid using harsh chemicals that can degrade the foam material.
9. Headphones or Earbuds
Why Clean?: Earwax, sweat, and dirt can affect sound quality and hygiene.
How to Clean:
Wipe down with a slightly damp cloth or disinfectant wipe.
Use a cotton swab dipped in rubbing alcohol to clean small crevices.
Avoid submerging in water, especially for non-waterproof models.
Pro Tip: Store headphones in a clean, dry case when not in use.
10. Gloves and Grips
Why Clean?: Gloves and grips absorb sweat and can develop odors over time.
How to Clean:
Hand wash with mild detergent and warm water.
Rinse thoroughly and air dry completely.
For leather gloves, use a leather cleaner and conditioner occasionally.
Pro Tip: Allow gloves to dry completely before storing to prevent mold.
General Tips for Maintaining Gym Gear
Wash Immediately: Don’t let sweaty gear sit for too long; wash or clean it as soon as possible.
Air Dry: Avoid using high heat to dry gym gear, as it can damage fabrics and materials.
Rotate Gear: Use multiple sets of gear (e.g., clothes, shoes) to extend their lifespan.
Disinfect Regularly: Use disinfectant sprays or wipes for items that can’t be washed, like foam rollers or gym bags.
Store Properly: Keep gear in a cool, dry place to prevent mold, mildew, and odors.
Conclusion
Regularly cleaning and maintaining your gym gear not only keeps it smelling fresh but also extends its lifespan and ensures it performs at its best. By following these tips, you can keep your gear in top condition and create a healthier, more enjoyable workout environment. Remember, a little care goes a long way!
When it comes to strength training, having the right gym accessories can make a significant difference in your performance, safety, and overall experience. Here’s a list of must-have gym accessories for strength training, along with their benefits:

1. Weightlifting Belt
Purpose: Provides support to your lower back and core during heavy lifts.
Benefits:
Reduces the risk of injury during squats, deadlifts, and overhead presses.
Helps maintain proper form and spinal alignment.
When to Use: For heavy compound lifts like squats, deadlifts, and overhead presses.
2. Weightlifting Gloves
Purpose: Protects your hands and improves grip.
Benefits:
Prevents calluses, blisters, and tears.
Enhances grip strength and reduces hand fatigue.
When to Use: During pull-ups, rows, deadlifts, or any exercise where grip is a limiting factor.
3. Lifting Straps
Purpose: Helps you lift heavier weights by taking the load off your grip.
Benefits:
Allows you to focus on larger muscle groups (e.g., back, legs) without grip fatigue.
Reduces the risk of dropping weights due to a weak grip.
When to Use: For heavy deadlifts, rows, or shrugs.
4. Knee Sleeves or Wraps
Purpose: Provides support and compression to your knees.
Benefits:
Reduces joint stress during squats and lunges.
Improves blood flow and reduces soreness.
When to Use: During heavy squats, lunges, or leg presses.
5. Wrist Wraps
Purpose: Stabilizes and supports your wrists during heavy lifts.
Benefits:
Prevents wrist pain or injury during bench presses, overhead presses, or cleans.
Helps maintain proper wrist alignment.
When to Use: During pressing movements or exercises that strain the wrists.
6. Resistance Bands
Purpose: Adds resistance to bodyweight exercises or assists with mobility work.
Benefits:
Great for warm-ups, mobility drills, or adding variety to your workouts.
Portable and versatile for home or gym use.
When to Use: For warm-ups, mobility exercises, or assistance with pull-ups.
7. Foam Roller
Purpose: Aids in muscle recovery and self-myofascial release.
Benefits:
Reduces muscle soreness and improves flexibility.
Helps release tight muscles and improve blood flow.
When to Use: Before or after workouts for recovery and mobility.
8. Lifting Shoes
Purpose: Provides stability and support during heavy lifts.
Benefits:
Flat, non-compressible soles improve balance and power transfer.
Ideal for squats, deadlifts, and Olympic lifts.
When to Use: During heavy compound lifts or Olympic weightlifting.
9. Chalk or Liquid Grip
Purpose: Improves grip on barbells, dumbbells, or pull-up bars.
Benefits:
Reduces slipping and enhances grip strength.
Prevents calluses and blisters.
When to Use: During deadlifts, pull-ups, or any exercise where grip is crucial.
10. Gym Towel
Purpose: Keeps you and the equipment clean and dry.
Benefits:
Wipes away sweat to maintain hygiene.
Provides a barrier between you and shared equipment.
When to Use: During every workout to stay clean and comfortable.
11. Water Bottle
Purpose: Keeps you hydrated during workouts.
Benefits:
Prevents dehydration and maintains performance.
Helps regulate body temperature.
When to Use: Throughout your workout to stay hydrated.
12. Headphones or Earbuds
Purpose: Keeps you motivated with your favorite music or podcasts.
Benefits:
Improves focus and endurance during workouts.
Blocks out distractions in the gym.
When to Use: During any workout to stay motivated.
13. Gym Bag
Purpose: Stores and organizes all your gym gear.
Benefits:
Keeps your accessories, clothes, and shoes in one place.
Makes it easy to transport your gear to and from the gym.
When to Use: Every time you head to the gym.
14. Fractional Plates (Micro Plates)
Purpose: Allows for small, incremental weight increases.
Benefits:
Helps with progressive overload, especially for beginners or advanced lifters.
Ideal for improving strength gradually.
When to Use: When you need to increase weight in small increments (e.g., 1.25 lbs or 0.5 kg).
15. Pull-Up Assistance Bands
Purpose: Helps you perform pull-ups if you’re still building strength.
Benefits:
Provides assistance to complete full reps.
Great for beginners or those working on pull-up progressions.
When to Use: During pull-up or chin-up exercises.
16. Ab Wheel or Sliders
Purpose: Strengthens your core and improves stability.
Benefits:
Targets deep core muscles for better strength and posture.
Portable and easy to use at home or in the gym.
When to Use: For core workouts or as part of a warm-up.
17. Massage Gun
Purpose: Aids in muscle recovery and reduces soreness.
Benefits:
Helps release muscle tension and improve blood flow.
Speeds up recovery between workouts.
When to Use: After workouts or on rest days for recovery.
18. Notebook or Fitness Tracker
Purpose: Tracks your progress and workouts.
Benefits:
Helps you stay organized and motivated.
Allows you to monitor strength gains and set goals.
When to Use: During every workout to log sets, reps, and weights.
Conclusion
These must-have gym accessories can enhance your strength training routine by improving performance, preventing injuries, and keeping you comfortable. Whether you’re a beginner or an experienced lifter, investing in the right gear can help you achieve your fitness goals more effectively and safely. Always prioritize proper form and technique, and use accessories to complement your training, not replace it! These gym accessories are essential for anyone serious about strength training. They help improve performance, protect against injuries, and enhance overall lifting experience. Whether you’re a powerlifter, bodybuilder, or casual gym-goer, having the right gear in your bag can make a significant difference in your progress and results!
Gym Gear & Accessories: Benefits of Using Weightlifting Grips & Straps
Introduction
In the world of weightlifting, where performance, endurance, and technique are paramount, athletes continuously seek tools that enhance their lifting capacity while preventing injuries. Weightlifting grips and straps are two popular accessories that significantly contribute to improved grip strength, wrist stability, and overall lifting efficiency.
Whether you’re a beginner or a seasoned lifter, choosing the right lifting gear can be a game-changer in achieving your fitness goals. This article explores the differences, benefits, and best use cases for weightlifting grips and straps, helping you determine which one suits your workout regimen best.

Understanding Weightlifting Straps & Grips
What Are Lifting Straps?
Lifting straps, also known as wrist straps, are designed to help lifters maintain a stronger grip on weights. They are long strips of fabric, usually made from cotton, nylon, or leather, that loop around the wrist and wrap around the barbell or dumbbell. Their primary purpose is to reduce grip fatigue by transferring some of the weight load from the hands to the wrists, enabling the lifter to focus more on muscle engagement rather than struggling to hold onto the weight.
Lifting straps are widely used for exercises such as:
Deadlifts
Rows (barbell, dumbbell, and machine-assisted)
Rack pulls
Heavy shrugs
Lat pulldowns
What Are Lifting Grips?
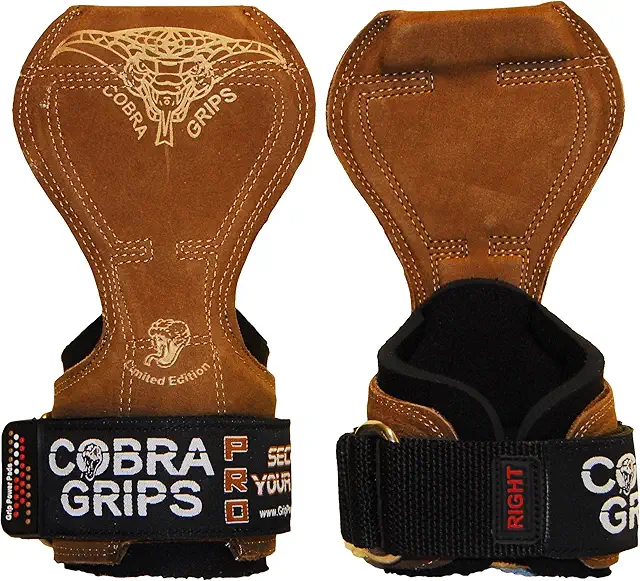
Lifting grips are multi-functional weightlifting accessories that provide a combination of wrist support, palm protection, and grip enhancement. Unlike straps, which focus primarily on improving grip strength, grips also protect the hands from calluses, blisters, and abrasions caused by bar knurling.
Typically made from rubber, neoprene, or leather, lifting grips feature a wrist wrap with a padded gripping surface that helps in maintaining a secure grip without excessive squeezing. They are commonly used for:
Pull-ups & chin-ups
Deadlifts
Barbell & dumbbell rows
Kettlebell swings
Lifting Straps vs. Lifting Grips: Key Differences
While both lifting straps and grips serve similar functions, they differ in structure and purpose. Below is a comparison of their primary characteristics:
| Feature | Lifting Straps | Lifting Grips |
|---|---|---|
| Grip Assistance | Excellent grip stability | Enhanced grip, but less secure than straps |
| Wrist Support | Minimal wrist support | Strong wrist support |
| Hand Protection | Limited; may cause friction | Prevents blisters & calluses |
| Comfort Level | May require adjustments | Comfortable, but may feel bulky |
| Ease of Use | Takes practice to wrap correctly | Quick & easy application |
| Ideal For | Powerlifters & weightlifters | CrossFit athletes & bodybuilders |
How to Use Lifting Grips & Straps
Using Lifting Grips
Wrap the wrist strap around your wrist securely.
Position the padded grip under the bar or dumbbell handle.
Grip the weight over the lifting grip and begin your set.
Adjust the grip to ensure maximum comfort and efficiency.
Using Lifting Straps
Loop the strap around your wrist and secure it tightly.
Wrap the excess material around the bar.
Rotate your grip to tighten the strap onto the bar.
Begin lifting while maintaining control of the weight.
Types of Lifting Straps & Materials
1. Closed Loop Straps
Also called Olympic lifting straps, these allow for a quick release and are ideal for movements that require fast transitions, such as snatches and cleans.
2. Lasso Lifting Straps
These provide a secure grip and are commonly used for deadlifts, shrugs, and heavy rows.
3. Figure 8 Lifting Straps
Designed for maximum grip stability, these straps are best suited for powerlifters performing deadlifts.
Material Considerations
Cotton: Comfortable but may lack durability.
Nylon: Strong and long-lasting but can cause chafing.
Leather: Durable but may require a break-in period.
Benefits of Using Lifting Grips & Straps
1. Enhanced Grip Strength
Both lifting grips and straps reduce grip fatigue, allowing you to lift heavier weights for more reps without worrying about losing control of the bar.
2. Wrist Support & Stability
Lifting grips, in particular, offer added wrist support, minimizing strain and reducing the risk of injuries.
3. Improved Performance
By taking pressure off the fingers and forearms, these accessories enable lifters to focus on target muscles, leading to better muscle engagement and growth.
4. Callus & Skin Protection
Grips provide an extra layer of protection against rough knurling, helping prevent blisters and calluses.
5. Injury Prevention
Straps and grips help prevent overuse injuries by evenly distributing the weight and reducing strain on smaller muscle groups.
When to Use Lifting Straps vs. Lifting Grips
| Training Goal | Best Choice |
| Maximal grip strength training | Lifting straps |
| Wrist stability & protection | Lifting grips |
| Bodybuilding & endurance training | Lifting grips |
| Heavy compound lifts | Lifting straps |
| Pull-ups & chin-ups | Lifting grips |
Common Mistakes to Avoid
1. Overusing Straps & Grips
Relying too much on lifting accessories can hinder your natural grip strength development.
2. Incorrect Application
Improper wrapping or grip positioning can lead to ineffective use and even injuries.
3. Ignoring Comfort & Fit
Ill-fitting grips or straps can cause discomfort, reducing their effectiveness.
Choosing the Right Gear for Your Training
When deciding between lifting grips and straps, consider the following:
Your primary lifting goals
The type of exercises you perform
Your wrist strength & stability needs
Personal comfort & preference
If heavy lifting and maximal strength gains are your priority, lifting straps are ideal. On the other hand, if you require versatile wrist support, grip assistance, and hand protection, then lifting grips will be the better option.
Conclusion
Lifting grips and straps serve distinct yet complementary purposes in strength training and bodybuilding. By understanding their unique benefits and differences, you can incorporate the right gear into your routine to enhance performance, protect your hands, and prevent injuries.
Before investing in a pair, assess your lifting style, comfort needs, and long-term fitness goals. No matter your choice, using the right gym accessories will ensure you train harder, smarter, and safer every time you step into the gym.
Ready to Upgrade Your Workouts?
Pick the right lifting grips or straps today and elevate your weightlifting game to the next level!
Weightlifting grips and straps are essential tools for anyone serious about strength training. They provide support, improve grip, and help you lift heavier weights safely. Here’s a detailed look at their benefits and how they can enhance your workouts:
Benefits of Using Weightlifting Grips & Straps
1. Improved Grip Strength
Why It Matters: Grips and straps reduce the strain on your hands, allowing you to focus on lifting heavier weights without worrying about your grip failing.
Best For: Deadlifts, rows, pull-ups, and other exercises that require a strong grip.
2. Reduced Calluses and Blisters
Why It Matters: Grips protect your palms from friction, preventing painful calluses and blisters.
Best For: High-rep workouts or exercises with rough bars (e.g., pull-ups, barbell rows).
3. Enhanced Performance
Why It Matters: By eliminating grip fatigue, you can perform more reps or lift heavier weights, leading to better muscle growth and strength gains.
Best For: Heavy deadlifts, shrugs, and other grip-intensive exercises.
4. Wrist Support and Stability
Why It Matters: Some grips and straps come with wrist wraps, providing extra support and reducing the risk of injury.
Best For: Overhead presses, snatches, and other exercises that strain the wrists.
5. Versatility
Why It Matters: Grips and straps can be used for a variety of exercises, making them a versatile addition to your gym bag.
Best For: Cross-training, power-lifting, and bodybuilding.
6. Injury Prevention
Why It Matters: By reducing strain on your hands, wrists, and forearms, grips and straps help prevent overuse injuries.
Best For: Long training sessions or high-volume workouts.
Types of Weightlifting Grips & Straps
1. Lifting Straps
What They Are: Long straps that wrap around the barbell or dumbbell and your wrist, providing a secure grip.
Best For: Heavy deadlifts, rows, and shrugs.
2. Lifting Grips
What They Are: Padded gloves or wraps that protect your palms and improve grip.
Best For: Pull-ups, kettlebell swings, and high-rep exercises.
3. Wrist Wraps
What They Are: Straps that wrap around your wrist for added support and stability.
Best For: Overhead presses, bench presses, and snatches.
4. Hook Grips
What They Are: Straps with a loop that hooks onto the bar, allowing you to lift heavier weights without relying on your grip strength.
Best For: Olympic lifts and heavy deadlifts.
Pro Tips for Using Grips & Straps
Use Sparingly: Don’t rely on grips and straps for every exercise. Train your grip strength by going strap-free for lighter lifts.
Proper Fit: Ensure your grips and straps fit snugly but aren’t too tight, as this can restrict blood flow.
Maintenance: Clean your grips and straps regularly to prevent odor and prolong their lifespan.
Combine with Chalk: For extra grip, use lifting chalk along with your straps or grips.
When to Use Grips & Straps
Heavy Lifts: When your grip is the limiting factor.
High-Rep Workouts: To prevent calluses and blisters.
Weak Grip: If you’re recovering from an injury or have naturally weak grip strength.
Final Thoughts
Weightlifting grips and straps are game-changers for anyone looking to improve their performance, protect their hands, and lift heavier weights safely. Whether you’re a beginner or a seasoned lifter, these tools can help you take your training to the next level.
Weightlifting grips and straps offer several benefits, including: increased lifting capacity by reducing grip fatigue, improved form by providing support, potential for injury prevention by distributing load more evenly across the hands and wrists, and allowing for heavier weights to be lifted, leading to greater muscle development and strength gains, particularly on exercises like deadlifts and rows where grip strength can be limiting.
- Enhanced grip strength:
Grips, especially those with textured surfaces, can directly improve grip strength, while straps help minimize grip fatigue, allowing you to lift heavier weights for more reps.
- Improved lifting technique:
By taking the strain off your hands and wrists, straps can help you maintain proper form and focus on the targeted muscle groups during exercises.
- Muscle growth potential:
Lifting heavier weights due to reduced grip fatigue can lead to greater muscle growth and strength gains.
- Injury prevention:
Straps can help prevent injuries to the hands, wrists, and forearms by distributing the load more evenly.
- Versatility:
Both grips and straps can be used for a variety of exercises, including deadlifts, rows, pull-ups, and lat pull-downs.
- Proper fit:
Ensure the straps are the right size and fit snugly to provide optimal support without restricting blood flow.
- Not for every exercise:
While beneficial for certain lifts, using straps for exercises that primarily target grip strength (like farmer’s carries) can hinder the intended training stimulus.
- Grip strength training:While straps can help with heavier lifts, it’s important to still incorporate dedicated grip strength exercises into your routine for overall hand health

Versatile Fitness Equipment
Ideal for both indoor and outdoor use, this equipment offers the flexibility needed for a comprehensive workout.

Advanced Workout Equipment
This equipment is engineered for superior performance, enhancing both endurance and strength training.

Classic Sports Equipment
This equipment is a staple for any athlete, offering timeless utility and robust construction.
Alternative Power Deadlifts Adjustable Gloves
Engineered for weightlifting and bodybuilding, these gloves provide maximum grip and wrist support.


If you’re looking for gym gear and accessories to enhance your workouts, here’s a curated list of essentials that can help you stay motivated, improve performance, and make your fitness journey more enjoyable. Whether you’re a beginner or a seasoned gym-goer, these items are must-haves for your fitness arsenal:
Gym Gear & Accessories
1. Workout Gloves
Why You Need Them: Protect your hands from calluses and improve grip during weightlifting, pull-ups, or rowing.
Recommended: Look for padded, breathable gloves with wrist support.
2. Resistance Bands
Why You Need Them: Perfect for strength training, stretching, and mobility exercises. Great for home workouts or gym use.
Recommended: A set of varying resistance levels (light, medium, heavy).
3. Weightlifting Belt
Why You Need It: Provides core support and stability during heavy lifts like deadlifts and squats.
Recommended: Adjustable, durable belts with padding for comfort.
4. Gym Bag
Why You Need It: Keep all your gear organized and portable. Look for compartments for shoes, clothes, and accessories.
Recommended: Water-resistant material with ventilated shoe pockets.
5. Foam Roller
Why You Need It: Essential for post-workout recovery, reducing muscle soreness, and improving flexibility.
Recommended: High-density foam rollers for deep tissue massage.
6. Water Bottle
Why You Need It: Stay hydrated during workouts with a durable, leak-proof bottle.
Recommended: Insulated stainless steel bottles to keep drinks cold or hot.
7. Wireless Earbuds/Headphones
Why You Need Them: Stay motivated with your favorite workout playlist without dealing with tangled wires.
Recommended: Sweat-proof, noise-canceling earbuds with long battery life.
8. Gym Towel
Why You Need It: Keep sweat at bay and maintain hygiene during workouts.
Recommended: Quick-drying, microfiber towels that are compact and lightweight.
9. Weightlifting Shoes
Why You Need Them: Provide stability and support during heavy lifts, especially squats and deadlifts.
Recommended: Flat-soled shoes with a secure fit and good ankle support.
10. Fitness Tracker/Smartwatch
Why You Need It: Monitor your heart rate, steps, calories burned, and workout progress.
Recommended: Popular brands like Fitbit, Garmin, or Apple Watch.
11. Jump Rope
Why You Need It: A portable and effective cardio tool for warming up or high-intensity workouts.
Recommended: Adjustable length with comfortable handles.
12. Protein Shaker Bottle
Why You Need It: Mix protein shakes or supplements quickly and easily.
Recommended: Leak-proof bottles with a mixing ball for smooth shakes.
13. Knee Sleeves/Wrist Wraps
Why You Need Them: Provide joint support and stability during heavy lifts or high-impact exercises.
Recommended: Neoprene sleeves for warmth and compression.
14. Yoga Mat
Why You Need It: Perfect for yoga, stretching, or floor exercises. Provides cushioning and grip.
Recommended: Non-slip, eco-friendly mats with adequate thickness.
15. Massage Gun
Why You Need It: Relieve muscle tension and soreness with a portable percussion massager.
Recommended: Cordless models with multiple speed settings.
Pro Tips for Choosing Gym Gear
Quality Over Quantity: Invest in durable, high-quality gear that lasts.
Comfort is Key: Ensure your gear fits well and doesn’t hinder your performance.
Portability: Choose lightweight, easy-to-carry items for convenience.
Personalization: Pick gear that matches your fitness goals and preferences.
Final Thoughts
The right gym gear and accessories can make a huge difference in your workout experience. Whether you’re lifting weights, running, or doing yoga, having the right tools will help you stay motivated, perform better, and recover faster.
Benefits of Using Weightlifting Grips & Straps: Enhance Your Performance
Introduction
Weightlifting grips and straps are essential gym accessories that help athletes lift heavier, improve grip strength, and reduce hand fatigue. Whether you’re a beginner or an advanced lifter, these tools can make a significant difference in your performance and safety during workouts. This guide explores the key benefits of using weightlifting grips and straps, the types available, and how to choose the best option for your training needs.
Why Use Weightlifting Grips & Straps?
Key Benefits:
✅ Improved Grip Strength – Helps prevent the bar from slipping due to sweat or fatigue.
✅ Increased Lifting Capacity – Allows you to lift heavier weights by reducing forearm fatigue.
✅ Hand & Wrist Protection – Minimizes blisters, calluses, and wrist strain.
✅ Better Muscle Engagement – Focuses on target muscles without worrying about grip failure.
✅ Enhanced Endurance – Reduces grip fatigue for high-rep sets and prolonged training.
Types of Weightlifting Grips & Straps
There are different types of weightlifting grips and straps, each designed for specific training styles and exercises.
1. Lifting Straps
Material: Cotton, leather, or nylon.
Best For: Deadlifts, rows, shrugs.
How They Work: Loop around the barbell to enhance grip and support.
2. Figure 8 Straps
Material: Heavy-duty cotton or nylon.
Best For: Powerlifting and heavy deadlifts.
How They Work: Wrapped twice around the wrist and bar for maximum security.
3. Hook Grips
Material: Metal hooks with padded wrist straps.
Best For: Pull exercises like lat pulldowns.
How They Work: The metal hook grips the bar, reducing forearm strain.
4. Padded Weightlifting Grips
Material: Neoprene padding with rubberized grip.
Best For: High-rep training, functional fitness.
How They Work: Provides direct grip on the bar while protecting palms.
How Weightlifting Grips & Straps Improve Performance
1. Enhanced Grip Strength
Reduces reliance on forearm endurance.
Prevents grip failure during heavy lifts.
2. Reduced Wrist Strain
Provides wrist support and stabilizes joint movement.
Ideal for athletes recovering from wrist injuries.
3. Increased Muscle Activation
Focuses on primary muscle groups (e.g., lats, traps, hamstrings).
Prevents grip fatigue from limiting workout effectiveness.
Best Exercises for Weightlifting Grips & Straps
| Exercise | Best Grip/Strap Type |
|---|---|
| Deadlifts | Figure 8 Straps |
| Barbell Rows | Lifting Straps |
| Pull-ups | Padded Grips |
| Lat Pulldowns | Hook Grips |
| Shrugs | Lifting Straps |
How to Choose the Right Weightlifting Grips & Straps
Factors to Consider:
✅ Material Durability – Leather and heavy-duty nylon last longer.
✅ Comfort & Padding – Padded grips prevent discomfort during high-rep workouts.
✅ Training Goals – Powerlifters need heavy-duty straps, while bodybuilders may prefer padded grips.
✅ Ease of Use – Some straps require more setup time than others.
Common Mistakes When Using Weightlifting Straps & Grips
🚫 Over-Reliance on Grips – Avoid using straps for every set; maintain natural grip strength.
🚫 Incorrect Wrapping Technique – Poor strap positioning reduces effectiveness.
🚫 Using the Wrong Type for the Exercise – Figure 8 straps are not ideal for pull-ups.
🚫 Ignoring Wrist Support Needs – Choose a strap with wrist padding if needed.
Top Weightlifting Grips & Straps for 2025
Here are some of the best weightlifting grips and straps to enhance your training experience.
1. CRUNCHQUENCH Heavy-Duty Lifting Straps
✅ Reinforced stitching for durability
✅ Padded wrist support
✅ Perfect for powerlifters and strongmen
2. CRUNCHQUENCH Figure 8 Straps
✅ Maximum security for deadlifts
✅ Heavy-duty cotton blend
✅ Designed for serious lifters
3. CRUNCHQUENCH Padded Weightlifting Grips
✅ Neoprene padding for comfort
✅ Ideal for CrossFit and functional training
✅ Provides direct palm protection
How to Maintain Your Weightlifting Grips & Straps
Proper maintenance ensures durability and hygiene.
Cleaning Tips:
Hand wash with mild soap and water.
Air dry completely before using.
Avoid excessive moisture exposure to prevent wear.
Storage Tips:
Keep in a dry area to prevent mold buildup.
Store flat or rolled up to maintain shape.
Avoid excessive stretching or folding.
Final Thoughts
Weightlifting grips and straps are an invaluable addition to your training routine. Whether you want to lift heavier, reduce hand fatigue, or enhance muscle activation, choosing the right pair can significantly improve your performance.
Upgrade your lifting experience today with the best weightlifting grips and straps!
Choosing the right weightlifting gloves is essential for comfort, grip, and injury prevention. Here’s a step-by-step guide to help you pick the perfect pair for your workouts:
1. Determine Your Needs
Type of Lifting:
Powerlifting/Heavy Weights: Prioritize gloves with thick padding and wrist support.
Cross-Training/Cardio: Opt for lightweight, breathable gloves for versatility.
Pull-Ups/Gymnastics: Look for minimal padding and a secure grip.
Common Issues:
Calluses? → Choose gloves with palm padding.
Slipping grip? → Look for silicone or textured palms.
Wrist pain? → Prioritize gloves with wrist straps or reinforced support.
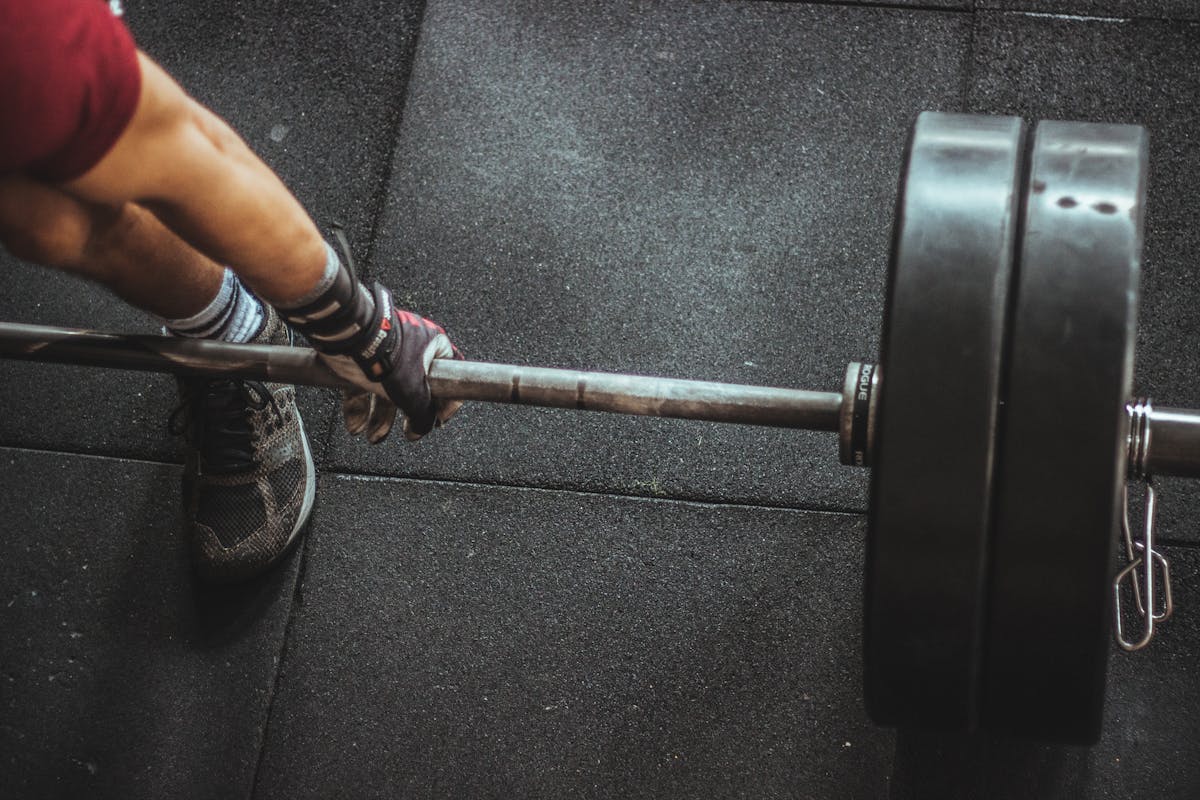
2. Key Features to Look For
Material
Leather: Durable and long-lasting but less breathable.
Synthetic (Mesh/Nylon): Lightweight and breathable but wears out faster.
Neoprene: Flexible and sweat-resistant for high-intensity workouts.
Padding
Padded Palms: Protects against calluses and blisters.
Padding Thickness:
Light Padding: For cardio, pull-ups, or light weights.
Heavy Padding: For heavy lifting or barbell work.
Wrist Support
Adjustable Wrist Straps: Provide stability during heavy lifts (e.g., deadlifts).
Wrist Wrap Gloves: Ideal for preventing wrist strain.
Grip
Silicone Grips: Prevent slippage on barbells or dumbbells.
Textured Palms: Enhance grip for exercises like rows or pull-ups.
Fit
Snug but Not Tight: Should allow natural hand movement.
Adjustable Closures: Velcro straps or elastic bands for a secure fit.
Breathability
Mesh Panels: Keep hands cool during long workouts.
Perforated Palms: Reduce sweat buildup.
3. Sizing Guide
Measure Your Hand:
Wrap a tape measure around the widest part of your palm (excluding the thumb).
Match the measurement to the brand’s size chart (S, M, L, XL).
Try Before Buying: If possible, test gloves in-store for comfort and flexibility.
4. Top Recommendations by Activity
| Activity | Best Glove Type |
|---|---|
| Heavy Lifting | Padded palms + wrist straps (e.g., Harbinger) |
| CrossFit | Lightweight + breathable (e.g., Nike) |
| Pull-Ups | Minimal padding + grip-focused (e.g., Gymnastic grips) |
| General Gym Use | Versatile gloves with moderate padding (e.g., RDX) |
5. Care & Maintenance
Clean Regularly: Wipe with a damp cloth and mild soap to prevent odor.
Air Dry: Never machine-dry, as heat can damage materials.
Rotate Pairs: Extend lifespan by alternating between two pairs.
6. Common Mistakes to Avoid
Ignoring Wrist Support: Weak wrists need extra stabilization.
Choosing Style Over Function: Prioritize comfort and durability over aesthetics.
Buying Too Small/Large: Poor fit leads to blisters or reduced grip.
Final Tips
Break Them In: Wear gloves for short sessions initially to soften the material.
Replace When Worn: Frayed padding or loose stitching compromises protection.
Strength Training & Weightlifting: Common Weightlifting Mistakes
Introduction
Weightlifting is an essential part of strength training, helping individuals build muscle, improve endurance, and increase overall fitness. However, many lifters—both beginners and experienced—make mistakes that can hinder progress and increase the risk of injury. This guide will discuss the most common weightlifting mistakes, their impact, and how to correct them to maximize your results safely and effectively.
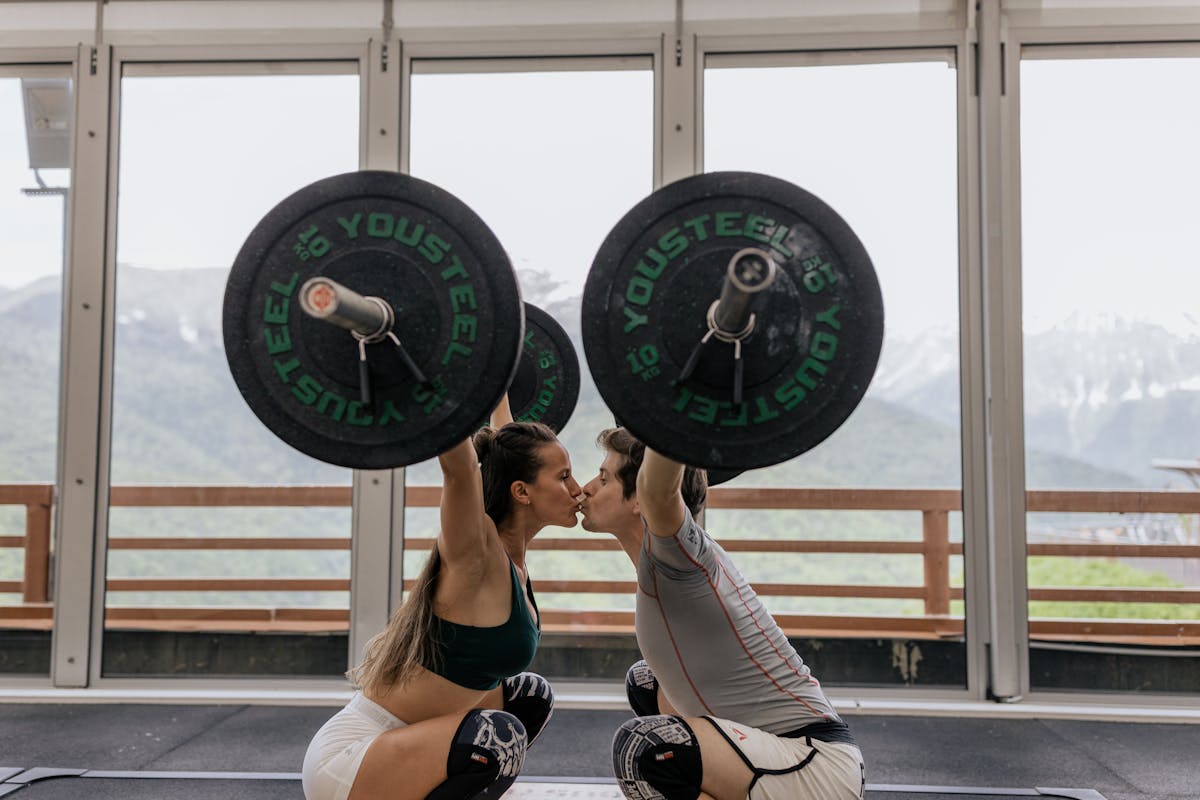
1. Skipping Warm-Ups and Mobility Work
Many lifters underestimate the importance of warming up before a workout. A proper warm-up increases blood flow to the muscles, enhances flexibility, and prepares the body for heavy lifts.
Why It’s a Mistake:
Increased risk of muscle strain or injury.
Reduced range of motion, leading to poor form.
Lower performance during the workout.
How to Fix It:
Spend at least 5-10 minutes warming up with dynamic stretches, light cardio, or resistance band exercises.
Incorporate mobility drills to improve joint flexibility.
2. Using Poor Form
Executing exercises with improper form is one of the most common and dangerous weightlifting mistakes.
Why It’s a Mistake:
Leads to muscular imbalances.
Increases risk of injury.
Reduces effectiveness of the exercise.
How to Fix It:
Work with a trainer or watch instructional videos to learn correct form.
Lift with a controlled tempo and focus on technique rather than lifting heavy weights.
Use mirrors or film yourself to check and correct your posture.
3. Lifting Too Heavy, Too Soon
Many beginners try to lift excessive weight without first building a solid foundation of strength.
Why It’s a Mistake:
Can lead to poor form and injury.
Strains muscles and joints unnecessarily.
Slows down long-term progress due to burnout or injury.
How to Fix It:
Start with moderate weights and focus on controlled movements.
Gradually increase weight while maintaining proper form.
Use progressive overload by adding small increments over time.
4. Neglecting Compound Exercises
Some lifters focus too much on isolation exercises instead of incorporating compound movements.
Why It’s a Mistake:
Slower muscle growth and overall strength gains.
Less functional strength development.
Imbalance between muscle groups.
How to Fix It:
Incorporate compound exercises such as squats, deadlifts, bench presses, and rows into your routine.
Use isolation exercises to complement compound lifts rather than replace them.
5. Ignoring Proper Breathing Techniques
Proper breathing during weightlifting is crucial for maintaining core stability and reducing fatigue.
Why It’s a Mistake:
Decreases power output.
Increases risk of dizziness or fainting.
Reduces oxygen supply to working muscles.
How to Fix It:
Use diaphragmatic breathing: inhale before lifting, exhale during exertion.
Maintain controlled breathing throughout sets.
6. Not Allowing Enough Rest and Recovery
Muscle growth happens during recovery, not just in the gym.
Why It’s a Mistake:
Leads to overtraining and burnout.
Reduces muscle repair and growth.
Increases risk of injuries.
How to Fix It:
Ensure 48 hours of rest between training the same muscle group.
Incorporate rest days and active recovery.
Prioritize sleep and hydration.
7. Overlooking the Importance of Nutrition
Strength training requires a proper diet to fuel muscle growth and recovery.
Why It’s a Mistake:
Lack of energy for workouts.
Slower muscle growth.
Poor recovery and increased fatigue.
How to Fix It:
Eat a balanced diet with protein, healthy fats, and carbohydrates.
Stay hydrated and include post-workout nutrition.
8. Not Tracking Progress
Without monitoring progress, it’s difficult to see improvements and make necessary adjustments.
Why It’s a Mistake:
Makes it harder to set realistic goals.
Reduces motivation due to lack of visible results.
How to Fix It:
Keep a training journal to track weights, reps, and progress.
Set short-term and long-term goals.
Adjust workouts based on performance.
9. Focusing Only on Strength and Ignoring Flexibility
A strong body should also be flexible and mobile to prevent injuries and improve movement efficiency.
Why It’s a Mistake:
Leads to stiffness and restricted movement.
Increases risk of muscle imbalances and injury.
How to Fix It:
Include stretching or yoga in your routine.
Perform mobility drills regularly.
10. Not Listening to Your Body
Many lifters push through pain and fatigue without recognizing signs of overtraining or injury.
Why It’s a Mistake:
Can lead to chronic injuries.
Reduces workout effectiveness.
How to Fix It:
Pay attention to warning signs like persistent pain or fatigue.
Modify workouts when needed.
Seek professional help for recurring pain.
Conclusion
Avoiding these common weightlifting mistakes can significantly improve your performance, prevent injuries, and enhance overall results. Focus on proper technique, progressive overload, and recovery to optimize your training. By making informed adjustments to your workouts and lifestyle, you’ll maximize muscle growth and strength safely and effectively.
Strength Training & Weightlifting: Recovery & Muscle Repair
Introduction
Strength training and weightlifting push your muscles to their limits, leading to micro-tears in the muscle fibers. While training is essential for muscle growth, proper recovery and repair are equally, if not more, important. Recovery ensures muscle adaptation, reduces injury risk, and maximizes strength gains. In this guide, we will explore the essential elements of muscle recovery, effective strategies for faster muscle repair, and how to optimize post-workout recovery for long-term progress.
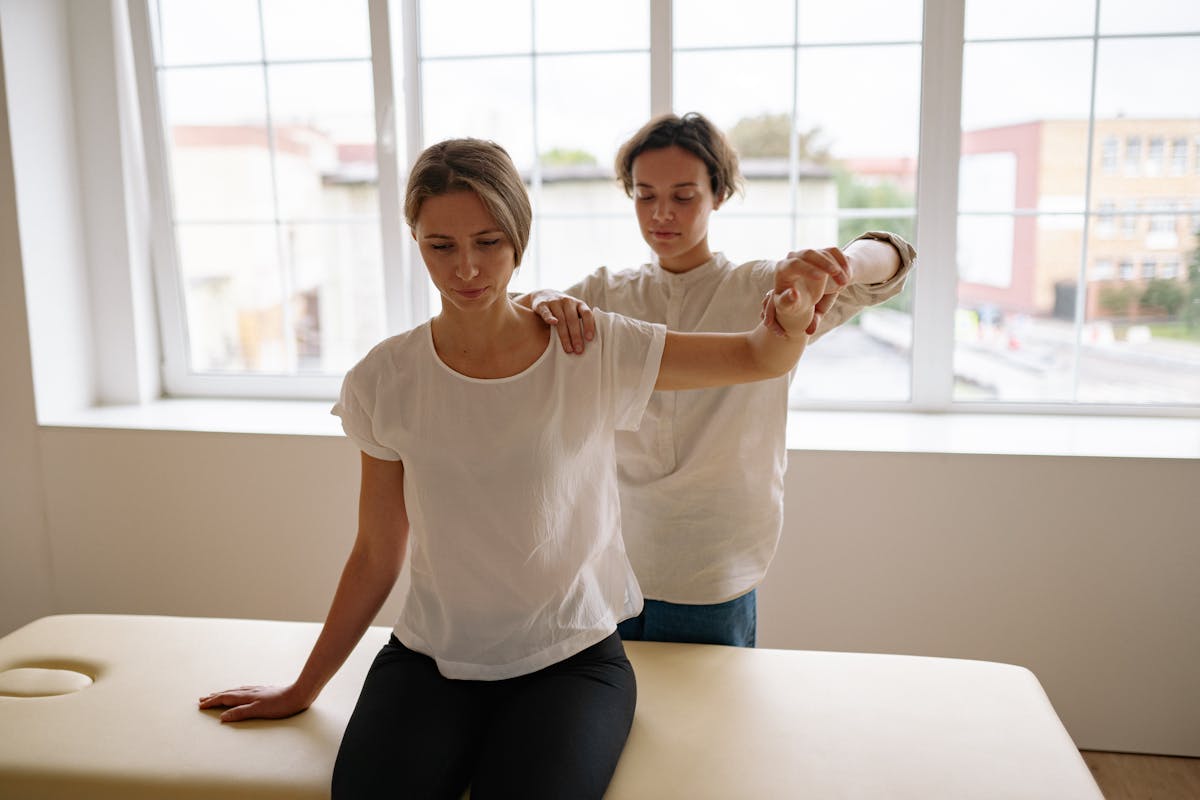
The Science Behind Muscle Recovery
Muscle recovery occurs in different phases:
Immediate Recovery: Happens within minutes after exercise, allowing your body to restore ATP (adenosine triphosphate) and oxygen levels.
Short-Term Recovery: The recovery phase that occurs between workout sets, which helps prevent fatigue and maintain performance.
Long-Term Recovery: Involves muscle protein synthesis, nutrient replenishment, and structural adaptation of the muscle fibers.
Understanding these phases allows you to implement proper recovery techniques to optimize muscle repair and growth.
Why Recovery Is Crucial for Strength Training & Weightlifting
Prevents Overtraining: Avoids burnout and excessive fatigue.
Reduces Injury Risk: Minimizes muscle strain and ligament stress.
Enhances Performance: Increases strength, endurance, and power output.
Boosts Muscle Growth: Supports muscle protein synthesis and tissue repair.
Top Recovery Strategies for Strength Training & Weightlifting
1. Prioritizing Sleep for Muscle Recovery
Sleep is the most effective natural recovery tool for the human body. During deep sleep, the body releases growth hormone, which plays a key role in muscle repair and regeneration.
Tips for Better Sleep:
Aim for 7-9 hours of quality sleep per night.
Establish a consistent sleep schedule.
Avoid screens and blue light at least 30 minutes before bedtime.
Use blackout curtains and keep your bedroom cool and dark.
2. Proper Nutrition for Muscle Repair
Your muscles require essential nutrients to recover and grow effectively.
Key Nutrients for Recovery:
Protein: Essential for muscle repair and growth. Sources: Chicken, eggs, fish, tofu, whey protein.
Carbohydrates: Replenish glycogen stores and fuel muscle recovery. Sources: Rice, oats, quinoa, sweet potatoes.
Healthy Fats: Reduce inflammation and promote cellular repair. Sources: Avocados, nuts, olive oil, fatty fish.
Electrolytes & Hydration: Helps regulate muscle contractions and reduce cramping. Sources: Coconut water, leafy greens, bananas.
Best Post-Workout Meal Ideas:
Grilled chicken with quinoa and steamed vegetables.
Greek yogurt with mixed berries and honey.
Protein smoothie with banana, almond milk, and whey protein.
3. Active Recovery Techniques
Active recovery involves light movement to promote circulation and reduce muscle soreness.
Best Active Recovery Methods:
Foam Rolling: Helps release muscle tension and improves flexibility.
Stretching & Yoga: Reduces stiffness and promotes blood flow.
Swimming or Light Cardio: Enhances circulation without excessive strain.
4. Hydration & Electrolyte Balance
Dehydration can lead to muscle cramps, fatigue, and slower recovery.
Hydration Tips:
Drink at least 3 liters of water daily.
Consume electrolyte-rich beverages post-workout.
Avoid excessive caffeine and alcohol, which can cause dehydration.
5. The Role of Rest Days
Rest days allow the body to recover, repair tissues, and prevent overtraining.
Types of Rest Days:
Complete Rest Days: No physical activity, allowing total recovery.
Active Recovery Days: Low-intensity activities such as walking, swimming, or yoga.
Signs You Need a Rest Day:
Persistent muscle soreness.
Decreased workout performance.
Lack of motivation or chronic fatigue.
6. Massage Therapy for Recovery
Massage therapy can accelerate muscle recovery by improving circulation and reducing muscle tightness.
Best Massage Techniques for Weightlifters:
Deep Tissue Massage: Targets deep muscle layers to relieve knots and stiffness.
Sports Massage: Enhances flexibility and muscle elasticity.
Foam Rolling: A self-massage technique that helps release muscle adhesions.
7. Contrast Therapy (Hot & Cold Treatments)
Alternating between hot and cold therapy can reduce inflammation and accelerate muscle healing.
Methods:
Cold Therapy (Ice Baths): Reduces swelling and numbs muscle pain.
Heat Therapy (Sauna/Hot Showers): Increases blood flow and relaxes tight muscles.
Contrast Therapy: Alternating between hot and cold baths for 20-minute sessions.
8. Supplements for Faster Recovery
Supplements can support muscle repair and reduce inflammation.
Best Supplements for Recovery:
Whey Protein: Boosts muscle protein synthesis.
BCAAs (Branched-Chain Amino Acids): Reduces muscle soreness and speeds up repair.
Creatine: Enhances muscle recovery and energy levels.
Glutamine: Supports immune function and muscle hydration.
Omega-3 Fatty Acids: Reduces inflammation and joint pain.
9. Optimizing Hormonal Balance for Recovery
Hormones play a key role in muscle repair and strength gains.
Ways to Optimize Hormones Naturally:
Maintain healthy testosterone levels through strength training and proper nutrition.
Manage cortisol (stress hormone) by reducing stress and getting enough sleep.
Ensure proper insulin sensitivity by controlling sugar intake.
Common Recovery Mistakes to Avoid
Skipping Cool-Downs: Always include light stretching and foam rolling post-workout.
Not Eating Enough Protein: Ensure adequate protein intake for muscle repair.
Ignoring Mobility Work: Regular stretching prevents stiffness and injuries.
Training Through Pain: Listen to your body and rest when necessary.
Sample Weekly Recovery Plan for Weightlifters
| Day | Activity | Recovery Focus |
|---|---|---|
| Monday | Heavy Strength Training | Foam Rolling & Stretching |
| Tuesday | Light Cardio & Mobility Work | Sauna & Hydration |
| Wednesday | Weightlifting Session | Protein & Electrolytes |
| Thursday | Active Recovery (Swimming) | Massage Therapy |
| Friday | Strength Training & HIIT | Contrast Therapy |
| Saturday | Rest Day | Full Body Recovery |
| Sunday | Yoga & Mobility Work | Sleep & Stress Reduction |
Conclusion
Recovery and muscle repair are just as important as strength training itself. Without proper rest, nutrition, and recovery strategies, muscle growth and performance can be significantly hindered. Implementing structured recovery techniques, prioritizing sleep, staying hydrated, and fueling your body with the right nutrients will ensure long-term progress and injury prevention. Stay consistent with your training and recovery routine, and you’ll maximize your strength gains while maintaining overall health and well-being.
Do You Need Lifting Straps?
5 Benefits & 3 Drawbacks Explained
Introduction
If you’re struggling to maintain your grip during heavy lifts, you may be wondering if lifting straps are worth using or if you should focus on improving your grip strength.
Lifting straps allow you to lift more weight, encourage muscle hypertrophy, improve the mind-muscle connection, protect your hands, and promote lifting symmetry. However, over-reliance on straps can hinder grip strength if not used properly.
In this article, we’ll cover the 5 benefits and 3 drawbacks of using lifting straps, who can benefit the most, and how to avoid becoming too dependent on them.

What Are Lifting Straps?
Lifting straps, also known as wrist straps, are long pieces of fabric or leather that wrap around your wrist and the barbell or dumbbell to help secure your grip. They are primarily used to support grip strength, especially in pulling exercises such as deadlifts, rows, and pull-ups.
How Lifting Straps Work:
Attach around the wrist and wrap around the weight.
Provide additional grip support to prevent grip fatigue.
Reduce strain on the hands and forearms during heavy lifts.
5 Benefits of Using Lifting Straps
1. Lift More Weight
One of the main reasons lifters use straps is to help them lift heavier weights. Straps allow you to continue training when your muscular strength surpasses your grip capacity.
Removes grip as a limiting factor.
Increases strength development for major lifts.
Helps lifters reach new personal records.
2. Protect Your Hands
Lifting straps help protect your hands from calluses and blisters caused by repeated gripping of bars with aggressive knurling.
Prevents tearing of calluses.
Reduces friction between the bar and hands.
Helps maintain hand health for long-term lifting.
3. Improves Symmetry
Many lifters use a mixed grip during deadlifts, which can create muscular imbalances over time. Using lifting straps can help maintain symmetry in strength development.
Encourages even muscle growth.
Reduces risk of biceps tears from mixed grip.
Ensures equal engagement of both arms.
4. Cleaner Alternative to Chalk
Chalk is often used to improve grip, but it can be messy and is banned in some gyms. Lifting straps provide an alternative that doesn’t leave a mess behind.
No need to clean up after use.
Accepted in most commercial gyms.
Easy to carry and transport.
5. Enhances Mind-Muscle Connection & Hypertrophy
By taking grip fatigue out of the equation, straps allow lifters to focus on their target muscles and train closer to failure.
Improves muscle activation.
Helps lifters reach hypertrophy with higher reps.
Allows for better contraction in pulling exercises.
3 Drawbacks of Using Lifting Straps
1. Becoming Over-Reliant
If you use lifting straps for every set, your grip strength may suffer.
Over-reliance can make it difficult to lift without straps.
Can become a crutch for grip-dependent movements.
Not allowed in competitive power-lifting meets.
2. Weakens Grip Strength
Since lifting straps remove the need for a strong grip, neglecting grip training can lead to weaker forearms.
Ways to Maintain Grip Strength:
Perform heavy barbell holds for 30 seconds.
Use a grip-strengthening tool or stress ball.
Practice hanging from a bar for extended durations.
Incorporate Fat Gripz into workouts.
3. Not Suitable for Overhead Movements
Straps should not be used for Olympic lifts such as snatches and clean and jerks. They can make it difficult to let go of the bar if needed.
Increases risk of injury in overhead movements.
Not recommended for explosive lifts.
Should only be used by experienced lifters when necessary.
Who Should Be Using Lifting Straps?
Best Candidates for Lifting Straps:
Bodybuilders – Focus on hypertrophy and training muscles closer to failure.
Hook Grip Lifters – Useful for reducing thumb strain during high-rep training.
Strongman Competitors – Permitted in competitions and useful for heavy pulling events.
Who Should NOT Use Lifting Straps?
1. Competitive Power-lifters
Since power-lifters cannot use straps in competition, they should avoid overusing them in training.
Should focus on grip strength for heavy attempts.
Use straps only for back-off sets or volume work.
2. Lifters Focused on Grip Strength
Those looking to strengthen their grip should limit strap use and focus on grip-demanding exercises.
Prioritize raw grip training.
Avoid straps for direct grip-strengthening exercises.
Best Lifting Straps for 2025
Here are the top-rated lifting straps for various lifting needs:
1. CRUNCHQUENCH Heavy-Duty Lifting Straps
✅ Reinforced stitching for durability
✅ Padded wrist support
✅ Ideal for powerlifters and strongmen
👉 Buy Now
2. CRUNCHQUENCH Figure 8 Straps
✅ Maximum security for deadlifts
✅ Heavy-duty cotton blend
✅ Designed for serious lifters
👉 Buy Now
3. CRUNCHQUENCH Padded Weightlifting Grips
✅ Neoprene padding for comfort
✅ Perfect for CrossFit and functional training
✅ Provides direct palm protection
👉 Buy Now
Final Thoughts
Lifting straps can be a game-changer for those struggling with grip fatigue during heavy lifts. However, they should be used strategically to avoid weakening grip strength. If used properly, they can enhance strength gains, protect hands, and improve lifting efficiency.
Are you ready to upgrade your lifting experience? Check out the best lifting straps today! 👇
👉 Shop Now
🔹 Do you use lifting straps? Share your experience in the comments below!
Top Weightlifting Gloves for Superior Grip and Hand Protection
Introduction
When it comes to strength training, grip strength and hand protection are crucial for an effective and injury-free workout. Whether you’re lifting heavy weights, performing high-rep CrossFit workouts, or looking for extra wrist support, weightlifting gloves can be a game-changer.
Not only do they protect against calluses and blisters, but they also provide added grip and stability, making lifts safer and more effective. With countless options available, choosing the right pair can be overwhelming. That’s why we’ve compiled this expert guide to the best weightlifting gloves for every type of lifter.

Why Wear Weightlifting Gloves?
Before diving into our top picks, let’s discuss why you should consider using weightlifting gloves in the first place.
1. Enhanced Grip Strength
The primary function of weightlifting gloves is to improve your grip on weights, barbells, and pull-up bars. Many gloves have silicone or rubberized padding on the palm to prevent slipping, helping you maintain better control during your lifts.
2. Hand Protection
Regular lifting can lead to calluses, blisters, and abrasions, especially when working with heavy weights or textured bars. Gloves provide a protective barrier to keep your hands in better condition over time.
3. Wrist Support
Some weightlifting gloves come with built-in wrist straps to add extra support, reducing the risk of strain or injury during heavy pressing movements like bench presses, deadlifts, and overhead presses.
4. Reduced Strain on Fingers
By distributing the load more evenly across your hands, gloves help reduce tension on your fingers, which is especially beneficial during high-repetition workouts.
The 7 Best Weightlifting Gloves for 2025
We tested and reviewed several of the best weightlifting gloves based on grip, durability, comfort, material quality, and overall value. Here are the top picks for different lifting needs.
1. Best Overall: Ihuan Breathable Fingerless Lifting Gloves
Ideal for: General weightlifting, CrossFit, and gym workouts
Material: Microfiber with anti-slip silicone grip
Features: Wrist support, breathable mesh back, padded palm
Pros: Comfortable fit, great wrist support, excellent grip
Cons: Wrist straps may feel too tight for some users
These gloves are an all-around excellent choice for beginners and experienced lifters alike. The breathable material keeps your hands cool, while the padded palms provide extra protection without sacrificing grip strength.
2. Best for CrossFit: Rogue Mechanix Gloves V2
Ideal for: CrossFit, functional training, pull-ups
Material: Synthetic leather and breathable mesh fabric
Features: Full-finger protection, lightweight, durable stitching
Pros: Flexible, comfortable, good for bar muscle-ups
Cons: No padding in the palm, limited wrist support
If you engage in high-rep workouts, these gloves provide a good balance of protection and mobility, making them ideal for pull-ups, kettlebells, and Olympic lifting.
3. Best Heavy-Duty Weightlifting Gloves: Grip Power Pads Elite Leather Gloves
Ideal for: Powerlifters, bodybuilders, heavy-duty lifting
Material: Durable leather with reinforced padding
Features: 25-inch wrist wrap, rubber padding, finger loops for easy removal
Pros: Extreme durability, great wrist support, ideal for heavy lifts
Cons: Expensive, sizing runs small
These gloves are built for serious lifters who need maximum protection and durability during heavy lifting sessions.
4. Best Full-Finger Gloves: Bionic Full-Finger Fitness Gloves
Ideal for: Outdoor training, cold-weather workouts
Material: Genuine leather with Cool-On breathable fabric
Features: Full-finger design, built-in padding, wrist wrap
Pros: Great protection from cold and germs, durable construction
Cons: Fingers may feel too long for some users
These gloves are perfect for those who need full-finger coverage for hygiene or cold weather while maintaining a solid grip and protection.
5. Best Budget Option: SIMARI Workout Gloves
Ideal for: Beginners and casual lifters
Material: Elasticized fabric with microfiber padding
Features: Lightweight, anti-slip design, breathable mesh
Pros: Affordable, comfortable, decent grip
Cons: Not as durable as premium gloves
If you’re just starting and need a cost-effective solution, these gloves provide good grip and protection without breaking the bank.
6. Best Gloves with Wrist Support: Harbinger Pro Weightlifting Gloves
Ideal for: Anyone needing extra wrist stabilization
Material: Leather, spandex, and reinforced wrist wrap
Features: Hook and loop closure, perforated palm
Pros: Excellent wrist support, good compression
Cons: Hard to remove after sweating, limited color options
These gloves are a great option if you have weak wrists or need extra stability during pressing movements.
7. Best Grip: Trideer Workout Gloves
Ideal for: Those prioritizing grip strength
Material: Silicone-enhanced palm, breathable microfiber mesh
Features: Thick palm padding, 18-inch wrist brace
Pros: Superior grip, comfortable fit, good wrist stability
Cons: Sizing runs large
These gloves offer the best non-slip grip, making them ideal for lifters who struggle with sweaty hands or slippery bars.
How to Choose the Best Weightlifting Gloves
When selecting weightlifting gloves, consider the following factors:
1. Fit and Comfort
Ensure the gloves fit snugly but do not restrict movement.
Fingerless gloves offer more flexibility, while full-finger gloves provide better protection.
2. Material and Breathability
Leather gloves are more durable but may feel heavy.
Mesh-backed gloves offer more breathability for high-intensity workouts.
3. Grip and Padding
If you lift heavy weights, opt for gloves with extra palm padding.
For maximum grip, look for gloves with anti-slip silicone or rubber padding.
4. Wrist Support
If you have weak wrists, choose gloves with adjustable wrist wraps for added stability.
How to Maintain Your Weightlifting Gloves
To keep your gloves in the best condition:
Wash them regularly to remove sweat and odor.
Avoid machine drying; instead, let them air dry.
Store them in a cool, dry place after workouts.
Final Thoughts
Choosing the right pair of weightlifting gloves can significantly enhance your lifting experience by improving grip strength, preventing calluses, and providing wrist support. Whether you’re a powerlifter, CrossFitter, or casual gym-goer, the gloves on this list offer the best options for protection, durability, and comfort.
Ready to take your workouts to the next level? Pick a pair of weightlifting gloves that suits your needs and lift with confidence!
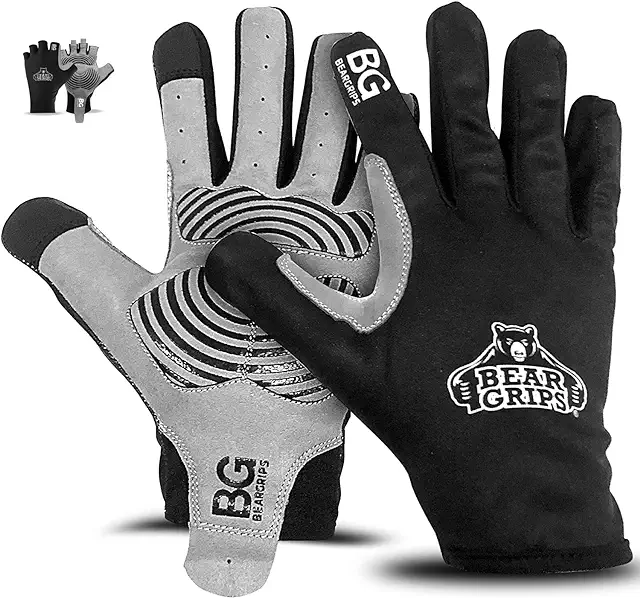
Bear Grips Weightlifting Gloves
Enhance your grip and protect your hands during intense workouts with these high-quality weightlifting gloves.

Gymreapers Weight Lifting Gloves
Premium weightlifting gloves with wrist support, designed for durability and maximum grip during deadlifts and strength training.

Sleek Sports Accessory
Designed for maximum convenience and efficiency, perfect for active lifestyles.

Ergonomic Sports Accessory
Ergonomically designed to enhance comfort and performance during intensive workouts.

High-Performance Training Gear
Crafted for professionals, this gear offers exceptional performance and durability.

Innovative Sporting Equipment
State-of-the-art sporting gear designed for peak performance.

Streamlined Fitness Device
Specially designed to support a wide array of exercises, enhancing flexibility and strength.

Compact Exercise Tool
Perfect for fitness enthusiasts on the go.

Enhanced Fitness Gear
Designed for all fitness levels.

Professional Athletic Gear
Tailored for high performance and durability.

Ultimate Training Equipment
Perfect for building strength and endurance.

Versatile Sporting Goods
A great addition to any workout routine.
Bear Grips Weightlifting Gloves
Enhance your grip and protect your hands during intense workouts with these high-quality weightlifting gloves.
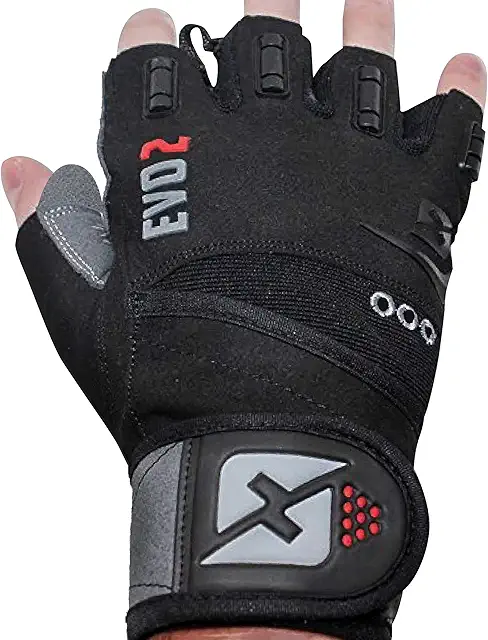
Skott Weightlifting Gloves
Premium gloves with wrist support and double durability, perfect for intense weightlifting and training sessions.
Gymreapers Weight Lifting Gloves
Premium weightlifting gloves with wrist support, designed for durability and maximum grip during deadlifts and strength training.
MOREOK Workout Powerlifting Gloves
High-quality workout gloves designed for powerlifting, weightlifting, and intense training sessions.
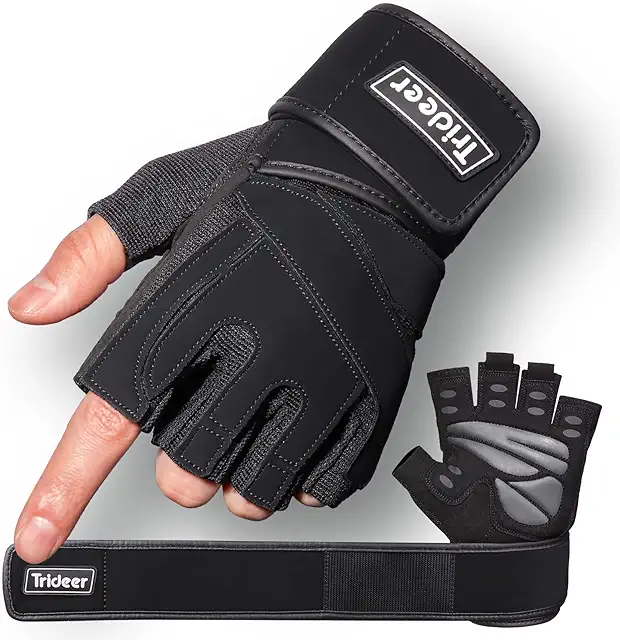
Trideer Padded Workout Gloves
Designed for weightlifting and fitness training, offering enhanced grip, comfort, and wrist support.

Ihuan Professional Weightlifting Gloves
Designed for superior grip, ventilation, and hand protection during intense training sessions.
Alternative Power Deadlifts Adjustable Gloves
Engineered for weightlifting and bodybuilding, these gloves provide maximum grip and wrist support.
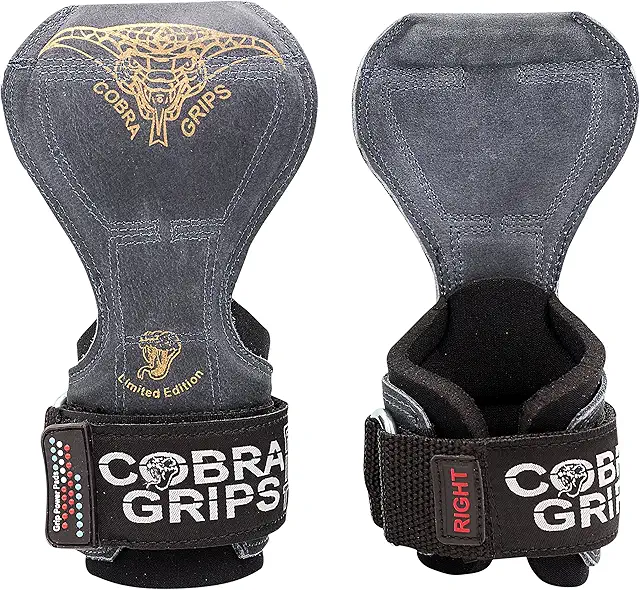
Alternative Power Deadlifts Gloves
Designed for deadlifts and bodybuilding, these gloves provide superior wrist support and grip strength.

RDX Bodybuilding Weightlifting Gloves
High-quality breathable gloves designed for superior grip and protection during intense lifting sessions.
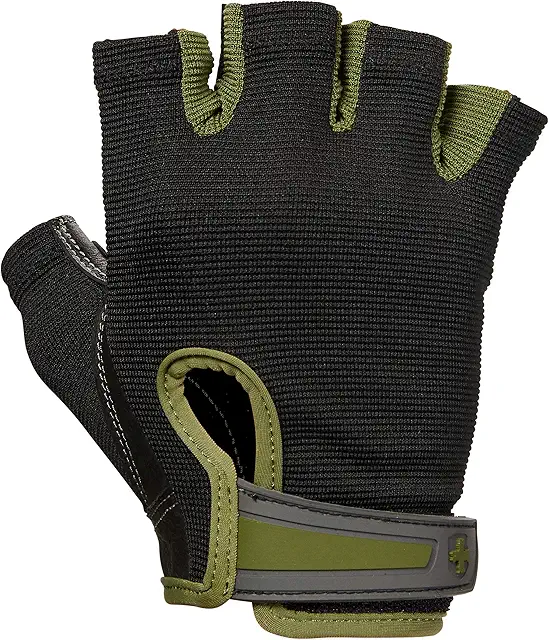
Harbinger Weightlifting Gloves
Crafted for serious lifters, these gloves offer excellent durability and grip without compromising flexibility.

Sunnex Weightlifting Gloves
Lightweight and breathable, designed for serious fitness enthusiasts looking for optimal hand protection and grip.

Atercel Weightlifting Gloves
Designed for optimum comfort and enhanced grip, perfect for gym training and CrossFit.

RDX Weightlifting Gloves
Optimized for comfort and durability, these gloves offer enhanced grip and protection during intense lifting sessions.

Enhanced Athletic Gear
Expertly crafted for superior durability and performance in sports.
Sleek Sports Accessory
Designed for maximum convenience and efficiency, perfect for active lifestyles.
Ergonomic Sports Accessory
Ergonomically designed to enhance comfort and performance during intensive workouts.
High-Performance Training Gear
Crafted for professionals, this gear offers exceptional performance and durability.
Essential Fitness Kit
A versatile collection of fitness tools designed to support a wide range of exercises for daily fitness.
Streamlined Fitness Device
Specially designed to support a wide array of exercises, enhancing flexibility and strength.
Versatile Fitness Equipment
Ideal for both indoor and outdoor use, this equipment offers the flexibility needed for a comprehensive workout.
Advanced Workout Equipment
This equipment is engineered for superior performance, enhancing both endurance and strength training.
Classic Sports Equipment
This equipment is a staple for any athlete, offering timeless utility and robust construction.

Multi-Purpose Athletic Equipment
Designed to cater to a variety of sports activities, ensuring versatility and top performance.

Advanced Fitness Gear
Engineered for optimal performance and durability.

Ultimate Training Equipment
Designed for comprehensive workouts to enhance your fitness.
Innovative Sporting Equipment
State-of-the-art sporting gear designed for peak performance.
Professional Athletic Gear
Tailored for high performance and durability to meet all your sporting needs.
Compact Exercise Tool
Perfectly designed for on-the-go fitness enthusiasts looking for a compact workout solution.
Enhanced Fitness Gear
Advanced equipment designed for all levels of fitness, ensuring a comprehensive workout.
Dynamic Sports Equipment
Designed to enhance agility and performance in a variety of sports.

Versatile Sporting Goods
High-quality sporting goods for a versatile workout experience.
Innovative Sporting Equipment
State-of-the-art sporting gear designed for peak performance.
Compact Sports Gear
Ideal for athletes looking for high-quality, space-saving training equipment.