Maintaining and Cleaning Your Gym Gear: The Ultimate Guide
Properly caring for your gym equipment is essential to prevent bacteria buildup, eliminate odors, and extend the lifespan of your gear. Sweat and dirt can turn gym accessories into breeding grounds for germs and cause unpleasant smells over time. In this comprehensive guide, we’ll cover best practices for cleaning a variety of gym items – from weightlifting accessories (belts, straps, gloves, wraps) to workout shoes, resistance bands, yoga mats, foam rollers, and gym bags. Each section includes step-by-step cleaning instructions, tips to prevent odor and bacteria, and recommendations for cleaning products. Let’s dive in!
")
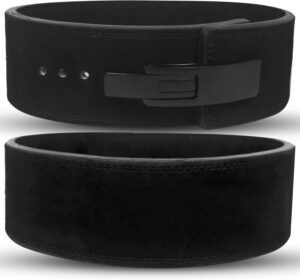
Weightlifting Belts
Weightlifting belts provide crucial support during heavy lifts, but they also absorb sweat and can harbor bacteria and odors. Regular maintenance will keep your belt hygienic and durable.
Cleaning Steps:
- Hand Wash Only: Avoid machine washing lifting belts, as the agitation can damage the material. Instead, fill a basin or sink with warm (not hot) water. Add a small amount of mild detergent or dish soap and mix.
- Scrub Gently: Submerge the belt and gently scrub it using a soft brush or cloth, especially on inner areas that touch your body. Avoid harsh chemicals or excessive scrubbing, which can ruin leather or fabric. For stubborn odor, you can add a little white vinegar to the water (e.g. a 1:3 vinegar-water mix) as a natural deodorizer.
- Rinse Thoroughly: Rinse the belt in clean water to remove all soap residue. Residual soap can dry out or irritate the belt’s material, so ensure it’s completely rinsed.
- Dry Properly: Pat the belt with a clean towel to absorb excess water, then lay it flat or hang it in a well-ventilated area to air dry completely. Never use a dryer or direct high heat, and avoid twisting the belt when wet to maintain its shape.
Maintenance & Odor Prevention:
- Wipe After Workouts: If the belt gets very sweaty, wipe it down with a damp cloth after each use to remove sweat and salt. This simple step helps prevent bacteria growth and odor buildup.
- Leather Care: If you have a leather belt, consider applying a leather conditioner occasionally to keep it from drying out and cracking. Use products designed for leather (e.g. Lexol or a neatsfoot oil) and follow the product instructions. Avoid bleach or alcohol-based cleaners on leather, as they can degrade it.
- Proper Storage: Store your belt in a cool, dry place. Do not leave it in direct sunlight or in a hot car, which can cause the material (leather or fabric) to become brittle. It’s best to hang the belt or lay it flat; avoid keeping it tightly rolled up for long periods to prevent creases.
- Inspection: Regularly check for any signs of wear, such as frayed stitching or cracks. A well-maintained belt will last years, but if you see structural damage, consider repairing or replacing it for safety.

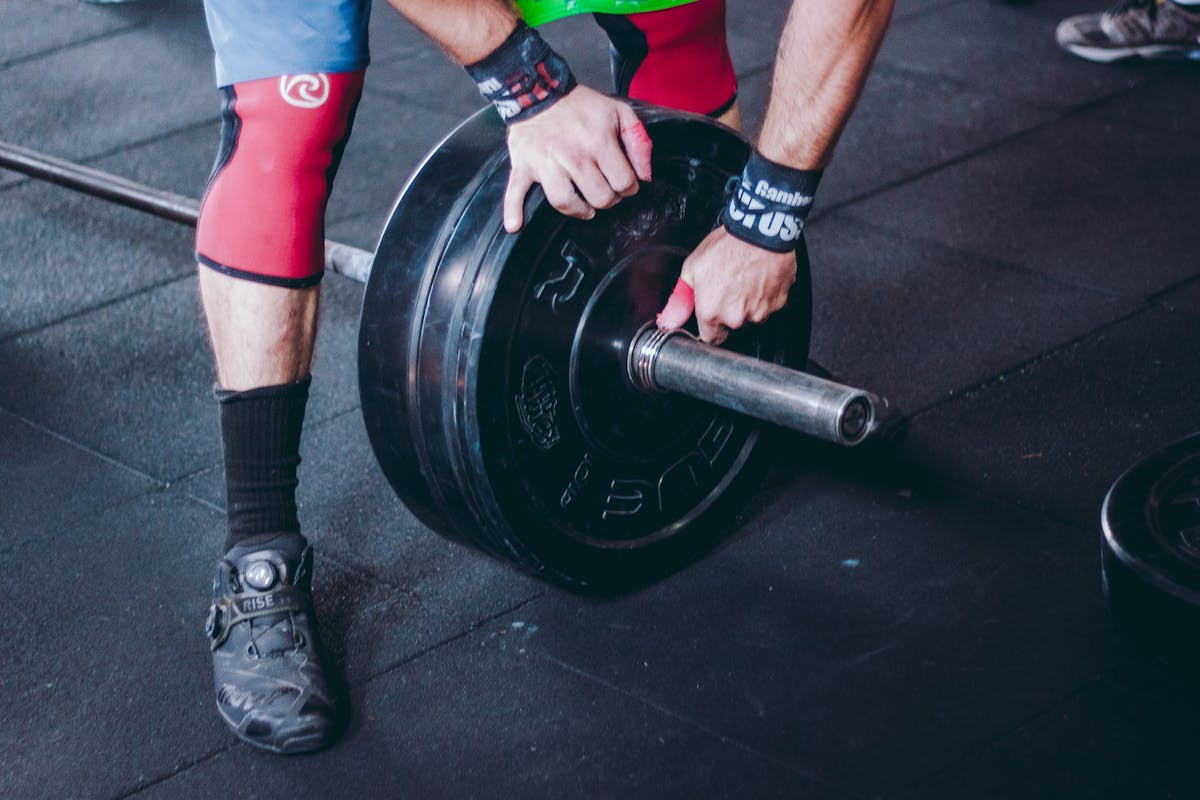
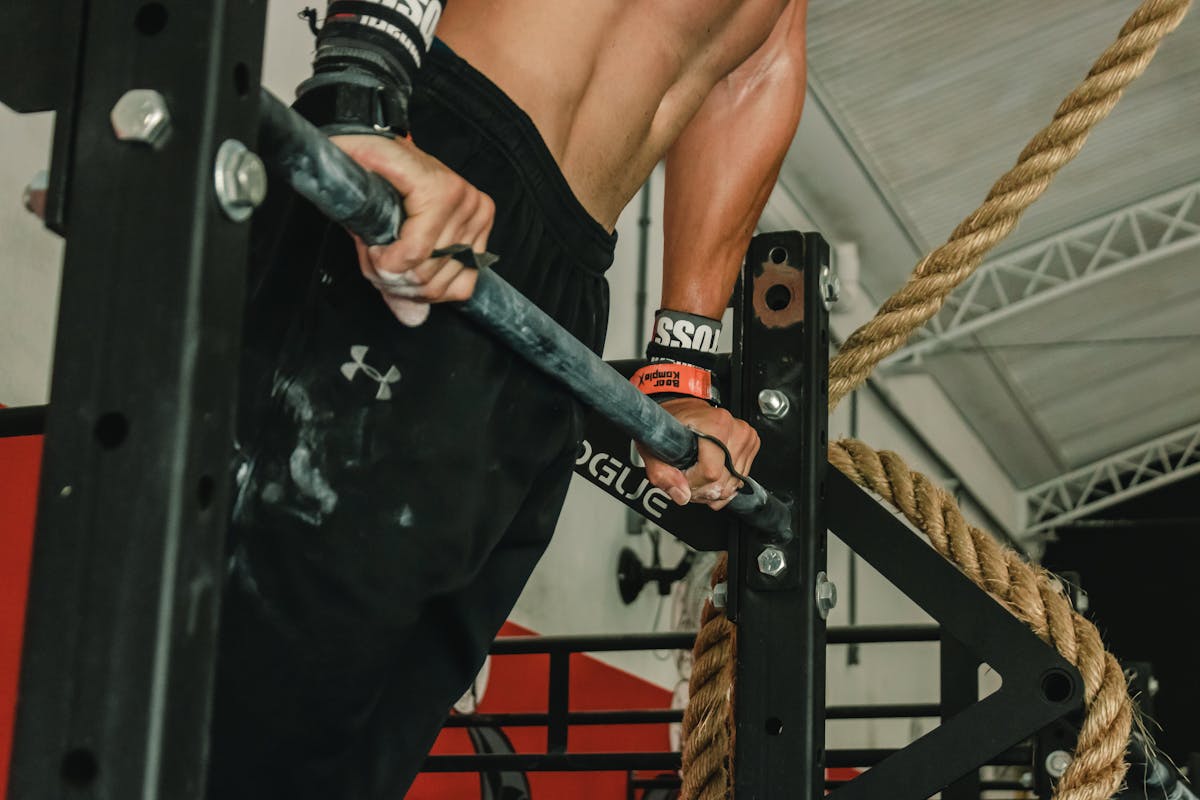
Lifting Straps
Lifting straps help improve your grip on bars or dumbbells during heavy pulls. They’re usually made of sturdy fabric (canvas, cotton, nylon) or leather, and they can get grimy and smelly from frequent use. Keeping straps clean will not only make them more pleasant to use but also preserve their strength.
Cleaning Steps:
- Hand Washing Recommended: While some lifting straps can be machine washed, hand washing is gentler and will extend their life
. Fill a bowl or sink with warm water (not too hot) and add a bit of mild laundry detergent.
- Soak and Agitate: Place the straps in the soapy water. Let them soak for a few minutes, then use your hands or a soft cloth to rub the straps, loosening sweat and dirt. The warm water and detergent will help break down oils and grime from your workouts
.
- Scrub and Rinse: For really dirty spots, gently scrub with a soft brush or cloth. Once clean, rinse the straps thoroughly under cool water to remove all detergent.
- Squeeze Out Water: Press the straps to squeeze out excess water (do not wring or twist them forcefully, as that can stretch or distort the material)
.
- Air Dry: Hang or lay the straps out in a shaded, well-ventilated area to air dry. Avoid direct sunlight, which can cause some materials to shrink or fibers to weaken
. Never put lifting straps in a dryer, as the heat can damage synthetic fibers or cause shrinkage similar to high sun exposure
. Allow 12–24 hours for full drying, depending on humidity
.
Maintenance & Tips:
- Frequency: Wash straps roughly once a week or after 4–5 uses, or whenever they start to smell
. Over-washing can wear them out, so find a balance between hygiene and longevity.
- Quick Cleaning: After each workout, if the straps are sweaty, let them air out. Hang them on your gym bag or in an open space so they dry instead of stuffing them away damp. This prevents bacteria and mildew. You can also wipe them down quickly with a damp cloth after use.
- Odor Removal: If straps develop a strong odor, you can soak them in a mixture of water and baking soda before washing. Baking soda helps neutralize smells. For example, dissolve 1/4 cup baking soda in a basin of warm water and let the straps sit for 15–20 minutes, then wash as usual. Make sure to rinse out all the baking soda afterwards.
- Avoid Harsh Chemicals: Do not use bleach on fabric straps; it can weaken fibers. Likewise, avoid fabric softeners, as they can leave residues that make straps slippery. A mild detergent is sufficient for cleaning.
- Storage: Ensure straps are completely dry before storing to prevent mildew. Store them flat or rolled loosely in a cool, dry place. If they have leather loops, occasionally condition those small leather parts with a leather conditioner to keep them supple.
, 4 fl oz (Pack of 6) - No Slippery Residue, Organic Essential Oils, Deep-Cleansing for Fitness Gear & Gym Equipment, Microfiber Towels Included")
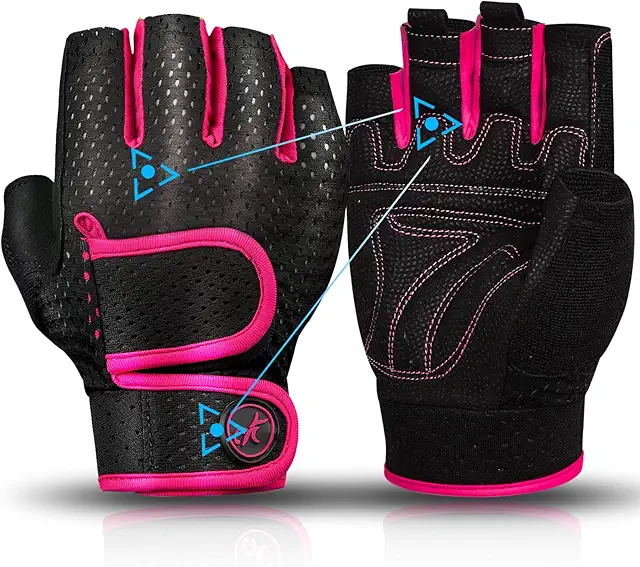
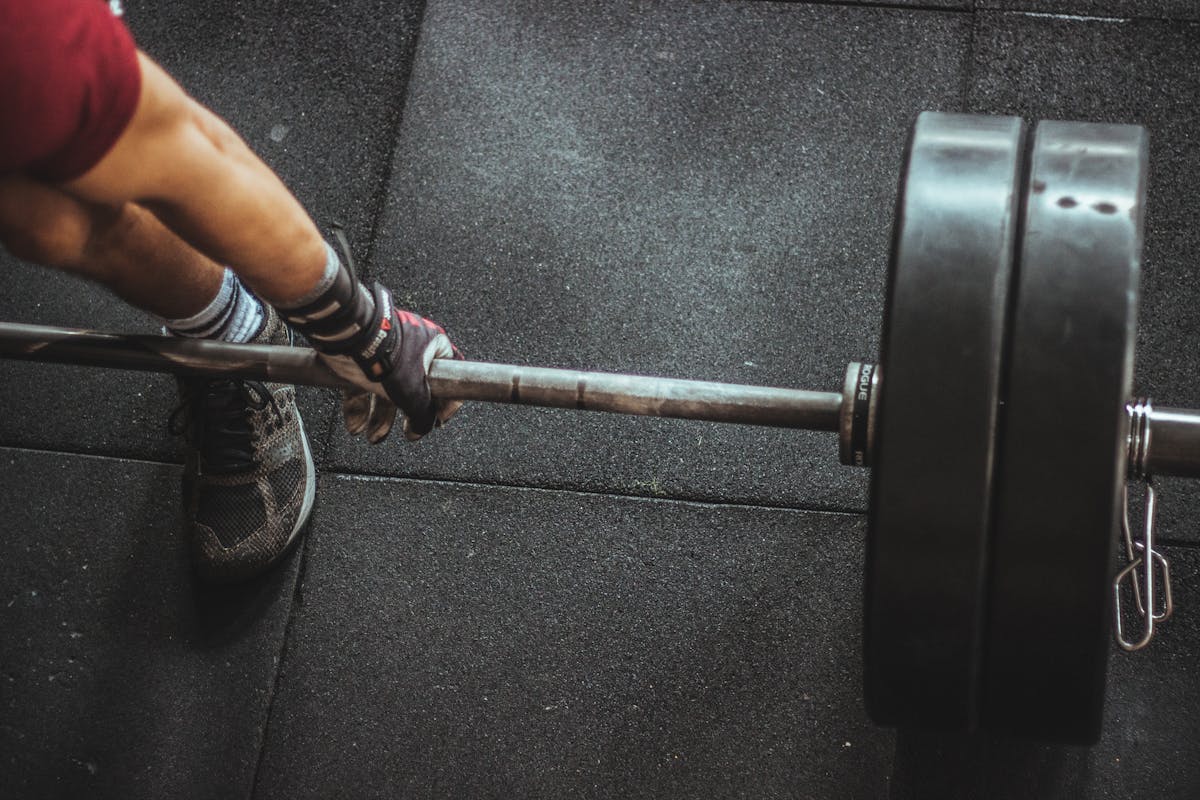
Weightlifting Gloves
Gym gloves (lifting gloves) protect your hands but they soak up sweat and can get smelly quickly. They are often made of synthetic materials or leather (or a mix, like leather palms with fabric backing). Cleaning your gloves regularly will keep bacteria and odors at bay and also maintain their flexibility.
Cleaning Steps:
- Hand Wash for Most Gloves: The safest way to wash workout gloves is by hand with mild soap. Fill a sink with warm water and a bit of mild detergent (or dish soap). Turn the gloves inside out (especially if they’re lined or have padding) and submerge them. Gently scrub the material by rubbing the gloves against themselves or using your hands. Pay attention to areas between fingers and the palm where sweat accumulates.
- Machine Wash (If Allowed): Check the care label – some fabric gloves are machine washable. If so, place them in a mesh laundry bag and wash on a gentle cycle with cold water. Never use hot water, which can cause colors to bleed or materials (like leather or rubber components) to warp. Avoid bleach and strong detergents which can be too harsh on glove materials.
- Rinse Well: If hand washing, rinse the gloves thoroughly in cool water to remove all soap. Squeeze them gently to expel water. If machine washed, take them out of the laundry bag and gently squeeze out excess water.
- Air Dry: Reshape the gloves and let them air dry. It’s best to dry gloves in the shade (away from direct sun) to prevent any fading or material damage. You can hang them or lay them flat on a towel. Do not put gloves in a dryer or expose them to high heat – this can shrink them or melt any rubber/elastic parts. To speed drying, you can stuff the gloves with crumpled newspaper or paper towels to help absorb moisture and maintain their shape.
Odor & Bacteria Prevention:
- Dry After Each Use: A key to preventing stinky gloves is to dry them out after every workout. Don’t leave sweaty gloves balled up in your gym bag. Instead, pull them out, turn them inside out, and let them air dry. This prevents the dark, damp environment that breeds bacteria. For leather gloves, wiping them down with a towel after use to remove sweat is essential to prevent mold and odors.
- Baking Soda Soak: If gloves develop persistent odor, use baking soda as a soak or wash additive. For example, dissolve 1/4 cup baking soda in a sink of warm water and soak the gloves for 20-30 minutes, then wash normally. Baking soda is a natural deodorizer that neutralizes smells. (Just note that baking soda by itself doesn’t kill germs, so you should still properly wash or disinfect the gloves after soaking.)
- Vinegar Spray: Another trick for odor is a vinegar spray. Mix equal parts white vinegar and water in a spray bottle. After a workout, you can lightly spray the inside of the gloves with this solution. Vinegar helps neutralize odors and has some antibacterial properties
. Allow the gloves to dry completely after spraying (the vinegar smell will dissipate as it dries).
- Disinfection: To kill bacteria, you might occasionally use a disinfectant. Isopropyl alcohol (70% or less) can kill germs, but use it sparingly – higher concentrations can dry out and stiffen leather or fabric. A gentler option is an antibacterial sports gear spray or wipe designed for fabrics. Always follow up any disinfectant use with air drying.
- Leather Glove Care: If your gloves have leather parts, clean them with a damp cloth (water or a water/vinegar mix) instead of fully soaking, if possible. After cleaning leather, it’s a good idea to apply a leather conditioner or a few drops of a leather-safe oil to keep it supple. For example, you can use a leather conditioner product or even a small amount of coconut oil. Let it absorb and wipe off any excess to avoid greasiness. Leather gloves naturally have some odor, but keeping them clean and conditioned will prevent mildew and cracking.
- Replace When Needed: Over time, gloves may accumulate wear or odors that can’t be fully removed. If you’ve tried washing and they still smell or the material is breaking down (tears, flattened padding), it might be time to invest in a new pair. Marking the calendar to wash your gloves regularly (e.g. weekly or bi-weekly, depending on usage) will delay this inevitability and keep them fresh longer.
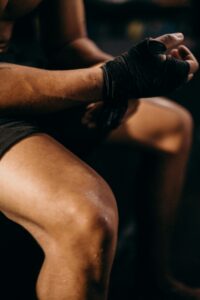
Wrist and Knee Wraps
Wrist wraps and knee wraps (including knee sleeves or any supportive wraps) are typically made of elastic fabric blends. They soak up sweat and can get smelly, and their elasticity can deteriorate if not cared for. Cleaning wraps carefully will keep them supportive and free of odors.
Cleaning Steps:
- Hand Wash Gently: Fill a sink or bucket with warm water (avoid very hot water which can affect elasticity). Add a small amount of mild detergent. You can also add a splash of white vinegar to the water for extra odor-fighting.
- Soak and Lightly Scrub: Submerge the wraps and gently agitate them in the soapy water. Use your hands or a soft cloth/soft brush to rub any soiled spots. Be gentle to avoid stretching out the material – do not scrub aggressively or use rough brushes.
- Rinse: Drain the soapy water and refill with clean water (or rinse under the faucet). Rinse the wraps thoroughly until no soap remains. Any soap left in the fabric can cause irritation or stiffness.
- Press Out Water: Lift the wraps out and gently squeeze them to press out water. Do not wring or twist the wraps tightly, as that can deform their shape or elasticity. Instead, you can lay each wrap on a towel, roll the towel up, and press to blot out moisture.
- Air Dry Flat: Unroll the towel and lay the wraps flat or hang them over a rod to air dry. Ensure good ventilation. Keep them out of direct sunlight and away from direct heat sources while drying, since high heat can weaken elastic fibers. Wait until they are completely dry before using or storing them.
Maintenance & Best Practices:
- No Machine Wash/Dry: It’s generally not recommended to machine wash elastic wraps, because the agitation can rip the Velcro or stretch out the elastic, and machine drying is too hot. Some people do machine wash on gentle, but hand washing is safest. If you must machine wash, use cold water on delicate cycle and put the wraps in a mesh laundry bag to protect them, then hang dry immediately after.
- Post-Workout Care: After using wraps, unfasten them and allow them to air out. Hang them over a hanger or the back of a chair when you get home so they can dry rather than fester in your gym bag. Wiping them down with a clean towel to remove sweat can also reduce how often you need to fully wash them.
- Odor Control: If wraps have a strong smell, try a deodorizing soak. For example, you can soak them in a mixture of one part white vinegar to three parts water for 20 minutes, then rinse and wash normally. Vinegar helps kill bacteria and neutralize odors. Another option is adding a teaspoon of baking soda to the wash water (but ensure it dissolves to avoid residue). Always rinse well.
- Extend Elasticity: The elastic material in wraps will last longer if you avoid overstretching them when not necessary. Wrap them only as tightly as needed for support during workouts, and don’t keep them stretched out in storage. Also, avoid fabric softeners – they can coat the fibers and reduce the grippiness and elasticity of wraps.
- Storage: Once completely dry, roll up your wraps loosely or fold them, and store in a dry place. Keep them out of direct sunlight when stored, as UV light can degrade elastic over time. If your wraps have Velcro, fasten the Velcro to itself (to a patch of the wrap) when storing so it doesn’t catch on other fabrics or collect lint.
- Lifespan: Over time (after many uses and washes), wraps may lose elasticity or the Velcro may wear out. Inspect them regularly – if you see fraying, weakened stretch, or if they no longer provide support, it might be time to replace them. Using two or more pairs in rotation can reduce wear on any single pair.

Workout Shoes
Gym shoes and running shoes absorb a lot of sweat and can develop odors or even fungus (like athlete’s foot) if not cleaned. Dirty shoes can also break down faster (sweat and dirt can degrade materials). Maintaining your workout shoes involves both cleaning and odor management.
Cleaning Steps:
- Preparation: Remove the shoelaces and insoles from your shoes before cleaning. Laces and insoles should be cleaned separately. (You can wash laces by hand in soapy water or put them in a mesh bag in the washing machine.) Removing insoles also allows you to clean inside the shoe more effectively
.
- Knock Off Dirt: If there’s mud or dirt on the shoes (especially on the soles), let it dry and then brush it off. Use an old toothbrush or a soft shoe brush to gently scrub away dirt from the outsole (bottom) and the mesh or fabric of the uppers
. This prevents abrasive dirt from grinding into the material.
- Wash the Uppers: Fill a bowl or sink with warm water and a small amount of mild detergent (or dish soap). Using the brush or a cloth, scrub the shoe’s upper (the fabric or leather part) with the soapy water
. Be thorough but gentle, especially with knit or mesh materials. For stubborn stains, a bit of baking soda can be made into a paste with water and gently scrubbed on, or use a specialty sneaker cleaner if you have one. If your shoes are leather, use a cleaner made for leather or just mild soap – do not soak leather shoes, just wipe them.
- Clean the Insoles: Insoles often hold a lot of odor. Scrub the insoles with soapy water as well – you can use a brush to get any dirt out of them. Another option is to use a solution of one part white vinegar to two parts water to wipe down the insoles, which helps kill bacteria and odors
. Rinse the insoles with clean water and let them air dry separately. If they’re extremely smelly and washing doesn’t help, consider replacing the insoles with new ones.
- Rinse and Wipe: After scrubbing the shoes, rinse off any soap. You can either wipe them down with a clean damp cloth or briefly rinse under running water. Make sure all detergent is gone.
- Drying: Do not put your shoes in the dryer! High heat can warp or shrink the shoe and even melt the glue that holds them together
. Instead, air dry them. To dry shoes faster and maintain shape, stuff each shoe with crumpled newspaper or paper towels (this helps absorb moisture)
. Replace the paper if it becomes soaked. Place the shoes in a well-ventilated area, out of direct sunlight (sun can fade colors or weaken some materials). If possible, put a fan nearby to blow air through them for faster drying. Let them dry completely before wearing – damp shoes can breed bacteria or mold.
Odor Prevention & Shoe Care:
- Wear Socks: This may sound obvious, but wearing clean, moisture-wicking socks is one of the best ways to keep your shoes from smelling. Socks absorb a lot of sweat that would otherwise soak into the shoe lining
. Cotton socks are okay, but athletic socks made from wool or synthetic blends will wick moisture better and help inhibit bacteria
. Always change into fresh socks for each workout.
- Alternate Pairs: If you have more than one pair of workout shoes, alternate between them. This gives each pair a full day or more to dry out between uses, drastically reducing odor buildup.
- Post-Workout Dry Out: After a workout, remove your shoes from your gym bag and let them air out. Pull out the insoles (if removable) and let them dry separately. Loosen the laces and open up the shoe tongue so air can circulate inside. If your shoes are damp, stuff with newspaper as mentioned or use shoe trees (cedar shoe trees can help absorb moisture and odors).
- Vinegar or Disinfectant Spray: Keep a small spray bottle of diluted white vinegar (50/50 with water) handy. After wearing your shoes, lightly spray the interior and let them dry. The vinegar neutralizes odors and fights bacteria
. There are also commercial antibacterial shoe sprays (or even just a standard disinfectant spray like Lysol) you can use inside the shoes to kill odor-causing germs. Just ensure you let the shoes dry before next use.
- Baking Soda Powder: A classic odor absorber: sprinkle baking soda inside your shoes after they’ve dried from a workout. Shake a few tablespoons into each shoe, tilt the shoe around so it spreads, and leave it overnight. Dump out the powder (or vacuum it out) before wearing the shoes. Baking soda will absorb and neutralize many smells
. (You can also put the baking soda into a sock as described in some remedies, and place the sock in the shoe to contain the powder.)
- Washing Frequency: You don’t need to fully wash your shoes very often – only when they are dirty or smelly. Aim for a deep clean every few months or as needed. Over-washing could break down adhesives. Spot clean and deodorize regularly, and deep clean occasionally.
- Protect and Repair: If your shoes have any suede or leather, consider treating those areas with a protective spray (for suede/nubuck or leather) to repel dirt and water. Also, address minor issues early: if you see a bit of stitching coming loose or the sole starting to peel, a bit of shoe glue can fix it and prolong the shoe’s life. Clean shoes not only smell better but also perform better (no clogged treads, no salt eating away at fabric, etc.).
- When to Retire Shoes: Even with great care, workout shoes don’t last forever. After about 300-500 miles of running or a year of regular gym use, their cushioning may compress and materials wear out. No amount of cleaning can restore worn-out soles or support. So keep an eye on the condition – if the outsole is worn flat, the shoes feel less supportive, or odor is persistent even after cleaning, it might be time for a new pair.

Resistance Bands
Resistance bands (including large loop bands and tubing with handles) are usually made of latex or rubber (and some of synthetic latex-free materials). They can collect sweat, body oils, and dirt, which can degrade the material over time and foster bacteria. Cleaning them properly will keep them in good, snap-resistant condition.
Cleaning Steps:
- Wipe Down After Use: Get in the habit of wiping your resistance bands after each workout. Use a damp cloth with plain water or a gentle baby wipe to remove sweat and oils. This quick step helps prevent deterioration and germ buildup.
- Soap and Water Wash: For a deeper cleaning, fill a basin with lukewarm water and add a few drops of mild dish soap. Using very hot water isn’t necessary and could affect the elasticity of some bands. Dip a soft cloth or sponge in the soapy water and gently clean the entire length of the band. You can also submerge the band and swish it around. Mild soap will remove grime without harming the material
.
- Rinse and Dry: If you submerged the band, rinse it in clean water. If you used a soapy cloth, wipe again with a cloth dipped in plain water to remove any soap residue. Immediately after, pat the band dry with a towel
. It’s important not to leave rubber bands wet, as water sitting on them for long periods could penetrate or cause spots. After towel-drying, hang the band or lay it flat to air dry the rest of the way. Make sure the band is completely dry before you store it or use it again (using a band while it’s wet can make it more prone to slipping or maybe stretching out).
- Light Disinfection (Optional): To disinfect resistance bands (for example, if multiple people use them or you want to sanitize after gym use), use a quaternary ammonium disinfectant product. Many gym equipment wipes or sprays (like certain Clorox or Lysol wipes) use quaternary ammonium compounds that are safe on rubber
. You can gently wipe the band with these and let it air dry. Avoid alcohol or bleach-based disinfectants on latex/rubber – products with bleach, isopropyl alcohol, or ethanol can dry out or damage the band, leading to cracks or loss of elasticity
. Always check the active ingredients: quaternary ammonium (often listed as “benzalkonium chloride” or similar) is the key ingredient to look for in a safe disinfectant for bands
.
Maintenance & Tips:
- Inspect for Damage: Before each use (and after cleaning), quickly inspect your resistance bands. Look for any tears, nicks, or thin spots, especially where the band might have been anchored or knotted
. If a band is damaged (cracks or punctures), retire it – a damaged band can snap unexpectedly. Regular cleaning helps you notice these issues and also helps prevent them by removing substances that might degrade the rubber.
- Storage: Proper storage will greatly extend a band’s life. Keep bands in a cool, dry place out of direct sunlight
. UV light and heat can cause latex to become brittle. After each session, remove any attachments (like handles or door anchors) and store the band untensioned (don’t leave it stretched out). Ideally, hang them or place them loosely coiled. A closed gym bag is fine as long as the bag isn’t stored somewhere hot or humid.
- Avoid Abrasive Surfaces: When using bands, try not to drag them on rough surfaces (concrete, asphalt) which can scuff or cut them. Also, be mindful of sharp edges or metal burrs on equipment that can nick the bands. A nick can turn into a tear under tension. Using a band sleeve or wrapping a towel at anchor points can reduce wear.
- Cleaning Products: Aside from soap and water, you generally don’t need fancy cleaners for bands. However, some companies sell silicone-based wipes or sprays to “condition” rubber. Check with your band’s manufacturer – but usually, keeping them clean and dusted with a tiny bit of talcum powder (for latex bands) is enough to maintain their elasticity. The talc can reduce stickiness between band layers.
- No Extreme Temps: Don’t leave resistance bands in a hot car or near a heater. Heat can deteriorate the material. Likewise, freezing cold can make them less pliable (though room temperature is usually fine). Just normal room conditions are best for longevity.

Yoga Mats
Your yoga mat can be a hotbed for germs – it’s in close contact with sweaty hands, feet, and gym floors. Regular cleaning keeps your mat grippy, odor-free, and safe from bacteria or fungi (which can cause issues like athlete’s foot or skin infections). The approach to cleaning can depend on the mat material (open-cell mats absorb more moisture; closed-cell mats are more sealed), but here are general practices:
Cleaning Steps (Routine Wiping):
- After Each Use: Wipe down your mat after every practice or gym session. Use either a store-bought yoga mat cleaner or a DIY solution. A great natural option is a 50/50 mix of water and white vinegar, plus a few drops of tea tree oil (tea tree is naturally antimicrobial)
. Keep this in a spray bottle. After your session, spray the solution onto the mat surface (both sides) and wipe with a clean cloth. This will remove sweat, dirt, and most bacteria on the surface, helping to prevent odors
. If you prefer a commercial product, look for a mat spray that contains disinfectant ingredients (some even include mild quaternary ammonium compounds or alcohol specifically safe for mats). Always check that any cleaner is compatible with your mat’s material (for example, some mats shouldn’t have vinegar, as it could degrade certain rubber over time – check manufacturer guidelines).
- Quick Wipe Method: If you don’t have a spray, even a plain damp cloth will do in a pinch to wipe off sweat. Some yogis also use baby wipes or disinfectant wipes, but be cautious: if the wipe has too much alcohol or harsh chemicals, it might dry out or wear down a natural rubber mat. Generally, a diluted gentle cleaner is best.
Deep Cleaning (Monthly or As Needed):
Once in a while (perhaps every 1–4 weeks, depending on use and sweat levels), give your mat a deeper clean to remove accumulated grime and thoroughly sanitize it. There are two methods, depending on mat type:
- Soak Method (for sturdy, open-cell mats): Fill a bathtub (or large bin) with warm water and a bit of mild detergent (a few drops of dish soap per gallon of water is enough)
. Submerge your mat in the water and let it soak for 5–10 minutes. Then gently scrub the mat with a soft cloth or sponge on both sides
. Avoid using a hard brush that could scratch the mat. After scrubbing, drain the tub and rinse the mat with fresh water to wash off any soap. Note: This method is great for porous mats that can handle water. If your mat is labeled as “machine washable,” you could even wash it on a gentle cycle with cold water, but many experts prefer hand-washing to be safe. Always avoid hot water as it can damage or deform mats
.
- Spot Clean/Wipe Method (for closed-cell or delicate mats): If your mat is a type that doesn’t absorb water (closed-cell, or made of TPE, etc.), soaking is not necessary or recommended. Instead, mix a bowl of warm water with a few drops of dish soap. Dip a soft cloth in the soapy water and wipe the mat thoroughly – working in sections, and paying attention to dirty spots
. You might need to go over it a couple of times. Then use another cloth with plain water to wipe off any soap. This method cleans the surface without over-saturating the mat.
- Disinfecting: If you want to disinfect (kill germs, not just clean), you can use a solution with a bit of disinfectant. One natural option is 3% hydrogen peroxide diluted with water (equal parts). Lightly spray or wipe this onto the mat and let it sit for a few minutes (but don’t soak the mat with it)
. Then wipe off and rinse the mat. There are also yoga mat-specific disinfectant wipes available. Ensure any disinfectant sits on the surface for a couple of minutes to do its job before wiping off (per product instructions)
. Always rinse or wipe down after disinfecting to remove any chemical residue that could irritate skin.
Drying and Storage:
- Air Dry Completely: After any deep cleaning (or if your mat gets significantly wet), it’s crucial to dry it out fully. Hang your mat over a shower rod, drying rack, or lay it flat on a dry towel in a well-ventilated area. It may take a few hours to overnight to dry depending on thickness. Make sure both sides dry. Never put a yoga mat in a tumble dryer – the heat can ruin it
. Also avoid direct sunlight when drying, because UV rays can degrade some mat materials (like natural rubber) and cause them to become brittle or discolored.
- Regular Storage: Once the mat is dry, roll it up loosely (with the clean side out) or use a strap to keep it rolled. Store it in a cool, dry place. A breathable mat bag is ideal because it protects the mat from dust and germs while still allowing airflow. If you store your mat for a long time unused, take it out occasionally to air it out
. Storing a damp mat or trapping it in a non-breathable bag can lead to mildew or bad odors.
- Odor Control: If your mat has a lingering odor (either from sweat or a rubber smell), wiping it with the vinegar solution should help. You can also sprinkle baking soda on the mat surface, let it sit for 10 minutes, then wipe or vacuum it off – baking soda absorbs odors. Just be sure to get all the powder off so it doesn’t make the mat slick.
- Mat Longevity: Keep an eye on your mat’s condition. Over time, mats can wear out – you might see pieces flaking off or notice it staying slippery even when clean. That’s a sign the material is breaking down, and no amount of cleaning will fix that. Replace a mat when it’s worn out or if it continues to smell or harbor germs despite cleaning. A good mat can last a couple of years with regular use if cared for. Also, consider using a yoga towel on top for hot yoga sessions – it absorbs sweat and can protect the mat, making cleaning easier. Just wash the towel afterward.
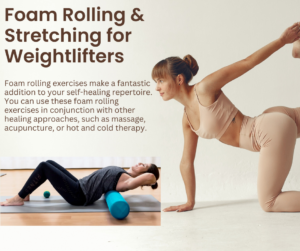
Foam Rollers
Foam rollers are used for self-massage (myofascial release) and often make a lot of contact with your body and the gym floor. They can pick up sweat, skin cells, and germs, so cleaning them is important especially if you share them or use them on a dirty floor. Foam rollers come in different materials (some are dense foam, others have a softer exterior), so always follow any manufacturer’s care instructions. Here’s how to generally keep them clean and odor-free:
Cleaning Steps:
- Wipe Down Regularly: The easiest routine is to wipe your foam roller with disinfectant wipes after each use. Products like Lysol or Clorox disinfecting wipes are effective options that kill bacteria and viruses on surfaces
. Simply take a wipe and rub down the entire roller surface, getting into any grooves or textures. This quick wipe removes sweat and germs. If you prefer a natural approach, you can use a cloth dampened with a mixture of water and a few drops of tea tree oil (tea tree is antifungal and antibacterial) or a very diluted vinegar solution.
- Soap and Water (Deep Clean): For a deeper clean, especially if the roller is visibly dirty, use soap and water. If your foam roller is solid foam (no electronic parts and not hollow with moving parts), you can even give it a bath. Fill a tub or large bucket with hot water and some mild detergent. Submerge the roller and let it soak a few minutes, then scrub it with a cloth or soft brush
. This can help remove any grime or sweat from crevices. However, be aware that soaking will saturate the foam, and drying will take time. It’s generally enough to just wipe the roller’s surface with soapy water. Use a sponge or cloth, dip in warm soapy water, and scrub the roller all over.
- Rinse (if you used soap): If you did a full wash or used a lot of soap, rinse the roller with clean water (spraying it down or using a damp cloth to wipe away suds). You want no slippery soap residue on the roller, as that would be unpleasant next time you use it.
- Dry Thoroughly: Shake off excess water if it was soaked. Then let the roller air dry completely. Do not put a foam roller in a clothes dryer – the heat can damage it (and if it’s a softer foam, it might even melt or warp). Also avoid direct sunlight which can degrade the foam material
. Instead, stand it up or lay it on a dry towel in a well-ventilated area. It may take quite a few hours for a soaked foam roller to dry out (possibly 24+ hours if it’s thick foam). Ensure all moisture evaporates, especially from any little crevices, to prevent mold or mildew from developing inside the foam

Maintenance & Usage Tips:
- Personal Use: Wherever possible, treat your foam roller like a personal item (like a toothbrush, as one expert put it
). Sharing foam rollers can spread germs, so if you’re at a gym, consider wiping it before and after use, or bring your own roller if feasible.
- Clean the Floor/Mat: A lot of the dirt on a foam roller actually comes from the floor it’s used on. Make sure the area you’re rolling on is clean – wipe down your exercise mat or floor beforehand. This reduces how much grime the roller picks up.
- Disinfectant Options: Besides wipes and soapy water, you can use any EPA-registered spray cleaner that’s safe for plastics/foam
. Just spray it on and wipe off. Some examples are sprays with benzalkonium chloride or a dilute bleach solution (bleach can discolor foam though, so test a small area). Many people stick with the convenience of pre-soaked disinfectant wipes for routine cleaning.
- No Harsh Solvents: Avoid using strong solvents or undiluted alcohol on foam rollers. These can break down the material. For example, pure bleach or ammonia cleaners might eat away at the foam or cause it to crumble faster. Stick to gentle cleaners or those known to be safe for vinyl/foam surfaces.
- Keep It Dry: Foam can trap a bit of moisture. After cleaning, storing your roller upright (standing on its end) can help any remaining moisture drain or evaporate. Also, if you ever take it to say, an outdoor bootcamp (where it might get muddy), definitely clean it ASAP after – don’t let dirt sit on it too long.
- Special Rollers: If you have a vibrating foam roller or one with an inner plastic core, do not submerge it in water (to protect the electronics and structure). Instead, remove the electronic core if possible and just wipe the foam exterior. For the electronics, follow the manufacturer’s cleaning advice (usually just wiping down with a slightly damp cloth, ensuring it’s powered off and not soaking wet).
- Longevity: A foam roller can last many years if kept clean and not physically damaged. Over time, heavy use might cause some deformation, but that’s more from use than cleaning. By keeping it clean, you ensure that you’re not grinding dirt into it (which could wear it out) and not exposing yourself to germs each session. Remember: a clean roller not only protects you from illness but also is just nicer to use (no smell, no grime).
Gym Bags
Your gym bag carries everything – including wet clothes, shoes, and sweaty gear – which means it can become a hotspot for bacteria and odors. A smelly gym bag can even transfer that odor to your clean clothes if you’re not careful. Regular cleaning and smart habits will keep your gym bag fresh, extend its life, and prevent it from harboring nasty germs.
Cleaning Steps:
- Empty and Pre-Treat: First, take everything out of your gym bag. Turn all pockets inside out and shake out or vacuum up any debris (dirt, protein powder spills, etc.). You can use a lint roller to pick up hair or lint from inside. Check care labels – many gym bags are nylon or polyester and can be hand or machine washed, but some (with leather accents or structured frames) might require hand cleaning. Remove any hard bottom panels or supports if possible (clean those separately with a wipe).
- Hand Wash (All Bags): The safest method for any bag is hand washing. Fill a bathtub or large sink with cool or lukewarm water. Add a mild detergent (laundry detergent or dish soap works). Submerge the bag (if the material allows) and use a soft cloth or brush to gently scrub both the interior and exterior
. Focus on any stained areas (a bit of laundry stain remover or a paste of baking soda can help on tough stains). For persistent odors or mildew, adding a cup of white vinegar to the wash water can be very helpful
. It disinfects and deodorizes. Spend a good few minutes cleaning all surfaces, then rinse the bag thoroughly with clean water.
- OR Machine Wash (If Allowed): If the label says the bag is machine washable (and it has no fragile parts), you can use the washer. Important: Before machine washing, turn the bag inside out and place it in a mesh laundry bag or an old pillowcase, zippered or tied shut
. This protects straps and zippers from snagging the machine. Use a gentle cycle with cold water and mild detergent
. Wash with some towels or other items to balance the load. Avoid bleach (unless the bag is plain white and heavily stained – even then, bleach can degrade fabrics). Once done, immediately take the bag out for drying.
- Drying: Air dry your gym bag completely. Hang it upside down (with zippers open and pockets agape) or set it outside in the shade to dry
. Good airflow is key – you want every corner and seam to dry, which can take a day. Do not put the bag in a dryer; the heat can shrink or melt parts of it and warp any padding
. Also avoid direct sunlight for long periods, as it can fade colors and overheat materials
. If you’re in a hurry, you can speed up drying by placing a small fan blowing into the bag’s opening. You can also put some dry towels inside to absorb moisture, then replace them after an hour. Ensure there’s no dampness left (sniff inside for any musty smell which indicates residual moisture).
Odor Elimination & Interior Care:
- Disinfect Inside: Gym bag interiors are where odors brew. After cleaning (or between washes), you can disinfect the inside. A simple method is wiping the interior with a mixture of equal parts water and white vinegar
. Vinegar kills many bacteria and deodorizes. Alternatively, use antibacterial wipes or sprays inside the bag – Lysol or Clorox wipes are effective for killing germs in the lining
. Wipe all the pockets and fabric inside. If using a spray, lightly mist the inside and let it air dry. (Make sure the spray is fabric-friendly; phenolic disinfectant sprays or those with quats are usually fine on nylon/polyester).
- Banish the Smell: To tackle stubborn smells, try a baking soda treatment. Sprinkle a few tablespoons of baking soda all over the inside of the bag
. Zip it up and let it sit overnight (with the bag empty). Baking soda will absorb odors from the fabric. The next day, shake out the powder (or vacuum it out). You can also leave an open box of baking soda or a sachet of activated charcoal in your bag when not in use – these continue to absorb odors passively.
- Natural Fresheners: In between uses, you might drop a few dryer sheets or cedar wood balls into your bag to keep it smelling fresh
. Dryer sheets impart a pleasant scent and help with minor moisture; cedar chips (or cedar shoe inserts) are antifungal and give a fresh woodsy smell that repels moths and mildew. There are also products like “No Stink Sports Deodorizer” pouches – essentially charcoal deodorizer bags – that you can toss into your gym bag to continuously fight odor
. These can be very effective.
- Don’t Forget Small Areas: Clean the zippers, straps, and buckles. Use an old toothbrush and soapy water to scrub zipper teeth and pulls if you notice grime there
. Wipe down shoulder straps (these can get sweaty) with a soapy cloth or disinfectant wipe. Also, if your bag has a waterproof compartment for shoes or wet clothes, wipe that out with vinegar or disinfectant regularly, as bacteria can thrive in the moisture it contains.
Preventing Bacteria & Mold:
- Segregate Wet Items: One key rule – never leave wet or sweaty clothes in a closed bag for long periods. As soon as you get home from the gym, take out your damp clothes, towel, and shoes. The longer they sit and breed bacteria in the bag, the more those odors and germs transfer to the bag itself. Use a plastic or waterproof pouch inside your bag for any wet items, so that moisture doesn’t leak onto the bag’s fabric.
- Air It Out: Whenever possible, let your bag air out. After emptying it, keep the zippers open and set the bag in a ventilated area. Even if you can’t wash it after every gym visit, just airing it will help moisture evaporate and reduce bacterial growth
. Some people rotate between two gym bags, allowing one to thoroughly air/dry out while using the other – this is an optional strategy if you have multiple bags
.
- Regular Cleaning Schedule: Depending on usage, aim to wash your gym bag every few weeks. If you use it daily and stuff a lot of sweaty gear in it, a weekly wash might be warranted. For lighter use, monthly or bi-monthly might suffice. A good practice is to do a quick clean: remove all items and wipe out the interior with a disinfectant cloth weekly, and do a full wash once a month or if you ever notice a smell.
- Protective Liners: You can also use removable liners or packing cubes inside your bag. For example, put your clothes in a washable sack, your shoes in a shoe bag, etc. This way, the bag’s interior doesn’t get as dirty. These inserts can be thrown in the wash easily.
- Storage of the Bag: When not in use, ensure the bag is dry and store it in a dry environment. Avoid stuffing it into a damp closet or leaving it in a trunk with moisture. A dry bag resists mold. If you won’t use it for a while, you might even place some silica gel desiccant packs in it to absorb any humidity. And as mentioned, a little dryer sheet or cedar piece can keep it smelling nice.
By following these cleaning and maintenance tips for each piece of gym gear, you’ll create a healthier workout environment for yourself. Not only will your equipment look and smell better, but regular care also means everything performs properly and lasts longer. A clean gym is a happy gym – for both you and your gear! Enjoy your workouts with the confidence that your equipment is fresh, safe, and well-maintained.


Premium Weightlifting Gloves
High-quality weightlifting gloves designed for comfort, grip, and durability during intense workouts.

Premium Weightlifting Wrist Wraps
Designed for superior wrist support and stability, these wraps help reduce strain during intense weightlifting and training sessions.

Weightlifting Wrist Wraps
Strong and durable wrist wraps designed for weightlifting, powerlifting, and bodybuilding to provide enhanced wrist support and stability.

High-Performance Weightlifting Gloves
Designed for superior grip, comfort, and durability, these gloves are perfect for heavy lifting and intense workouts.

Ultimate Gym Weightlifting Gloves
Designed for high-intensity workouts, these gloves provide superior grip, wrist support, and durability for all your training needs.

Weightlifting Gloves with Wrist Support
Durable and breathable gloves with integrated wrist support for weightlifting, CrossFit, and powerlifting.

Professional Athletic Gear
Tailored for high performance and durability to meet all your sporting needs.

Dynamic Sports Equipment
Designed to enhance agility and performance in a variety of sports.
MOREOK Workout Powerlifting Gloves
High-quality workout gloves designed for powerlifting, weightlifting, and intense training sessions.
Maintaining and cleaning your gym gear is essential for hygiene, longevity, and performance. Sweat, bacteria, and dirt can accumulate on your gear over time, leading to odors, wear and tear, and even skin infections. Here’s a comprehensive guide on how to clean and care for your gym gear:

1. Gym Clothes (Shirts, Shorts, Leggings)
Why Clean?: Sweat and bacteria can cause odors and degrade fabric over time.
How to Clean:
Turn clothes inside out before washing to remove sweat and bacteria trapped in the fibers.
Use cold or warm water and a mild detergent.
Avoid fabric softeners, as they can break down moisture-wicking properties.
Hang dry or use a low-heat setting to prevent shrinkage and damage to elastic fibers.
Pro Tip: Wash gym clothes immediately after use to prevent bacteria buildup.
2. Shoes (Running Shoes, Lifting Shoes)
Why Clean?: Dirty shoes can harbor bacteria and odors, and dirt can degrade the material.
How to Clean:
Remove insoles and laces, then shake out any loose dirt.
Use a soft brush or cloth to scrub the exterior with a mixture of mild soap and water.
Rinse with a damp cloth and let air dry completely (avoid direct heat or sunlight).
For odors, sprinkle baking soda inside the shoes and let it sit overnight before brushing it out.
Pro Tip: Rotate between two pairs of shoes to extend their lifespan.
3. Weightlifting Belt
Why Clean?: Sweat and dirt can weaken the material and cause odors.
How to Clean:
Wipe down leather belts with a damp cloth and mild soap. Avoid soaking.
For nylon belts, hand wash with mild detergent and air dry.
Use a leather conditioner occasionally to maintain the belt’s flexibility and durability.
Pro Tip: Store your belt in a cool, dry place to prevent mold or mildew.
4. Lifting Straps, Wrist Wraps, and Knee Sleeves
Why Clean?: These items come into direct contact with sweat and skin, making them prone to bacteria buildup.
How to Clean:
Hand wash with mild detergent and warm water.
Rinse thoroughly and air dry completely.
Avoid using bleach or harsh chemicals, as they can degrade the material.
Pro Tip: Wash these items after every use to prevent odors and bacteria growth.
5. Gym Bag
Why Clean?: Gym bags can accumulate dirt, sweat, and bacteria from your gear.
How to Clean:
Empty the bag and shake out any debris.
Wipe the interior and exterior with a damp cloth and mild soap.
For fabric bags, check the care label—some may be machine washable.
Air dry completely before using again.
Pro Tip: Use a separate compartment or pouch for dirty clothes and shoes to keep your bag cleaner.
6. Water Bottle
Why Clean?: Bacteria can grow in moist environments, leading to unpleasant odors and potential health risks.
How to Clean:
Wash daily with warm, soapy water and a bottle brush.
For deep cleaning, use a mixture of vinegar and water or baking soda.
Rinse thoroughly and air dry with the lid off.
Pro Tip: Avoid leaving water in your bottle for extended periods, especially in warm environments.
7. Resistance Bands
Why Clean?: Sweat and dirt can degrade the material and reduce elasticity.
How to Clean:
Wipe down with a damp cloth and mild soap.
Rinse with a clean, damp cloth and air dry completely.
Avoid submerging in water, as it can weaken the bands.
Pro Tip: Store resistance bands in a cool, dry place away from direct sunlight.
8. Foam Roller
Why Clean?: Foam rollers can accumulate sweat and bacteria from direct skin contact.
How to Clean:
Wipe down with a damp cloth and mild soap after each use.
For deep cleaning, use a disinfectant spray or wipes.
Air dry completely before storing.
Pro Tip: Avoid using harsh chemicals that can degrade the foam material.
9. Headphones or Earbuds
Why Clean?: Earwax, sweat, and dirt can affect sound quality and hygiene.
How to Clean:
Wipe down with a slightly damp cloth or disinfectant wipe.
Use a cotton swab dipped in rubbing alcohol to clean small crevices.
Avoid submerging in water, especially for non-waterproof models.
Pro Tip: Store headphones in a clean, dry case when not in use.
10. Gloves and Grips
Why Clean?: Gloves and grips absorb sweat and can develop odors over time.
How to Clean:
Hand wash with mild detergent and warm water.
Rinse thoroughly and air dry completely.
For leather gloves, use a leather cleaner and conditioner occasionally.
Pro Tip: Allow gloves to dry completely before storing to prevent mold.
General Tips for Maintaining Gym Gear
Wash Immediately: Don’t let sweaty gear sit for too long; wash or clean it as soon as possible.
Air Dry: Avoid using high heat to dry gym gear, as it can damage fabrics and materials.
Rotate Gear: Use multiple sets of gear (e.g., clothes, shoes) to extend their lifespan.
Disinfect Regularly: Use disinfectant sprays or wipes for items that can’t be washed, like foam rollers or gym bags.
Store Properly: Keep gear in a cool, dry place to prevent mold, mildew, and odors.
Conclusion
Regularly cleaning and maintaining your gym gear not only keeps it smelling fresh but also extends its lifespan and ensures it performs at its best. By following these tips, you can keep your gear in top condition and create a healthier, more enjoyable workout environment. Remember, a little care goes a long way!
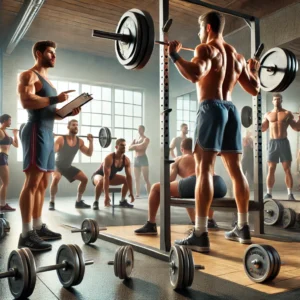
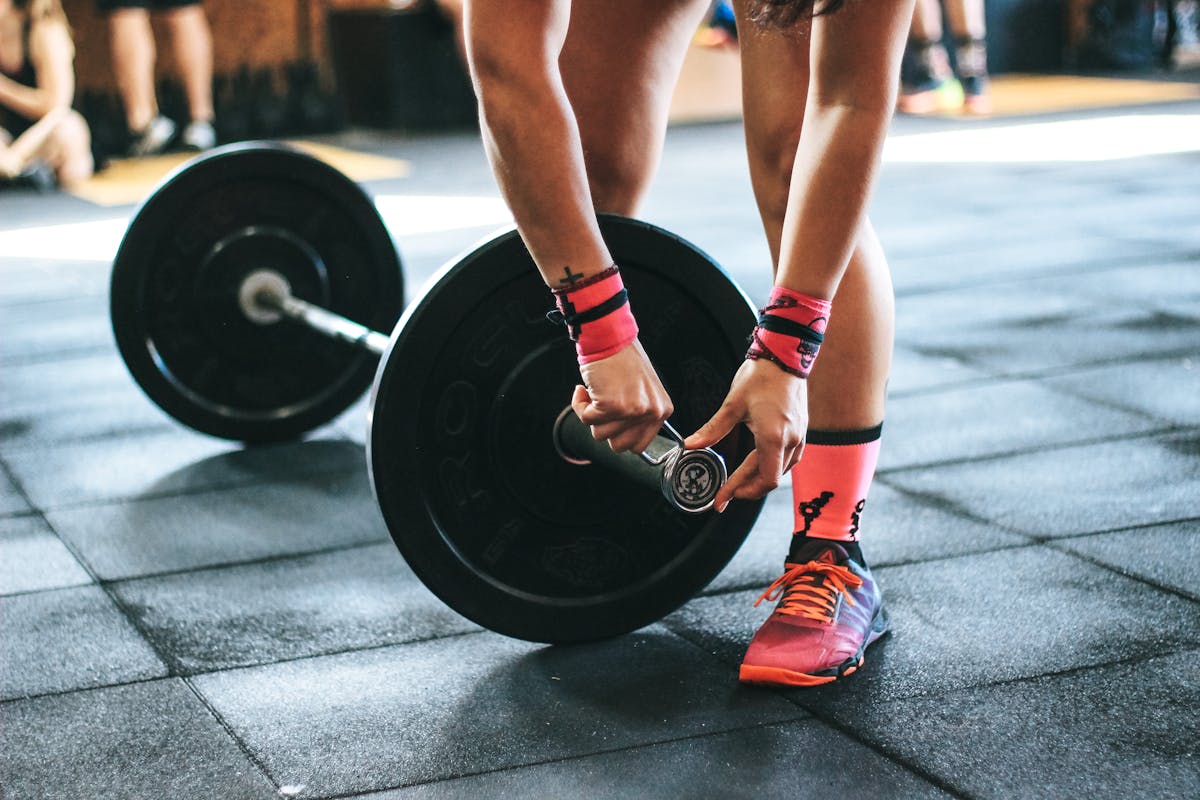
When it comes to strength training, having the right gym accessories can make a significant difference in your performance, safety, and overall experience. Here’s a list of must-have gym accessories for strength training, along with their benefits:

1. Weightlifting Belt
Purpose: Provides support to your lower back and core during heavy lifts.
Benefits:
Reduces the risk of injury during squats, deadlifts, and overhead presses.
Helps maintain proper form and spinal alignment.
When to Use: For heavy compound lifts like squats, deadlifts, and overhead presses.
2. Weightlifting Gloves
Purpose: Protects your hands and improves grip.
Benefits:
Prevents calluses, blisters, and tears.
Enhances grip strength and reduces hand fatigue.
When to Use: During pull-ups, rows, deadlifts, or any exercise where grip is a limiting factor.
3. Lifting Straps
Purpose: Helps you lift heavier weights by taking the load off your grip.
Benefits:
Allows you to focus on larger muscle groups (e.g., back, legs) without grip fatigue.
Reduces the risk of dropping weights due to a weak grip.
When to Use: For heavy deadlifts, rows, or shrugs.
4. Knee Sleeves or Wraps
Purpose: Provides support and compression to your knees.
Benefits:
Reduces joint stress during squats and lunges.
Improves blood flow and reduces soreness.
When to Use: During heavy squats, lunges, or leg presses.
5. Wrist Wraps
Purpose: Stabilizes and supports your wrists during heavy lifts.
Benefits:
Prevents wrist pain or injury during bench presses, overhead presses, or cleans.
Helps maintain proper wrist alignment.
When to Use: During pressing movements or exercises that strain the wrists.
6. Resistance Bands
Purpose: Adds resistance to bodyweight exercises or assists with mobility work.
Benefits:
Great for warm-ups, mobility drills, or adding variety to your workouts.
Portable and versatile for home or gym use.
When to Use: For warm-ups, mobility exercises, or assistance with pull-ups.
7. Foam Roller
Purpose: Aids in muscle recovery and self-myofascial release.
Benefits:
Reduces muscle soreness and improves flexibility.
Helps release tight muscles and improve blood flow.
When to Use: Before or after workouts for recovery and mobility.
8. Lifting Shoes
Purpose: Provides stability and support during heavy lifts.
Benefits:
Flat, non-compressible soles improve balance and power transfer.
Ideal for squats, deadlifts, and Olympic lifts.
When to Use: During heavy compound lifts or Olympic weightlifting.
9. Chalk or Liquid Grip
Purpose: Improves grip on barbells, dumbbells, or pull-up bars.
Benefits:
Reduces slipping and enhances grip strength.
Prevents calluses and blisters.
When to Use: During deadlifts, pull-ups, or any exercise where grip is crucial.
10. Gym Towel
Purpose: Keeps you and the equipment clean and dry.
Benefits:
Wipes away sweat to maintain hygiene.
Provides a barrier between you and shared equipment.
When to Use: During every workout to stay clean and comfortable.
11. Water Bottle
Purpose: Keeps you hydrated during workouts.
Benefits:
Prevents dehydration and maintains performance.
Helps regulate body temperature.
When to Use: Throughout your workout to stay hydrated.
12. Headphones or Earbuds
Purpose: Keeps you motivated with your favorite music or podcasts.
Benefits:
Improves focus and endurance during workouts.
Blocks out distractions in the gym.
When to Use: During any workout to stay motivated.
13. Gym Bag
Purpose: Stores and organizes all your gym gear.
Benefits:
Keeps your accessories, clothes, and shoes in one place.
Makes it easy to transport your gear to and from the gym.
When to Use: Every time you head to the gym.
14. Fractional Plates (Micro Plates)
Purpose: Allows for small, incremental weight increases.
Benefits:
Helps with progressive overload, especially for beginners or advanced lifters.
Ideal for improving strength gradually.
When to Use: When you need to increase weight in small increments (e.g., 1.25 lbs or 0.5 kg).
15. Pull-Up Assistance Bands
Purpose: Helps you perform pull-ups if you’re still building strength.
Benefits:
Provides assistance to complete full reps.
Great for beginners or those working on pull-up progressions.
When to Use: During pull-up or chin-up exercises.
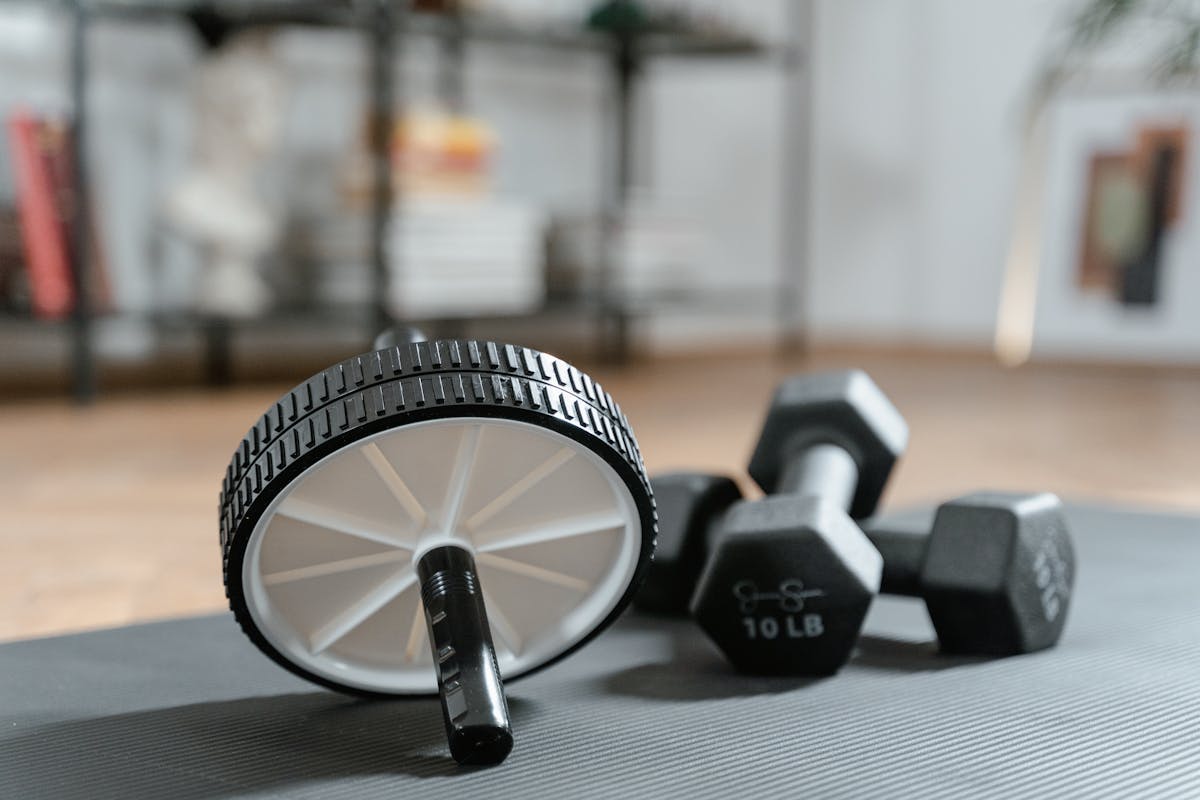
16. Ab Wheel or Sliders
Purpose: Strengthens your core and improves stability.
Benefits:
Targets deep core muscles for better strength and posture.
Portable and easy to use at home or in the gym.
When to Use: For core workouts or as part of a warm-up.
17. Massage Gun
Purpose: Aids in muscle recovery and reduces soreness.
Benefits:
Helps release muscle tension and improve blood flow.
Speeds up recovery between workouts.
When to Use: After workouts or on rest days for recovery.
18. Notebook or Fitness Tracker
Purpose: Tracks your progress and workouts.
Benefits:
Helps you stay organized and motivated.
Allows you to monitor strength gains and set goals.
When to Use: During every workout to log sets, reps, and weights.
Conclusion
These must-have gym accessories can enhance your strength training routine by improving performance, preventing injuries, and keeping you comfortable. Whether you’re a beginner or an experienced lifter, investing in the right gear can help you achieve your fitness goals more effectively and safely. Always prioritize proper form and technique, and use accessories to complement your training, not replace it! These gym accessories are essential for anyone serious about strength training. They help improve performance, protect against injuries, and enhance overall lifting experience. Whether you’re a powerlifter, bodybuilder, or casual gym-goer, having the right gear in your bag can make a significant difference in your progress and results!
Gym Gear & Accessories: Benefits of Using Weightlifting Grips & Straps
Introduction
In the world of weightlifting, where performance, endurance, and technique are paramount, athletes continuously seek tools that enhance their lifting capacity while preventing injuries. Weightlifting grips and straps are two popular accessories that significantly contribute to improved grip strength, wrist stability, and overall lifting efficiency.
Whether you’re a beginner or a seasoned lifter, choosing the right lifting gear can be a game-changer in achieving your fitness goals. This article explores the differences, benefits, and best use cases for weightlifting grips and straps, helping you determine which one suits your workout regimen best.

Understanding Weightlifting Straps & Grips
What Are Lifting Straps?
Lifting straps, also known as wrist straps, are designed to help lifters maintain a stronger grip on weights. They are long strips of fabric, usually made from cotton, nylon, or leather, that loop around the wrist and wrap around the barbell or dumbbell. Their primary purpose is to reduce grip fatigue by transferring some of the weight load from the hands to the wrists, enabling the lifter to focus more on muscle engagement rather than struggling to hold onto the weight.
Lifting straps are widely used for exercises such as:
Deadlifts
Rows (barbell, dumbbell, and machine-assisted)
Rack pulls
Heavy shrugs
Lat pulldowns
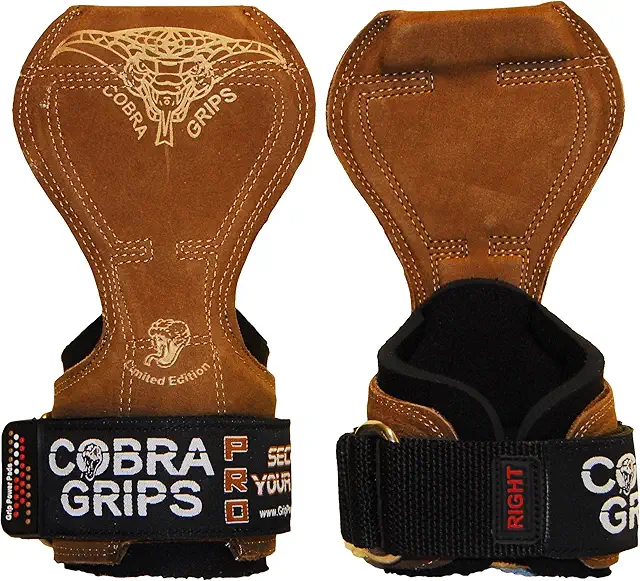
What Are Lifting Grips?
Lifting grips are multi-functional weightlifting accessories that provide a combination of wrist support, palm protection, and grip enhancement. Unlike straps, which focus primarily on improving grip strength, grips also protect the hands from calluses, blisters, and abrasions caused by bar knurling.
Typically made from rubber, neoprene, or leather, lifting grips feature a wrist wrap with a padded gripping surface that helps in maintaining a secure grip without excessive squeezing. They are commonly used for:
Pull-ups & chin-ups
Deadlifts
Barbell & dumbbell rows
Kettlebell swings
Lifting Straps vs. Lifting Grips: Key Differences
While both lifting straps and grips serve similar functions, they differ in structure and purpose. Below is a comparison of their primary characteristics:
| Feature | Lifting Straps | Lifting Grips |
|---|---|---|
| Grip Assistance | Excellent grip stability | Enhanced grip, but less secure than straps |
| Wrist Support | Minimal wrist support | Strong wrist support |
| Hand Protection | Limited; may cause friction | Prevents blisters & calluses |
| Comfort Level | May require adjustments | Comfortable, but may feel bulky |
| Ease of Use | Takes practice to wrap correctly | Quick & easy application |
| Ideal For | Powerlifters & weightlifters | CrossFit athletes & bodybuilders |
How to Use Lifting Grips & Straps
Using Lifting Grips
Wrap the wrist strap around your wrist securely.
Position the padded grip under the bar or dumbbell handle.
Grip the weight over the lifting grip and begin your set.
Adjust the grip to ensure maximum comfort and efficiency.
Using Lifting Straps
Loop the strap around your wrist and secure it tightly.
Wrap the excess material around the bar.
Rotate your grip to tighten the strap onto the bar.
Begin lifting while maintaining control of the weight.
Types of Lifting Straps & Materials
1. Closed Loop Straps
Also called Olympic lifting straps, these allow for a quick release and are ideal for movements that require fast transitions, such as snatches and cleans.
2. Lasso Lifting Straps
These provide a secure grip and are commonly used for deadlifts, shrugs, and heavy rows.
3. Figure 8 Lifting Straps
Designed for maximum grip stability, these straps are best suited for powerlifters performing deadlifts.
Material Considerations
Cotton: Comfortable but may lack durability.
Nylon: Strong and long-lasting but can cause chafing.
Leather: Durable but may require a break-in period.
Benefits of Using Lifting Grips & Straps
1. Enhanced Grip Strength
Both lifting grips and straps reduce grip fatigue, allowing you to lift heavier weights for more reps without worrying about losing control of the bar.
2. Wrist Support & Stability
Lifting grips, in particular, offer added wrist support, minimizing strain and reducing the risk of injuries.
3. Improved Performance
By taking pressure off the fingers and forearms, these accessories enable lifters to focus on target muscles, leading to better muscle engagement and growth.
4. Callus & Skin Protection
Grips provide an extra layer of protection against rough knurling, helping prevent blisters and calluses.
5. Injury Prevention
Straps and grips help prevent overuse injuries by evenly distributing the weight and reducing strain on smaller muscle groups.
When to Use Lifting Straps vs. Lifting Grips
| Training Goal | Best Choice |
| Maximal grip strength training | Lifting straps |
| Wrist stability & protection | Lifting grips |
| Bodybuilding & endurance training | Lifting grips |
| Heavy compound lifts | Lifting straps |
| Pull-ups & chin-ups | Lifting grips |
Common Mistakes to Avoid
1. Overusing Straps & Grips
Relying too much on lifting accessories can hinder your natural grip strength development.
2. Incorrect Application
Improper wrapping or grip positioning can lead to ineffective use and even injuries.
3. Ignoring Comfort & Fit
Ill-fitting grips or straps can cause discomfort, reducing their effectiveness.
Choosing the Right Gear for Your Training
When deciding between lifting grips and straps, consider the following:
Your primary lifting goals
The type of exercises you perform
Your wrist strength & stability needs
Personal comfort & preference
If heavy lifting and maximal strength gains are your priority, lifting straps are ideal. On the other hand, if you require versatile wrist support, grip assistance, and hand protection, then lifting grips will be the better option.
Conclusion
Lifting grips and straps serve distinct yet complementary purposes in strength training and bodybuilding. By understanding their unique benefits and differences, you can incorporate the right gear into your routine to enhance performance, protect your hands, and prevent injuries.
Before investing in a pair, assess your lifting style, comfort needs, and long-term fitness goals. No matter your choice, using the right gym accessories will ensure you train harder, smarter, and safer every time you step into the gym.
Ready to Upgrade Your Workouts?
Pick the right lifting grips or straps today and elevate your weightlifting game to the next level!
Weightlifting grips and straps are essential tools for anyone serious about strength training. They provide support, improve grip, and help you lift heavier weights safely. Here’s a detailed look at their benefits and how they can enhance your workouts:
Benefits of Using Weightlifting Grips & Straps
1. Improved Grip Strength
Why It Matters: Grips and straps reduce the strain on your hands, allowing you to focus on lifting heavier weights without worrying about your grip failing.
Best For: Deadlifts, rows, pull-ups, and other exercises that require a strong grip.
2. Reduced Calluses and Blisters
Why It Matters: Grips protect your palms from friction, preventing painful calluses and blisters.
Best For: High-rep workouts or exercises with rough bars (e.g., pull-ups, barbell rows).
3. Enhanced Performance
Why It Matters: By eliminating grip fatigue, you can perform more reps or lift heavier weights, leading to better muscle growth and strength gains.
Best For: Heavy deadlifts, shrugs, and other grip-intensive exercises.
4. Wrist Support and Stability
Why It Matters: Some grips and straps come with wrist wraps, providing extra support and reducing the risk of injury.
Best For: Overhead presses, snatches, and other exercises that strain the wrists.
5. Versatility
Why It Matters: Grips and straps can be used for a variety of exercises, making them a versatile addition to your gym bag.
Best For: Cross-training, power-lifting, and bodybuilding.
6. Injury Prevention
Why It Matters: By reducing strain on your hands, wrists, and forearms, grips and straps help prevent overuse injuries.
Best For: Long training sessions or high-volume workouts.
Types of Weightlifting Grips & Straps
1. Lifting Straps
What They Are: Long straps that wrap around the barbell or dumbbell and your wrist, providing a secure grip.
Best For: Heavy deadlifts, rows, and shrugs.
2. Lifting Grips
What They Are: Padded gloves or wraps that protect your palms and improve grip.
Best For: Pull-ups, kettlebell swings, and high-rep exercises.
3. Wrist Wraps
What They Are: Straps that wrap around your wrist for added support and stability.
Best For: Overhead presses, bench presses, and snatches.
4. Hook Grips
What They Are: Straps with a loop that hooks onto the bar, allowing you to lift heavier weights without relying on your grip strength.
Best For: Olympic lifts and heavy deadlifts.
Pro Tips for Using Grips & Straps
Use Sparingly: Don’t rely on grips and straps for every exercise. Train your grip strength by going strap-free for lighter lifts.
Proper Fit: Ensure your grips and straps fit snugly but aren’t too tight, as this can restrict blood flow.
Maintenance: Clean your grips and straps regularly to prevent odor and prolong their lifespan.
Combine with Chalk: For extra grip, use lifting chalk along with your straps or grips.
When to Use Grips & Straps
Heavy Lifts: When your grip is the limiting factor.
High-Rep Workouts: To prevent calluses and blisters.
Weak Grip: If you’re recovering from an injury or have naturally weak grip strength.
Final Thoughts
Weightlifting grips and straps are game-changers for anyone looking to improve their performance, protect their hands, and lift heavier weights safely. Whether you’re a beginner or a seasoned lifter, these tools can help you take your training to the next level.
Weightlifting grips and straps offer several benefits, including: increased lifting capacity by reducing grip fatigue, improved form by providing support, potential for injury prevention by distributing load more evenly across the hands and wrists, and allowing for heavier weights to be lifted, leading to greater muscle development and strength gains, particularly on exercises like deadlifts and rows where grip strength can be limiting.
- Enhanced grip strength:
Grips, especially those with textured surfaces, can directly improve grip strength, while straps help minimize grip fatigue, allowing you to lift heavier weights for more reps.
- Improved lifting technique:
By taking the strain off your hands and wrists, straps can help you maintain proper form and focus on the targeted muscle groups during exercises.
- Muscle growth potential:
Lifting heavier weights due to reduced grip fatigue can lead to greater muscle growth and strength gains.
- Injury prevention:
Straps can help prevent injuries to the hands, wrists, and forearms by distributing the load more evenly.
- Versatility:
Both grips and straps can be used for a variety of exercises, including deadlifts, rows, pull-ups, and lat pull-downs.
- Proper fit:
Ensure the straps are the right size and fit snugly to provide optimal support without restricting blood flow.
- Not for every exercise:
While beneficial for certain lifts, using straps for exercises that primarily target grip strength (like farmer’s carries) can hinder the intended training stimulus.
- Grip strength training:While straps can help with heavier lifts, it’s important to still incorporate dedicated grip strength exercises into your routine for overall hand health

Versatile Fitness Equipment
Ideal for both indoor and outdoor use, this equipment offers the flexibility needed for a comprehensive workout.

Advanced Workout Equipment
This equipment is engineered for superior performance, enhancing both endurance and strength training.

Classic Sports Equipment
This equipment is a staple for any athlete, offering timeless utility and robust construction.
Alternative Power Deadlifts Adjustable Gloves
Engineered for weightlifting and bodybuilding, these gloves provide maximum grip and wrist support.


If you’re looking for gym gear and accessories to enhance your workouts, here’s a curated list of essentials that can help you stay motivated, improve performance, and make your fitness journey more enjoyable. Whether you’re a beginner or a seasoned gym-goer, these items are must-haves for your fitness arsenal:
Gym Gear & Accessories
1. Workout Gloves
Why You Need Them: Protect your hands from calluses and improve grip during weightlifting, pull-ups, or rowing.
Recommended: Look for padded, breathable gloves with wrist support.
2. Resistance Bands
Why You Need Them: Perfect for strength training, stretching, and mobility exercises. Great for home workouts or gym use.
Recommended: A set of varying resistance levels (light, medium, heavy).
3. Weightlifting Belt
Why You Need It: Provides core support and stability during heavy lifts like deadlifts and squats.
Recommended: Adjustable, durable belts with padding for comfort.
4. Gym Bag
Why You Need It: Keep all your gear organized and portable. Look for compartments for shoes, clothes, and accessories.
Recommended: Water-resistant material with ventilated shoe pockets.
5. Foam Roller
Why You Need It: Essential for post-workout recovery, reducing muscle soreness, and improving flexibility.
Recommended: High-density foam rollers for deep tissue massage.
6. Water Bottle
Why You Need It: Stay hydrated during workouts with a durable, leak-proof bottle.
Recommended: Insulated stainless steel bottles to keep drinks cold or hot.
7. Wireless Earbuds/Headphones
Why You Need Them: Stay motivated with your favorite workout playlist without dealing with tangled wires.
Recommended: Sweat-proof, noise-canceling earbuds with long battery life.
8. Gym Towel
Why You Need It: Keep sweat at bay and maintain hygiene during workouts.
Recommended: Quick-drying, microfiber towels that are compact and lightweight.
9. Weightlifting Shoes
Why You Need Them: Provide stability and support during heavy lifts, especially squats and deadlifts.
Recommended: Flat-soled shoes with a secure fit and good ankle support.
10. Fitness Tracker/Smartwatch
Why You Need It: Monitor your heart rate, steps, calories burned, and workout progress.
Recommended: Popular brands like Fitbit, Garmin, or Apple Watch.
11. Jump Rope
Why You Need It: A portable and effective cardio tool for warming up or high-intensity workouts.
Recommended: Adjustable length with comfortable handles.
12. Protein Shaker Bottle
Why You Need It: Mix protein shakes or supplements quickly and easily.
Recommended: Leak-proof bottles with a mixing ball for smooth shakes.
13. Knee Sleeves/Wrist Wraps
Why You Need Them: Provide joint support and stability during heavy lifts or high-impact exercises.
Recommended: Neoprene sleeves for warmth and compression.
14. Yoga Mat
Why You Need It: Perfect for yoga, stretching, or floor exercises. Provides cushioning and grip.
Recommended: Non-slip, eco-friendly mats with adequate thickness.
15. Massage Gun
Why You Need It: Relieve muscle tension and soreness with a portable percussion massager.
Recommended: Cordless models with multiple speed settings.
Pro Tips for Choosing Gym Gear
Quality Over Quantity: Invest in durable, high-quality gear that lasts.
Comfort is Key: Ensure your gear fits well and doesn’t hinder your performance.
Portability: Choose lightweight, easy-to-carry items for convenience.
Personalization: Pick gear that matches your fitness goals and preferences.
Final Thoughts
The right gym gear and accessories can make a huge difference in your workout experience. Whether you’re lifting weights, running, or doing yoga, having the right tools will help you stay motivated, perform better, and recover faster.
Benefits of Using Weightlifting Grips & Straps: Enhance Your Performance
Introduction
Weightlifting grips and straps are essential gym accessories that help athletes lift heavier, improve grip strength, and reduce hand fatigue. Whether you’re a beginner or an advanced lifter, these tools can make a significant difference in your performance and safety during workouts. This guide explores the key benefits of using weightlifting grips and straps, the types available, and how to choose the best option for your training needs.
Why Use Weightlifting Grips & Straps?
Key Benefits:
✅ Improved Grip Strength – Helps prevent the bar from slipping due to sweat or fatigue.
✅ Increased Lifting Capacity – Allows you to lift heavier weights by reducing forearm fatigue.
✅ Hand & Wrist Protection – Minimizes blisters, calluses, and wrist strain.
✅ Better Muscle Engagement – Focuses on target muscles without worrying about grip failure.
✅ Enhanced Endurance – Reduces grip fatigue for high-rep sets and prolonged training.
Types of Weightlifting Grips & Straps
There are different types of weightlifting grips and straps, each designed for specific training styles and exercises.
1. Lifting Straps
Material: Cotton, leather, or nylon.
Best For: Deadlifts, rows, shrugs.
How They Work: Loop around the barbell to enhance grip and support.
2. Figure 8 Straps
Material: Heavy-duty cotton or nylon.
Best For: Powerlifting and heavy deadlifts.
How They Work: Wrapped twice around the wrist and bar for maximum security.
3. Hook Grips
Material: Metal hooks with padded wrist straps.
Best For: Pull exercises like lat pulldowns.
How They Work: The metal hook grips the bar, reducing forearm strain.
4. Padded Weightlifting Grips
Material: Neoprene padding with rubberized grip.
Best For: High-rep training, functional fitness.
How They Work: Provides direct grip on the bar while protecting palms.
How Weightlifting Grips & Straps Improve Performance
1. Enhanced Grip Strength
Reduces reliance on forearm endurance.
Prevents grip failure during heavy lifts.
2. Reduced Wrist Strain
Provides wrist support and stabilizes joint movement.
Ideal for athletes recovering from wrist injuries.
3. Increased Muscle Activation
Focuses on primary muscle groups (e.g., lats, traps, hamstrings).
Prevents grip fatigue from limiting workout effectiveness.
Best Exercises for Weightlifting Grips & Straps
| Exercise | Best Grip/Strap Type |
|---|---|
| Deadlifts | Figure 8 Straps |
| Barbell Rows | Lifting Straps |
| Pull-ups | Padded Grips |
| Lat Pulldowns | Hook Grips |
| Shrugs | Lifting Straps |
How to Choose the Right Weightlifting Grips & Straps
Factors to Consider:
✅ Material Durability – Leather and heavy-duty nylon last longer.
✅ Comfort & Padding – Padded grips prevent discomfort during high-rep workouts.
✅ Training Goals – Powerlifters need heavy-duty straps, while bodybuilders may prefer padded grips.
✅ Ease of Use – Some straps require more setup time than others.
Common Mistakes When Using Weightlifting Straps & Grips
🚫 Over-Reliance on Grips – Avoid using straps for every set; maintain natural grip strength.
🚫 Incorrect Wrapping Technique – Poor strap positioning reduces effectiveness.
🚫 Using the Wrong Type for the Exercise – Figure 8 straps are not ideal for pull-ups.
🚫 Ignoring Wrist Support Needs – Choose a strap with wrist padding if needed.
Top Weightlifting Grips & Straps for 2025
Here are some of the best weightlifting grips and straps to enhance your training experience.
1. CRUNCHQUENCH Heavy-Duty Lifting Straps
✅ Reinforced stitching for durability
✅ Padded wrist support
✅ Perfect for powerlifters and strongmen
2. CRUNCHQUENCH Figure 8 Straps
✅ Maximum security for deadlifts
✅ Heavy-duty cotton blend
✅ Designed for serious lifters
3. CRUNCHQUENCH Padded Weightlifting Grips
✅ Neoprene padding for comfort
✅ Ideal for CrossFit and functional training
✅ Provides direct palm protection
How to Maintain Your Weightlifting Grips & Straps
Proper maintenance ensures durability and hygiene.
Cleaning Tips:
Hand wash with mild soap and water.
Air dry completely before using.
Avoid excessive moisture exposure to prevent wear.
Storage Tips:
Keep in a dry area to prevent mold buildup.
Store flat or rolled up to maintain shape.
Avoid excessive stretching or folding.
Final Thoughts
Weightlifting grips and straps are an invaluable addition to your training routine. Whether you want to lift heavier, reduce hand fatigue, or enhance muscle activation, choosing the right pair can significantly improve your performance.
Upgrade your lifting experience today with the best weightlifting grips and straps!
Choosing the right weightlifting gloves is essential for comfort, grip, and injury prevention. Here’s a step-by-step guide to help you pick the perfect pair for your workouts:
1. Determine Your Needs
Type of Lifting:
Powerlifting/Heavy Weights: Prioritize gloves with thick padding and wrist support.
Cross-Training/Cardio: Opt for lightweight, breathable gloves for versatility.
Pull-Ups/Gymnastics: Look for minimal padding and a secure grip.
Common Issues:
Calluses? → Choose gloves with palm padding.
Slipping grip? → Look for silicone or textured palms.
Wrist pain? → Prioritize gloves with wrist straps or reinforced support.
2. Key Features to Look For
Material
Leather: Durable and long-lasting but less breathable.
Synthetic (Mesh/Nylon): Lightweight and breathable but wears out faster.
Neoprene: Flexible and sweat-resistant for high-intensity workouts.
Padding
Padded Palms: Protects against calluses and blisters.
Padding Thickness:
Light Padding: For cardio, pull-ups, or light weights.
Heavy Padding: For heavy lifting or barbell work.
Wrist Support
Adjustable Wrist Straps: Provide stability during heavy lifts (e.g., deadlifts).
Wrist Wrap Gloves: Ideal for preventing wrist strain.
Grip
Silicone Grips: Prevent slippage on barbells or dumbbells.
Textured Palms: Enhance grip for exercises like rows or pull-ups.
Fit
Snug but Not Tight: Should allow natural hand movement.
Adjustable Closures: Velcro straps or elastic bands for a secure fit.
Breathability
Mesh Panels: Keep hands cool during long workouts.
Perforated Palms: Reduce sweat buildup.
3. Sizing Guide
Measure Your Hand:
Wrap a tape measure around the widest part of your palm (excluding the thumb).
Match the measurement to the brand’s size chart (S, M, L, XL).
Try Before Buying: If possible, test gloves in-store for comfort and flexibility.
4. Top Recommendations by Activity
| Activity | Best Glove Type |
|---|---|
| Heavy Lifting | Padded palms + wrist straps (e.g., Harbinger) |
| CrossFit | Lightweight + breathable (e.g., Nike) |
| Pull-Ups | Minimal padding + grip-focused (e.g., Gymnastic grips) |
| General Gym Use | Versatile gloves with moderate padding (e.g., RDX) |
5. Care & Maintenance
Clean Regularly: Wipe with a damp cloth and mild soap to prevent odor.
Air Dry: Never machine-dry, as heat can damage materials.
Rotate Pairs: Extend lifespan by alternating between two pairs.
6. Common Mistakes to Avoid
Ignoring Wrist Support: Weak wrists need extra stabilization.
Choosing Style Over Function: Prioritize comfort and durability over aesthetics.
Buying Too Small/Large: Poor fit leads to blisters or reduced grip.
Final Tips
Break Them In: Wear gloves for short sessions initially to soften the material.
Replace When Worn: Frayed padding or loose stitching compromises protection.
Strength Training & Weightlifting: Common Weightlifting Mistakes
Introduction
Weightlifting is an essential part of strength training, helping individuals build muscle, improve endurance, and increase overall fitness. However, many lifters—both beginners and experienced—make mistakes that can hinder progress and increase the risk of injury. This guide will discuss the most common weightlifting mistakes, their impact, and how to correct them to maximize your results safely and effectively.
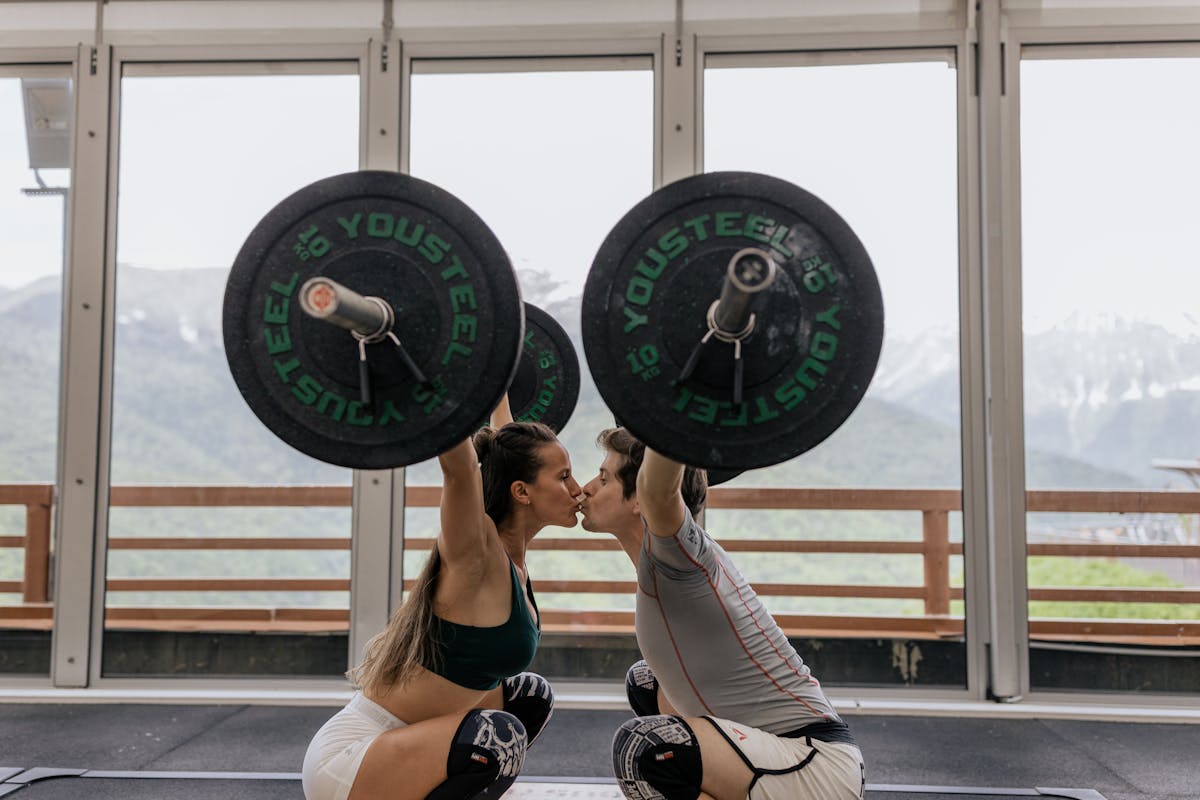
1. Skipping Warm-Ups and Mobility Work
Many lifters underestimate the importance of warming up before a workout. A proper warm-up increases blood flow to the muscles, enhances flexibility, and prepares the body for heavy lifts.
Why It’s a Mistake:
Increased risk of muscle strain or injury.
Reduced range of motion, leading to poor form.
Lower performance during the workout.
How to Fix It:
Spend at least 5-10 minutes warming up with dynamic stretches, light cardio, or resistance band exercises.
Incorporate mobility drills to improve joint flexibility.
2. Using Poor Form
Executing exercises with improper form is one of the most common and dangerous weightlifting mistakes.
Why It’s a Mistake:
Leads to muscular imbalances.
Increases risk of injury.
Reduces effectiveness of the exercise.
How to Fix It:
Work with a trainer or watch instructional videos to learn correct form.
Lift with a controlled tempo and focus on technique rather than lifting heavy weights.
Use mirrors or film yourself to check and correct your posture.
3. Lifting Too Heavy, Too Soon
Many beginners try to lift excessive weight without first building a solid foundation of strength.
Why It’s a Mistake:
Can lead to poor form and injury.
Strains muscles and joints unnecessarily.
Slows down long-term progress due to burnout or injury.
How to Fix It:
Start with moderate weights and focus on controlled movements.
Gradually increase weight while maintaining proper form.
Use progressive overload by adding small increments over time.
4. Neglecting Compound Exercises
Some lifters focus too much on isolation exercises instead of incorporating compound movements.
Why It’s a Mistake:
Slower muscle growth and overall strength gains.
Less functional strength development.
Imbalance between muscle groups.
How to Fix It:
Incorporate compound exercises such as squats, deadlifts, bench presses, and rows into your routine.
Use isolation exercises to complement compound lifts rather than replace them.
5. Ignoring Proper Breathing Techniques
Proper breathing during weightlifting is crucial for maintaining core stability and reducing fatigue.
Why It’s a Mistake:
Decreases power output.
Increases risk of dizziness or fainting.
Reduces oxygen supply to working muscles.
How to Fix It:
Use diaphragmatic breathing: inhale before lifting, exhale during exertion.
Maintain controlled breathing throughout sets.
6. Not Allowing Enough Rest and Recovery
Muscle growth happens during recovery, not just in the gym.
Why It’s a Mistake:
Leads to overtraining and burnout.
Reduces muscle repair and growth.
Increases risk of injuries.
How to Fix It:
Ensure 48 hours of rest between training the same muscle group.
Incorporate rest days and active recovery.
Prioritize sleep and hydration.
7. Overlooking the Importance of Nutrition
Strength training requires a proper diet to fuel muscle growth and recovery.
Why It’s a Mistake:
Lack of energy for workouts.
Slower muscle growth.
Poor recovery and increased fatigue.
How to Fix It:
Eat a balanced diet with protein, healthy fats, and carbohydrates.
Stay hydrated and include post-workout nutrition.
8. Not Tracking Progress
Without monitoring progress, it’s difficult to see improvements and make necessary adjustments.
Why It’s a Mistake:
Makes it harder to set realistic goals.
Reduces motivation due to lack of visible results.
How to Fix It:
Keep a training journal to track weights, reps, and progress.
Set short-term and long-term goals.
Adjust workouts based on performance.
9. Focusing Only on Strength and Ignoring Flexibility
A strong body should also be flexible and mobile to prevent injuries and improve movement efficiency.
Why It’s a Mistake:
Leads to stiffness and restricted movement.
Increases risk of muscle imbalances and injury.
How to Fix It:
Include stretching or yoga in your routine.
Perform mobility drills regularly.
10. Not Listening to Your Body
Many lifters push through pain and fatigue without recognizing signs of overtraining or injury.
Why It’s a Mistake:
Can lead to chronic injuries.
Reduces workout effectiveness.
How to Fix It:
Pay attention to warning signs like persistent pain or fatigue.
Modify workouts when needed.
Seek professional help for recurring pain.
Conclusion
Avoiding these common weightlifting mistakes can significantly improve your performance, prevent injuries, and enhance overall results. Focus on proper technique, progressive overload, and recovery to optimize your training. By making informed adjustments to your workouts and lifestyle, you’ll maximize muscle growth and strength safely and effectively.
Strength Training & Weightlifting: Recovery & Muscle Repair
Introduction
Strength training and weightlifting push your muscles to their limits, leading to micro-tears in the muscle fibers. While training is essential for muscle growth, proper recovery and repair are equally, if not more, important. Recovery ensures muscle adaptation, reduces injury risk, and maximizes strength gains. In this guide, we will explore the essential elements of muscle recovery, effective strategies for faster muscle repair, and how to optimize post-workout recovery for long-term progress.
The Science Behind Muscle Recovery
Muscle recovery occurs in different phases:
Immediate Recovery: Happens within minutes after exercise, allowing your body to restore ATP (adenosine triphosphate) and oxygen levels.
Short-Term Recovery: The recovery phase that occurs between workout sets, which helps prevent fatigue and maintain performance.
Long-Term Recovery: Involves muscle protein synthesis, nutrient replenishment, and structural adaptation of the muscle fibers.
Understanding these phases allows you to implement proper recovery techniques to optimize muscle repair and growth.
Why Recovery Is Crucial for Strength Training & Weightlifting
Prevents Overtraining: Avoids burnout and excessive fatigue.
Reduces Injury Risk: Minimizes muscle strain and ligament stress.
Enhances Performance: Increases strength, endurance, and power output.
Boosts Muscle Growth: Supports muscle protein synthesis and tissue repair.
Top Recovery Strategies for Strength Training & Weightlifting
1. Prioritizing Sleep for Muscle Recovery
Sleep is the most effective natural recovery tool for the human body. During deep sleep, the body releases growth hormone, which plays a key role in muscle repair and regeneration.
Tips for Better Sleep:
Aim for 7-9 hours of quality sleep per night.
Establish a consistent sleep schedule.
Avoid screens and blue light at least 30 minutes before bedtime.
Use blackout curtains and keep your bedroom cool and dark.
2. Proper Nutrition for Muscle Repair
Your muscles require essential nutrients to recover and grow effectively.
Key Nutrients for Recovery:
Protein: Essential for muscle repair and growth. Sources: Chicken, eggs, fish, tofu, whey protein.
Carbohydrates: Replenish glycogen stores and fuel muscle recovery. Sources: Rice, oats, quinoa, sweet potatoes.
Healthy Fats: Reduce inflammation and promote cellular repair. Sources: Avocados, nuts, olive oil, fatty fish.
Electrolytes & Hydration: Helps regulate muscle contractions and reduce cramping. Sources: Coconut water, leafy greens, bananas.
Best Post-Workout Meal Ideas:
Grilled chicken with quinoa and steamed vegetables.
Greek yogurt with mixed berries and honey.
Protein smoothie with banana, almond milk, and whey protein.
3. Active Recovery Techniques
Active recovery involves light movement to promote circulation and reduce muscle soreness.
Best Active Recovery Methods:
Foam Rolling: Helps release muscle tension and improves flexibility.
Stretching & Yoga: Reduces stiffness and promotes blood flow.
Swimming or Light Cardio: Enhances circulation without excessive strain.
4. Hydration & Electrolyte Balance
Dehydration can lead to muscle cramps, fatigue, and slower recovery.
Hydration Tips:
Drink at least 3 liters of water daily.
Consume electrolyte-rich beverages post-workout.
Avoid excessive caffeine and alcohol, which can cause dehydration.
5. The Role of Rest Days
Rest days allow the body to recover, repair tissues, and prevent overtraining.
Types of Rest Days:
Complete Rest Days: No physical activity, allowing total recovery.
Active Recovery Days: Low-intensity activities such as walking, swimming, or yoga.
Signs You Need a Rest Day:
Persistent muscle soreness.
Decreased workout performance.
Lack of motivation or chronic fatigue.
6. Massage Therapy for Recovery
Massage therapy can accelerate muscle recovery by improving circulation and reducing muscle tightness.
Best Massage Techniques for Weightlifters:
Deep Tissue Massage: Targets deep muscle layers to relieve knots and stiffness.
Sports Massage: Enhances flexibility and muscle elasticity.
Foam Rolling: A self-massage technique that helps release muscle adhesions.
7. Contrast Therapy (Hot & Cold Treatments)
Alternating between hot and cold therapy can reduce inflammation and accelerate muscle healing.
Methods:
Cold Therapy (Ice Baths): Reduces swelling and numbs muscle pain.
Heat Therapy (Sauna/Hot Showers): Increases blood flow and relaxes tight muscles.
Contrast Therapy: Alternating between hot and cold baths for 20-minute sessions.
8. Supplements for Faster Recovery
Supplements can support muscle repair and reduce inflammation.
Best Supplements for Recovery:
Whey Protein: Boosts muscle protein synthesis.
BCAAs (Branched-Chain Amino Acids): Reduces muscle soreness and speeds up repair.
Creatine: Enhances muscle recovery and energy levels.
Glutamine: Supports immune function and muscle hydration.
Omega-3 Fatty Acids: Reduces inflammation and joint pain.
9. Optimizing Hormonal Balance for Recovery
Hormones play a key role in muscle repair and strength gains.
Ways to Optimize Hormones Naturally:
Maintain healthy testosterone levels through strength training and proper nutrition.
Manage cortisol (stress hormone) by reducing stress and getting enough sleep.
Ensure proper insulin sensitivity by controlling sugar intake.
Common Recovery Mistakes to Avoid
Skipping Cool-Downs: Always include light stretching and foam rolling post-workout.
Not Eating Enough Protein: Ensure adequate protein intake for muscle repair.
Ignoring Mobility Work: Regular stretching prevents stiffness and injuries.
Training Through Pain: Listen to your body and rest when necessary.
Sample Weekly Recovery Plan for Weightlifters
| Day | Activity | Recovery Focus |
|---|---|---|
| Monday | Heavy Strength Training | Foam Rolling & Stretching |
| Tuesday | Light Cardio & Mobility Work | Sauna & Hydration |
| Wednesday | Weightlifting Session | Protein & Electrolytes |
| Thursday | Active Recovery (Swimming) | Massage Therapy |
| Friday | Strength Training & HIIT | Contrast Therapy |
| Saturday | Rest Day | Full Body Recovery |
| Sunday | Yoga & Mobility Work | Sleep & Stress Reduction |
Conclusion
Recovery and muscle repair are just as important as strength training itself. Without proper rest, nutrition, and recovery strategies, muscle growth and performance can be significantly hindered. Implementing structured recovery techniques, prioritizing sleep, staying hydrated, and fueling your body with the right nutrients will ensure long-term progress and injury prevention. Stay consistent with your training and recovery routine, and you’ll maximize your strength gains while maintaining overall health and well-being.
Do You Need Lifting Straps?
5 Benefits & 3 Drawbacks Explained
Introduction
If you’re struggling to maintain your grip during heavy lifts, you may be wondering if lifting straps are worth using or if you should focus on improving your grip strength.
Lifting straps allow you to lift more weight, encourage muscle hypertrophy, improve the mind-muscle connection, protect your hands, and promote lifting symmetry. However, over-reliance on straps can hinder grip strength if not used properly.
In this article, we’ll cover the 5 benefits and 3 drawbacks of using lifting straps, who can benefit the most, and how to avoid becoming too dependent on them.

What Are Lifting Straps?
Lifting straps, also known as wrist straps, are long pieces of fabric or leather that wrap around your wrist and the barbell or dumbbell to help secure your grip. They are primarily used to support grip strength, especially in pulling exercises such as deadlifts, rows, and pull-ups.
How Lifting Straps Work:
Attach around the wrist and wrap around the weight.
Provide additional grip support to prevent grip fatigue.
Reduce strain on the hands and forearms during heavy lifts.
5 Benefits of Using Lifting Straps
1. Lift More Weight
One of the main reasons lifters use straps is to help them lift heavier weights. Straps allow you to continue training when your muscular strength surpasses your grip capacity.
Removes grip as a limiting factor.
Increases strength development for major lifts.
Helps lifters reach new personal records.
2. Protect Your Hands
Lifting straps help protect your hands from calluses and blisters caused by repeated gripping of bars with aggressive knurling.
Prevents tearing of calluses.
Reduces friction between the bar and hands.
Helps maintain hand health for long-term lifting.
3. Improves Symmetry
Many lifters use a mixed grip during deadlifts, which can create muscular imbalances over time. Using lifting straps can help maintain symmetry in strength development.
Encourages even muscle growth.
Reduces risk of biceps tears from mixed grip.
Ensures equal engagement of both arms.
4. Cleaner Alternative to Chalk
Chalk is often used to improve grip, but it can be messy and is banned in some gyms. Lifting straps provide an alternative that doesn’t leave a mess behind.
No need to clean up after use.
Accepted in most commercial gyms.
Easy to carry and transport.
5. Enhances Mind-Muscle Connection & Hypertrophy
By taking grip fatigue out of the equation, straps allow lifters to focus on their target muscles and train closer to failure.
Improves muscle activation.
Helps lifters reach hypertrophy with higher reps.
Allows for better contraction in pulling exercises.
3 Drawbacks of Using Lifting Straps
1. Becoming Over-Reliant
If you use lifting straps for every set, your grip strength may suffer.
Over-reliance can make it difficult to lift without straps.
Can become a crutch for grip-dependent movements.
Not allowed in competitive power-lifting meets.
2. Weakens Grip Strength
Since lifting straps remove the need for a strong grip, neglecting grip training can lead to weaker forearms.
Ways to Maintain Grip Strength:
Perform heavy barbell holds for 30 seconds.
Use a grip-strengthening tool or stress ball.
Practice hanging from a bar for extended durations.
Incorporate Fat Gripz into workouts.
3. Not Suitable for Overhead Movements
Straps should not be used for Olympic lifts such as snatches and clean and jerks. They can make it difficult to let go of the bar if needed.
Increases risk of injury in overhead movements.
Not recommended for explosive lifts.
Should only be used by experienced lifters when necessary.
Who Should Be Using Lifting Straps?
Best Candidates for Lifting Straps:
Bodybuilders – Focus on hypertrophy and training muscles closer to failure.
Hook Grip Lifters – Useful for reducing thumb strain during high-rep training.
Strongman Competitors – Permitted in competitions and useful for heavy pulling events.
Who Should NOT Use Lifting Straps?
1. Competitive Power-lifters
Since power-lifters cannot use straps in competition, they should avoid overusing them in training.
Should focus on grip strength for heavy attempts.
Use straps only for back-off sets or volume work.
2. Lifters Focused on Grip Strength
Those looking to strengthen their grip should limit strap use and focus on grip-demanding exercises.
Prioritize raw grip training.
Avoid straps for direct grip-strengthening exercises.
Best Lifting Straps for 2025
Here are the top-rated lifting straps for various lifting needs:
1. CRUNCHQUENCH Heavy-Duty Lifting Straps
✅ Reinforced stitching for durability
✅ Padded wrist support
✅ Ideal for powerlifters and strongmen
👉 Buy Now
2. CRUNCHQUENCH Figure 8 Straps
✅ Maximum security for deadlifts
✅ Heavy-duty cotton blend
✅ Designed for serious lifters
👉 Buy Now
3. CRUNCHQUENCH Padded Weightlifting Grips
✅ Neoprene padding for comfort
✅ Perfect for CrossFit and functional training
✅ Provides direct palm protection
👉 Buy Now
Final Thoughts
Lifting straps can be a game-changer for those struggling with grip fatigue during heavy lifts. However, they should be used strategically to avoid weakening grip strength. If used properly, they can enhance strength gains, protect hands, and improve lifting efficiency.
Are you ready to upgrade your lifting experience? Check out the best lifting straps today! 👇
👉 Shop Now
🔹 Do you use lifting straps? Share your experience in the comments below!
Top Weightlifting Gloves for Superior Grip and Hand Protection
Introduction
When it comes to strength training, grip strength and hand protection are crucial for an effective and injury-free workout. Whether you’re lifting heavy weights, performing high-rep CrossFit workouts, or looking for extra wrist support, weightlifting gloves can be a game-changer.
Not only do they protect against calluses and blisters, but they also provide added grip and stability, making lifts safer and more effective. With countless options available, choosing the right pair can be overwhelming. That’s why we’ve compiled this expert guide to the best weightlifting gloves for every type of lifter.

Why Wear Weightlifting Gloves?
Before diving into our top picks, let’s discuss why you should consider using weightlifting gloves in the first place.
1. Enhanced Grip Strength
The primary function of weightlifting gloves is to improve your grip on weights, barbells, and pull-up bars. Many gloves have silicone or rubberized padding on the palm to prevent slipping, helping you maintain better control during your lifts.
2. Hand Protection
Regular lifting can lead to calluses, blisters, and abrasions, especially when working with heavy weights or textured bars. Gloves provide a protective barrier to keep your hands in better condition over time.
3. Wrist Support
Some weightlifting gloves come with built-in wrist straps to add extra support, reducing the risk of strain or injury during heavy pressing movements like bench presses, deadlifts, and overhead presses.
4. Reduced Strain on Fingers
By distributing the load more evenly across your hands, gloves help reduce tension on your fingers, which is especially beneficial during high-repetition workouts.
The 7 Best Weightlifting Gloves for 2025
We tested and reviewed several of the best weightlifting gloves based on grip, durability, comfort, material quality, and overall value. Here are the top picks for different lifting needs.
1. Best Overall: Ihuan Breathable Fingerless Lifting Gloves
Ideal for: General weightlifting, CrossFit, and gym workouts
Material: Microfiber with anti-slip silicone grip
Features: Wrist support, breathable mesh back, padded palm
Pros: Comfortable fit, great wrist support, excellent grip
Cons: Wrist straps may feel too tight for some users
These gloves are an all-around excellent choice for beginners and experienced lifters alike. The breathable material keeps your hands cool, while the padded palms provide extra protection without sacrificing grip strength.
2. Best for CrossFit: Rogue Mechanix Gloves V2
Ideal for: CrossFit, functional training, pull-ups
Material: Synthetic leather and breathable mesh fabric
Features: Full-finger protection, lightweight, durable stitching
Pros: Flexible, comfortable, good for bar muscle-ups
Cons: No padding in the palm, limited wrist support
If you engage in high-rep workouts, these gloves provide a good balance of protection and mobility, making them ideal for pull-ups, kettlebells, and Olympic lifting.
3. Best Heavy-Duty Weightlifting Gloves: Grip Power Pads Elite Leather Gloves
Ideal for: Powerlifters, bodybuilders, heavy-duty lifting
Material: Durable leather with reinforced padding
Features: 25-inch wrist wrap, rubber padding, finger loops for easy removal
Pros: Extreme durability, great wrist support, ideal for heavy lifts
Cons: Expensive, sizing runs small
These gloves are built for serious lifters who need maximum protection and durability during heavy lifting sessions.
4. Best Full-Finger Gloves: Bionic Full-Finger Fitness Gloves
Ideal for: Outdoor training, cold-weather workouts
Material: Genuine leather with Cool-On breathable fabric
Features: Full-finger design, built-in padding, wrist wrap
Pros: Great protection from cold and germs, durable construction
Cons: Fingers may feel too long for some users
These gloves are perfect for those who need full-finger coverage for hygiene or cold weather while maintaining a solid grip and protection.
5. Best Budget Option: SIMARI Workout Gloves
Ideal for: Beginners and casual lifters
Material: Elasticized fabric with microfiber padding
Features: Lightweight, anti-slip design, breathable mesh
Pros: Affordable, comfortable, decent grip
Cons: Not as durable as premium gloves
If you’re just starting and need a cost-effective solution, these gloves provide good grip and protection without breaking the bank.
6. Best Gloves with Wrist Support: Harbinger Pro Weightlifting Gloves
Ideal for: Anyone needing extra wrist stabilization
Material: Leather, spandex, and reinforced wrist wrap
Features: Hook and loop closure, perforated palm
Pros: Excellent wrist support, good compression
Cons: Hard to remove after sweating, limited color options
These gloves are a great option if you have weak wrists or need extra stability during pressing movements.
7. Best Grip: Trideer Workout Gloves
Ideal for: Those prioritizing grip strength
Material: Silicone-enhanced palm, breathable microfiber mesh
Features: Thick palm padding, 18-inch wrist brace
Pros: Superior grip, comfortable fit, good wrist stability
Cons: Sizing runs large
These gloves offer the best non-slip grip, making them ideal for lifters who struggle with sweaty hands or slippery bars.
How to Choose the Best Weightlifting Gloves
When selecting weightlifting gloves, consider the following factors:
1. Fit and Comfort
Ensure the gloves fit snugly but do not restrict movement.
Fingerless gloves offer more flexibility, while full-finger gloves provide better protection.
2. Material and Breathability
Leather gloves are more durable but may feel heavy.
Mesh-backed gloves offer more breathability for high-intensity workouts.
3. Grip and Padding
If you lift heavy weights, opt for gloves with extra palm padding.
For maximum grip, look for gloves with anti-slip silicone or rubber padding.
4. Wrist Support
If you have weak wrists, choose gloves with adjustable wrist wraps for added stability.
How to Maintain Your Weightlifting Gloves
To keep your gloves in the best condition:
Wash them regularly to remove sweat and odor.
Avoid machine drying; instead, let them air dry.
Store them in a cool, dry place after workouts.
Final Thoughts
Choosing the right pair of weightlifting gloves can significantly enhance your lifting experience by improving grip strength, preventing calluses, and providing wrist support. Whether you’re a powerlifter, CrossFitter, or casual gym-goer, the gloves on this list offer the best options for protection, durability, and comfort.
Ready to take your workouts to the next level? Pick a pair of weightlifting gloves that suits your needs and lift with confidence!
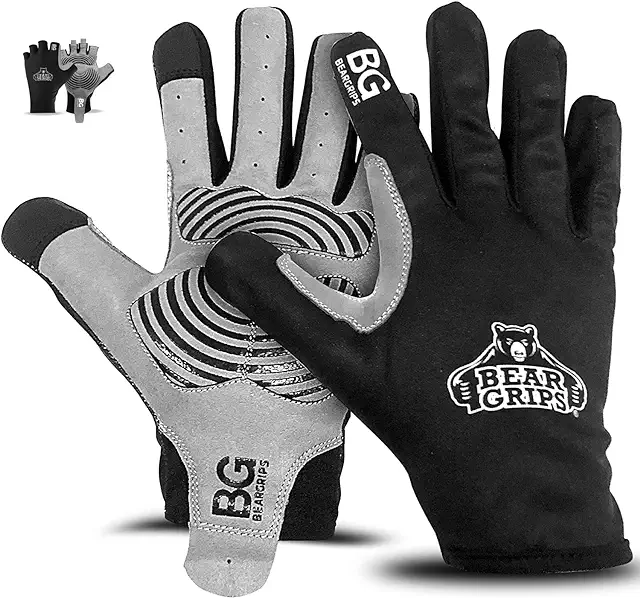
Bear Grips Weightlifting Gloves
Enhance your grip and protect your hands during intense workouts with these high-quality weightlifting gloves.

Gymreapers Weight Lifting Gloves
Premium weightlifting gloves with wrist support, designed for durability and maximum grip during deadlifts and strength training.

Sleek Sports Accessory
Designed for maximum convenience and efficiency, perfect for active lifestyles.

Ergonomic Sports Accessory
Ergonomically designed to enhance comfort and performance during intensive workouts.

High-Performance Training Gear
Crafted for professionals, this gear offers exceptional performance and durability.

Innovative Sporting Equipment
State-of-the-art sporting gear designed for peak performance.

Streamlined Fitness Device
Specially designed to support a wide array of exercises, enhancing flexibility and strength.

Compact Exercise Tool
Perfect for fitness enthusiasts on the go.

Enhanced Fitness Gear
Designed for all fitness levels.

Professional Athletic Gear
Tailored for high performance and durability.

Ultimate Training Equipment
Perfect for building strength and endurance.

Versatile Sporting Goods
A great addition to any workout routine.
Bear Grips Weightlifting Gloves
Enhance your grip and protect your hands during intense workouts with these high-quality weightlifting gloves.
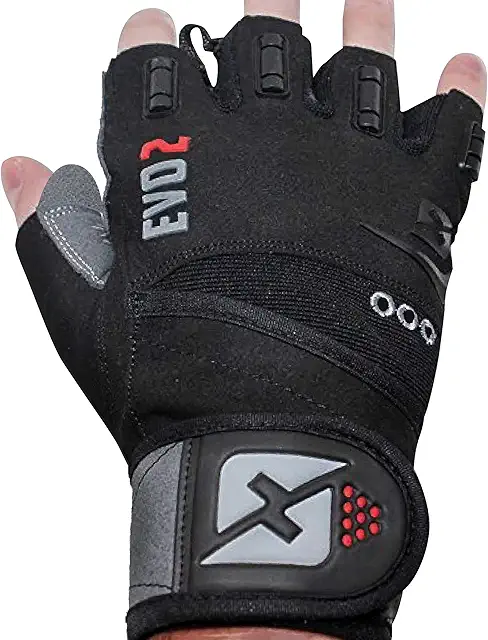
Skott Weightlifting Gloves
Premium gloves with wrist support and double durability, perfect for intense weightlifting and training sessions.
Gymreapers Weight Lifting Gloves
Premium weightlifting gloves with wrist support, designed for durability and maximum grip during deadlifts and strength training.
MOREOK Workout Powerlifting Gloves
High-quality workout gloves designed for powerlifting, weightlifting, and intense training sessions.
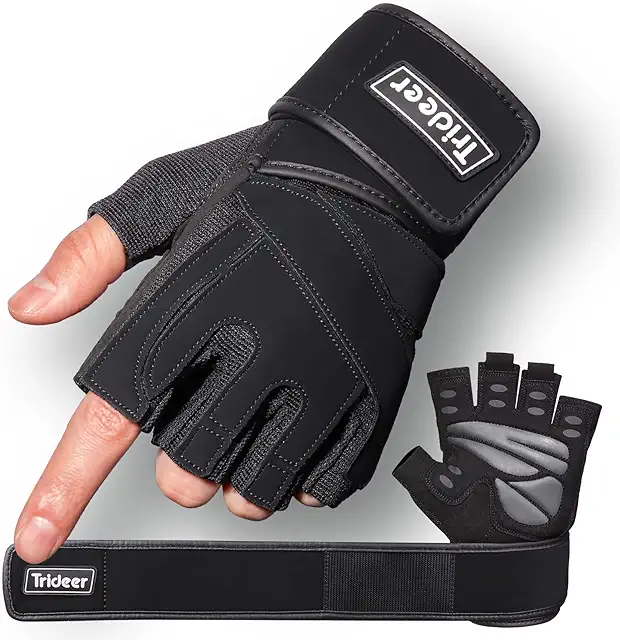
Trideer Padded Workout Gloves
Designed for weightlifting and fitness training, offering enhanced grip, comfort, and wrist support.

Ihuan Professional Weightlifting Gloves
Designed for superior grip, ventilation, and hand protection during intense training sessions.
Alternative Power Deadlifts Adjustable Gloves
Engineered for weightlifting and bodybuilding, these gloves provide maximum grip and wrist support.
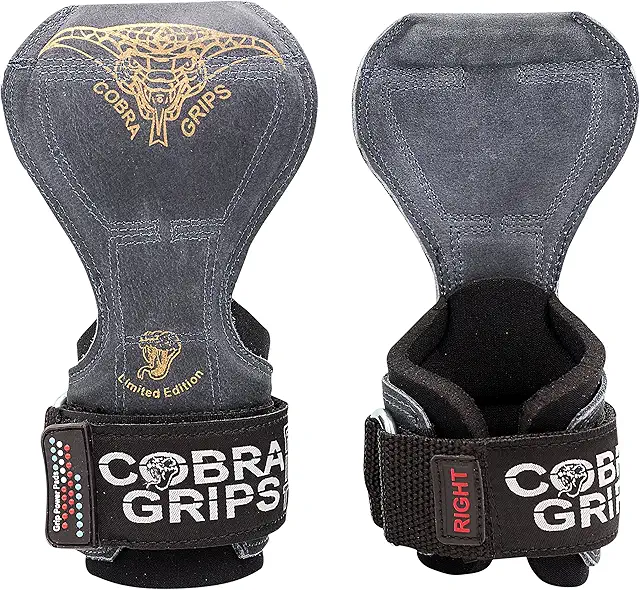
Alternative Power Deadlifts Gloves
Designed for deadlifts and bodybuilding, these gloves provide superior wrist support and grip strength.

RDX Bodybuilding Weightlifting Gloves
High-quality breathable gloves designed for superior grip and protection during intense lifting sessions.
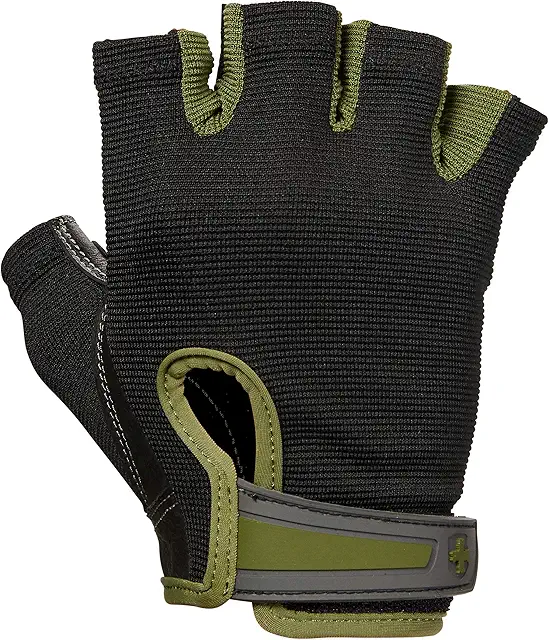
Harbinger Weightlifting Gloves
Crafted for serious lifters, these gloves offer excellent durability and grip without compromising flexibility.

Sunnex Weightlifting Gloves
Lightweight and breathable, designed for serious fitness enthusiasts looking for optimal hand protection and grip.

Atercel Weightlifting Gloves
Designed for optimum comfort and enhanced grip, perfect for gym training and CrossFit.

RDX Weightlifting Gloves
Optimized for comfort and durability, these gloves offer enhanced grip and protection during intense lifting sessions.

Enhanced Athletic Gear
Expertly crafted for superior durability and performance in sports.
Sleek Sports Accessory
Designed for maximum convenience and efficiency, perfect for active lifestyles.
Ergonomic Sports Accessory
Ergonomically designed to enhance comfort and performance during intensive workouts.
High-Performance Training Gear
Crafted for professionals, this gear offers exceptional performance and durability.
Essential Fitness Kit
A versatile collection of fitness tools designed to support a wide range of exercises for daily fitness.
Streamlined Fitness Device
Specially designed to support a wide array of exercises, enhancing flexibility and strength.
Versatile Fitness Equipment
Ideal for both indoor and outdoor use, this equipment offers the flexibility needed for a comprehensive workout.
Advanced Workout Equipment
This equipment is engineered for superior performance, enhancing both endurance and strength training.
Classic Sports Equipment
This equipment is a staple for any athlete, offering timeless utility and robust construction.

Multi-Purpose Athletic Equipment
Designed to cater to a variety of sports activities, ensuring versatility and top performance.

Advanced Fitness Gear
Engineered for optimal performance and durability.

Ultimate Training Equipment
Designed for comprehensive workouts to enhance your fitness.
Innovative Sporting Equipment
State-of-the-art sporting gear designed for peak performance.
Professional Athletic Gear
Tailored for high performance and durability to meet all your sporting needs.
Compact Exercise Tool
Perfectly designed for on-the-go fitness enthusiasts looking for a compact workout solution.
Enhanced Fitness Gear
Advanced equipment designed for all levels of fitness, ensuring a comprehensive workout.
Dynamic Sports Equipment
Designed to enhance agility and performance in a variety of sports.

Versatile Sporting Goods
High-quality sporting goods for a versatile workout experience.
Innovative Sporting Equipment
State-of-the-art sporting gear designed for peak performance.
Compact Sports Gear
Ideal for athletes looking for high-quality, space-saving training equipment.